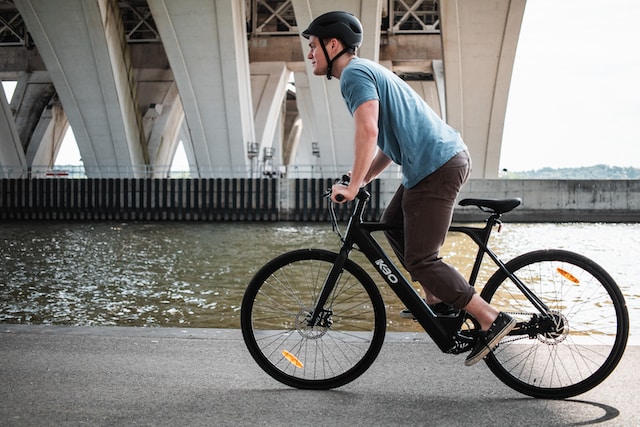
10 Pre-Ride Checks Every E-MTB Rider Should Do
Don’t let a mechanical mishap ruin your ride!
As an avid e-MTB rider, you know the thrill of hitting the trails. But before you drop that throttle, it’s crucial to perform a thorough pre-ride inspection. This routine maintenance not only prevents unexpected breakdowns but also ensures your safety and maximizes your e-bike’s lifespan.
Essential E-Bike Pre-Ride Checks
Here’s a step-by-step guide to keep your e-MTB in top shape:
1. Check Tire Pressure and Condition:
- Pressure: Use a reliable pressure gauge to check both front and rear tires. Underinflated tires can lead to poor handling, increased rolling resistance, and increased risk of punctures. Overinflated tires can reduce traction and comfort. Refer to the tire manufacturer’s recommendations for the optimal pressure range.
- Inspection: Carefully examine the entire tire surface for embedded objects, cuts, or abnormal wear patterns. Look for signs of dry rot or cracking, which can indicate tire age and potential failure. Pay attention to the sidewalls for any bulges or blisters, which may signal internal damage.
2. Brake Inspection:
- Lever Feel: Squeeze both brake levers firmly. The lever should engage smoothly with a consistent feel. If the lever feels spongy or has excessive free play, there might be air in the brake line or worn brake pads.
- Brake Pad Wear: Inspect the brake pads for remaining pad material. If the pads are worn down to the wear indicators or metal backing, they need to be replaced immediately. Uneven wear can affect braking performance and rotor life.
- Rotor Condition: Examine the brake rotors for damage, such as cracks, deep gouges, or excessive warping. A warped rotor can cause brake shudder and reduced stopping power.
- Caliper Alignment: Ensure the brake calipers are securely mounted and properly aligned with the rotors. Misaligned calipers can lead to uneven pad wear and reduced braking efficiency.
3. Drivetrain Assessment:
- Chain Tension: Rotate the cranks while observing the chain. It should move smoothly without excessive slack or tightness. A loose chain can skip or derail, while an overly tight chain can increase wear on drivetrain components.
- Shifting Performance: Shift through all gears to ensure crisp and precise shifting. Check for any hesitation, grinding, or chain skipping. If shifting is inconsistent, adjust the derailleur limits or replace worn cables or housing.
- Component Wear: Inspect the chain, cassette, chainrings, and derailleur pulleys for signs of wear, such as stretched links, worn teeth, or cracked components. Excessive wear can lead to poor shifting and reduced drivetrain efficiency.
- Lubrication: Apply a suitable bike chain lubricant to the chain. A well-lubricated chain shifts smoother and lasts longer. Avoid over-lubrication, as excess grease can attract dirt and grime.
RELATED CONTENT
4. Battery Health:
- Charge Level: Check the battery charge indicator before each ride. Ensure it has sufficient charge for your planned outing. A low battery can leave you stranded.
- Physical Condition: Inspect the battery for any signs of damage, such as swelling, cracks, or loose connections. A damaged battery poses a safety risk and should be replaced immediately.
- Secure Mounting: Verify that the battery is securely mounted to the bike. A loose battery can cause performance issues and potential damage.
- Charging Port: Check the charging port for any debris or damage. A clean and undamaged port ensures proper charging.
5. Motor Function:
- Noise and Vibration: Listen for any unusual noises coming from the motor. Excessive noise or vibration can indicate a problem.
- Power Output: Test the motor’s power output in different assistance modes. Ensure smooth acceleration and consistent power delivery.
- Overheating: Check for signs of overheating, such as excessive heat or unusual smells. Overheating can damage the motor and reduce its lifespan.
6. Suspension Performance:
- Fork and Shock Function: Cycle the suspension fork and shock a few times to check for smooth operation. Listen for any clunking or grinding noises.
- Sag Adjustment: Ensure the suspension sag is set correctly for your weight and riding style. Proper sag provides optimal performance and prevents bottoming out.
- Damping Control: Adjust rebound and compression damping according to trail conditions. Proper damping control improves handling and traction.
- Seal Inspection: Check for any oil leaks or damage to fork and shock seals. Leaking seals indicate potential issues and should be addressed promptly.
7. Quick-Release Checks:
- Tightness: Ensure all quick-release skewers are securely tightened. Loose skewers can lead to component failure and accidents.
- Lever Function: Check that the quick-release levers operate smoothly and securely. A damaged or malfunctioning lever can compromise safety.
- Skewer Alignment: Verify that the skewers are inserted correctly and aligned properly. Misaligned skewers can cause uneven clamping force and component damage.
8. Bolt and Fastener Inspection:
- Tightness: Check all critical bolts and fasteners, including stem, handlebars, seat post, pedals, and brakes. Use a torque wrench for precise tightening where specified.
- Condition: Inspect bolts and fasteners for signs of wear, corrosion, or damage. Replace any compromised hardware.
- Threadlocker: Apply threadlocker to bolts that require it, such as stem and handlebar bolts, to prevent loosening.
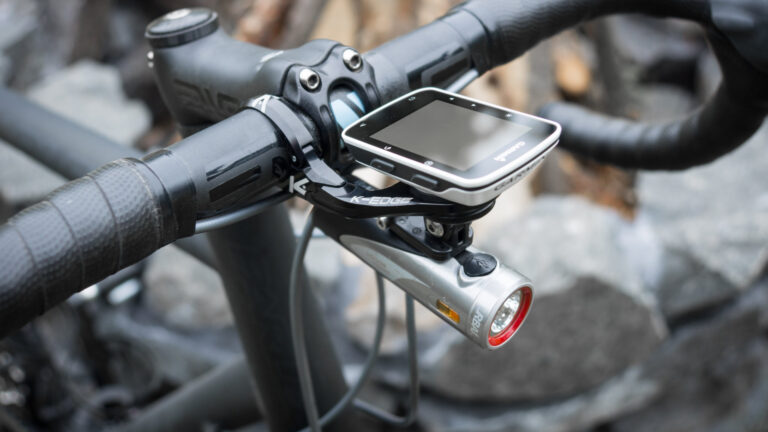
9. Lighting and Electronics:
- Function: Test all lights, including headlights, taillights, and brake lights. Ensure they turn on and off as expected.
- Battery: Check the battery level of your lights. Replace or recharge batteries as needed.
- Connections: Verify that all electrical connections are secure. Loose connections can cause intermittent or complete failure of lights and electronics.
- Display: Ensure the bike’s display is functioning correctly. Check for clear readings and responsiveness.
10. General Overview
- Frame and Components: Conduct a visual inspection of the entire bike, looking for cracks, dents, or other signs of damage. Pay close attention to welds, joints, and carbon fiber components.
- Loose Parts: Check for any loose components, such as pedals, grips, or accessories. Tighten any loose parts to prevent potential hazards.
- Overall Condition: Assess the overall condition of the bike. If you notice any unusual wear or damage, consider further inspection or repair before riding.
FAQs
A: It’s recommended to perform a complete pre-ride check before every ride, especially if you’re riding in challenging terrain or conditions. For shorter, less demanding rides, you may be able to get away with a quicker inspection.
A: If you discover an issue during your pre-ride check, it’s best to address it before riding. Minor problems can often be fixed quickly, while more serious issues may require professional attention.
A: While many maintenance tasks are similar for both regular and electric bikes, e-bikes have additional components like the motor, battery, and controller that require specific attention. It’s essential to have a checklist tailored to e-bikes.
A: The frequency of professional service depends on factors like riding conditions, usage, and the manufacturer’s recommendations. Generally, an annual tune-up is a good starting point.
A: To maximize battery life, avoid complete discharges, store your bike in a cool, dry place, and charge it regularly. Additionally, using the battery’s recommended charging settings and avoiding extreme temperatures can help prolong its lifespan.
A: Most modern e-bikes are designed to withstand light rain, but prolonged exposure to water can damage electrical components. It’s best to avoid riding in heavy rain or submerging your e-bike in water.
Conclusion
By diligently performing these ten pre-ride checks, you’ll significantly reduce the risk of unexpected breakdowns and ensure a safer, more enjoyable riding experience. Remember, a well-maintained e-bike is not only more reliable but also performs better.
Regular maintenance is key to prolonging the life of your e-bike and maximizing your investment. If you’re unsure about any of these checks or encounter persistent issues, consider consulting a professional bike mechanic.
Ready to hit the trails with confidence? Master these pre-ride checks and enjoy countless hours of electric mountain biking fun!
External Sources:
Kristina Grant is not just an enthusiast but a true authority on electric bikes. Nestled in the coastal beauty of Virginia, Kristina has found the perfect backdrop for her passion for electric biking. As a dedicated wife and homeschooling mom, her life revolves around family, faith, and the thrill of adventure.
Originally hailing from Ohio, Kristina's journey with electric bikes began as a curiosity and quickly evolved into a deep expertise. Her blog is a testament to her love for electric biking, combining her fascination for eco-friendly transportation with her coastal lifestyle.
When she's not cruising the beach on her electric bike, you'll find Kristina indulging in her other loves: long walks along the shore, getting lost in a good book, and cherishing moments with her loved ones. With a heart as big as her love for animals, especially cats, Kristina brings a unique perspective to the electric bike world, grounded in her strong faith in God and her dedication to a sustainable lifestyle.
Through her blog, Kristina shares her extensive knowledge of electric bikes, offering valuable insights, tips, and recommendations to fellow enthusiasts. Whether you're a seasoned rider or a newcomer to the electric bike scene, Kristina's blog is your go-to source for all things electric biking, fueled by her passion, expertise, and the scenic beauty of coastal Virginia.