Pack Smart, Ride Far: Explore Farther with This Ultimate Bikepacking Guide
Imagine this: you’re cruising down a scenic trail, wind whipping through your hair, breath-taking vistas unfolding before you. But unlike a traditional bikepacking trip, you’re not battling steep inclines or feeling utterly drained by the end of the day. That’s the magic of e-bike bikepacking!
E-bike bikepacking combines the freedom and adventure of self-supported bike travel with the assisted pedaling power of electric bikes. This exciting trend is rapidly gaining traction amongst cyclists for several reasons. Firstly, e-bikes allow riders of all fitness levels to explore challenging terrains and cover greater distances. Imagine conquering mountain passes or venturing deep into remote landscapes – e-bikes open up a world of possibilities for bikepackers.
Secondly, e-bikes can significantly reduce fatigue, allowing you to arrive at your campsite with more energy to set up, cook, and relax under the stars. This translates to a more enjoyable overall experience, especially on multi-day adventures.
However, there’s a twist when it comes to gearing up for an e-bike bikepacking trip. Traditional bikepacking accessories need to be adapted to accommodate the unique features of e-bikes, particularly the downtube battery placement. This blog post will delve into the essential bikepacking accessories specifically designed for e-bikes, helping you optimize your packing setup for an unforgettable adventure!
Key Takeaways
- Waterproof Panniers: Invest in high-quality, waterproof panniers to shield your gear from rain, mud, and other elements. Choose a size with ample cargo capacity to accommodate all your essentials, including e-bike specific items like chargers and spare batteries.
- Shelter System: Pack a lightweight, one-person tent designed for bikepacking to minimize weight and bulk. Select a sleeping bag with a temperature rating appropriate for the climate of your chosen route. Don’t forget a comfortable sleeping pad for insulation from the ground.
- Cooking Gear: A lightweight, backpacking stove and essential cookware like a pot, cup, and utensils will allow you to prepare hot meals on the go.
- Hydration: Ensure you stay hydrated throughout the day with a hydration bladder in your backpack and additional water bottles in your frame cages for easy access during rides.
- Tools and Repair Kit: Be prepared for minor mishaps by packing a multi-tool, spare inner tubes, a tire pump, chain lube, and a patch kit to address flat tires and other mechanical issues.
- Safety and Navigation: A properly fitted helmet, reliable front and rear lights for low-light visibility, and a first-aid kit are essential safety gear. Don’t forget a GPS device or a map and compass for navigation, and a power bank to keep your electronic devices charged, especially in remote areas.
- E-bike Specific Essentials: Pack your e-bike charger to keep your battery topped up during your trip. Consider carrying a spare battery for extended adventures or if charging opportunities are limited on your route.
Frame Bags for Downtube Batteries: Making the Most of Your E-bike’s Space
Unlike traditional bikes, e-bikes come with a downtube battery – the powerhouse that fuels your electric adventures. This essential component, however, can significantly limit the frame space available for regular bikepacking bags.
This is where frame bags specifically designed for e-bike downtube batteries come in. These innovative bags hug the contours of your e-bike’s frame, following the shape of the downtube battery and maximizing the storage capacity in that area.
How E-bike Frame Bags Maximize Storage:
- Space Efficiency: E-bike frame bags are designed with a triangular profile that seamlessly integrates with the downtube battery. This eliminates wasted space and allows you to utilize the entire area for packing gear.
- Customizable Compartments: Many e-bike frame bags feature internal compartments or dividers. This enables you to organize your belongings effectively, keeping smaller items separate from bulkier ones and ensuring everything stays put during your ride.
- Additional Storage Options: Some e-bike frame bags come with additional pockets or pouches on the sides or top. These are perfect for stashing quick-access essentials like snacks, maps, or bike tools.
RELATED CONTENT – Can I Install Accessories Like Racks or Baskets on an Electric Bike?
RELATED CONTENT – On the Go Charging Strategies While Traveling on an Ebike
3 Popular Frame Bags for E-bike Downtube Batteries:
Here’s a look at three popular options to consider, each with its own strengths:
Apidura Backcountry Frame Pack (around $120):
- Overview: This versatile frame bag is a great all-rounder, compatible with a wide range of e-bikes and battery shapes.
- Features: Water-resistant construction, internal fleece lining for scratch protection, multiple attachment points for secure fit.
- Pros: Durable, customizable compartments, sleek design.
- Cons: Pricier option compared to some competitors.
- Where to Buy: Check local bike shops or online retailers like Trek Bicycle: https://www.trekbikes.com/us/en_US/
Blackburn Outpost E-Bike Frame Bag (around $70):
- Overview: A budget-friendly option for e-bike riders seeking a functional frame bag.
- Features: Water-resistant materials, expandable main compartment, side pockets for additional storage.
- Pros: Affordable, easy to install, good value for the price.
- Cons: Simpler design compared to some high-end options, might not fit all e-bike geometries perfectly.
- Where to Buy: Blackburn Design: https://blackburndesign.com/ or other online cycling gear stores.
EVOC Frame Pack WP (around $95):
- Overview: This feature-packed frame bag caters to adventure-oriented e-bikers who demand top-notch performance.
- Features: Fully waterproof construction, welded seams for ultimate protection, integrated cable port for phone charging, reflective accents for improved visibility.
- Pros: Highly weatherproof, functional design with thoughtful details, improves nighttime safety.
- Cons: Pricier than some options, might be overkill for casual riders.
- Where to Buy: EVOC Sports: https://www.evocsports.com/ or authorized EVOC retailers.
Buying Factors to Consider:
When choosing the best frame bag for your e-bike downtube battery, consider these factors:
- Battery Size and Compatibility: Ensure the bag’s dimensions are compatible with your specific battery size and shape.
- Storage Capacity: Think about how much gear you typically carry and choose a bag with enough space for your needs.
- Material and Weatherproofing: Opt for water-resistant or waterproof materials to protect your belongings from the elements.
- Mounting System: Look for a bag with a secure and easy-to-use mounting system that won’t damage your e-bike’s frame.
- Price: Frame bags range in price depending on brand, features, and materials. Set a budget and choose an option that offers the best value for your needs.
By considering these factors and exploring the options mentioned above, you can find the perfect frame bag to maximize storage space and streamline your e-bike bikepacking setup. Remember, the “best” frame bag depends on your individual needs and preferences, so do your research and happy packing!
RELATED CONTENT – Enhance Your Ebike Riding Experience with Ebike Phone Mounts
Handlebar Bags with USB Charging Ports: Power Up Your E-bike Adventures
Imagine this: you’re deep into your e-bike bikepacking journey, relying on your phone for navigation and communication. Suddenly, your battery dips into the red zone. With limited access to outlets in remote locations, a dead phone can throw a wrench in your plans.
This is where handlebar bags with USB charging ports come to the rescue! These innovative bags offer a convenient solution for keeping your phone powered up on the go, ensuring you stay connected and informed throughout your e-bike adventure.
Why a Charged Phone Matters on E-bike Bikepacking Trips:
- Navigation: Most bikepacking routes rely on GPS navigation apps on smartphones. A dead phone translates to getting lost or having to rely on less efficient paper maps.
- Communication: Being able to call for help in case of emergencies or contact fellow riders is crucial. A charged phone ensures you stay connected and safe.
- Documentation: Many cyclists capture photos and videos of their journeys on their phones. A charged phone lets you document your e-bike adventure without worry.
RELATED CONTENT – Best Electric Bike Trails for Beginners
Top 3 E-bike Handlebar Bags with USB Charging:
These handy handlebar bags combine storage space with a built-in USB charging port. Simply connect your phone’s charging cable to the port and power it directly from your e-bike’s battery while you ride!
Here are three popular options to consider:
Rockbros Touch Screen Phone Bag with Power Bank (around $30):
- Overview: This budget-friendly option features a transparent touch-screen window for easy phone access and a built-in 2600mAh power bank for charging.
- Features: Water-resistant construction, expandable main compartment, adjustable handlebar mount.
- Pros: Affordable, touch-screen compatible, additional power bank storage.
- Cons: Limited storage space beyond the phone compartment, power bank might not suffice for long rides.
- Where to Buy: Online retailers like Amazon: https://www.amazon.com/ or cycling gear stores.
Arkel Rolltop Handlebar Bag with USB Port (around $80):
- Overview: This versatile handlebar bag offers ample storage space with a roll-top closure and an integrated USB charging port.
- Features: Durable waterproof materials, internal pockets for organization, removable shoulder strap for off-the-bike use.
- Pros: Highly weatherproof, spacious main compartment, convenient shoulder strap.
- Cons: Pricier than some options, might be bulky for minimalist riders.
- Where to Buy: Arkel website: https://arkel.ca/ or authorized Arkel retailers.
VAUDE Power NAVI Smartphone Case (around $50):
- Overview: This sleek phone case features a built-in USB charging port and mounts directly to your handlebars.
- Features: Water-resistant construction, touch-screen compatible, integrated cable management system.
- Pros: Compact and lightweight design, easy to install and use, keeps phone secure and protected.
- Cons: Limited storage space for additional items, might not be compatible with all phone sizes.
- Where to Buy: VAUDE website: https://www.vaude.com/ or outdoor gear retailers.
Choosing the Right Handlebar Bag:
When selecting an e-bike handlebar bag with a USB port, consider these factors:
- Phone Compatibility: Ensure the bag’s size and mounting system are compatible with your phone model.
- Storage Capacity: Think about how much additional gear you need to store besides your phone.
- Weatherproofing: Opt for a water-resistant or waterproof option to protect your belongings from the elements.
- Charging Power: Consider the power bank capacity (if included) or if the USB port draws power directly from your e-bike’s battery.
- Price: Handlebar bags with USB ports range in price depending on features and materials.
By choosing the right handlebar bag with a USB port, you can keep your phone charged and your e-bike adventures rolling smoothly. So, explore these options, find the perfect fit for your needs, and get ready to conquer the trails with a fully charged phone!
RELATED CONTENT – A Lightweight Frame Bike Rack for Easy Transport
Lightweight Bikepacking Racks: Keeping Your E-bike Nimble on the Trails
E-bikes are fantastic for conquering hills and extending your range on bikepacking adventures. However, unlike traditional bikes, they rely on electric motors to assist you. This adds weight, and every pound matters when it comes to efficiency. That’s where lightweight bikepacking racks come in!
Why Lightweight Racks Matter for E-bikes:
Traditional bikepacking racks, while sturdy, can be heavy and significantly impact your e-bike’s performance. The extra weight puts a strain on the motor, reducing its efficiency and potentially decreasing your overall range. Lightweight racks help mitigate this issue by minimizing the additional load on your e-bike’s system.
Material Matters: Balancing Weight and Strength:
When choosing a lightweight rack for your e-bike, the material plays a crucial role. Here’s a breakdown of two popular options:
- Aluminum: A great balance between weight and strength. Aluminum racks are generally lighter than steel alternatives but strong enough to carry essential bikepacking gear.
- Titanium: The ultimate in lightweight performance. Titanium racks are incredibly strong for their weight, making them ideal for weight-conscious e-bikers. However, they come at a premium price.
RELATED CONTENT – Planning Your Next Adventure on an Electric Cruiser Bike
RELATED CONTENT – Aventon Bike Rack Review
3 Popular Lightweight Bikepacking Racks for E-bikes:
Let’s explore three lightweight rack options compatible with many e-bikes:
Tubus Logo Evo Rack (around $180):
- Overview: This versatile aluminum rack is a popular choice for e-bikes due to its lightweight design and compatibility with various pannier systems.
- Features: Adjustable mounting points for a custom fit, multiple cargo loops for securing additional gear, sleek and minimalist design.
- Pros: Lightweight and durable aluminum construction, versatile mounting options, sleek aesthetics.
- Cons: Pricier than some steel rack options, might not be the lightest option on the market.
- Where to Buy: Online retailers like Bikepacking.com: https://bikepacking.com/ or authorized Tubus dealers.
Blackburn Local Carrier Rack (around $60):
- Overview: This budget-friendly aluminum rack offers a simple and effective solution for lightweight e-bike bikepacking setups.
- Features: Easy to install and use, compatible with most pannier bags, integrated kickstand mount (on some models).
- Pros: Affordable and lightweight, user-friendly design, additional kickstand functionality (depending on the model).
- Cons: Simpler design with fewer mounting options compared to high-end racks, might not be suitable for very heavy loads.
- Where to Buy: Blackburn Design: https://blackburndesign.com/ or local bike shops.
Carradice EXP Carrier Rack (around $250):
- Overview: This top-of-the-line titanium rack is the epitome of lightweight performance for serious e-bike adventurers.
- Features: Incredibly strong and lightweight titanium construction, customisable mounting options for various frame geometries, sleek and minimalist design.
- Pros: Ultralight titanium build, exceptional strength-to-weight ratio, highly customizable for different bikes.
- Cons: Most expensive option on this list, might be overkill for casual riders.
- Where to Buy: Carradice website: https://carradice.co.uk/ or authorized Carradice retailers.
Choosing the Right Lightweight Rack:
Here are some factors to consider when selecting a lightweight rack for your e-bike:
- E-bike Compatibility: Ensure the rack is designed to work with your specific e-bike’s frame geometry and weight distribution.
- Material: Aluminum offers a good balance, while titanium provides the ultimate lightweight solution (at a higher cost).
- Weight Capacity: Choose a rack with a weight capacity that can comfortably handle your intended gear load.
- Mounting System: Look for a rack with a secure and easy-to-install mounting system that won’t damage your e-bike’s frame.
- Price: Lightweight racks range in price depending on the material and features.
By keeping these factors in mind and exploring the options above, you can find the perfect lightweight bikepacking rack to optimize your e-bike’s performance and efficiency on your next adventure!
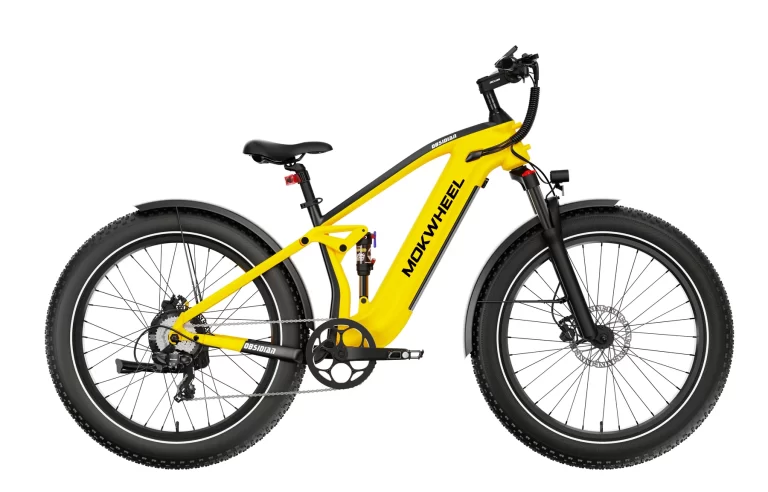
RELATED CONTENT – Mokwheel Obsidian Electric Bike Review
Waterproof Bikepacking Panniers: Keeping Your Gear Dry on E-bike Adventures
Imagine this: you’re cruising down a scenic trail, a sudden downpour rolls in, and your precious belongings are strapped to the back of your e-bike. With regular panniers, this could spell disaster for your clothes, sleeping bag, and electronics. That’s why waterproof bikepacking panniers are an essential component for e-bike adventurers!
Why Waterproof Panniers Matter:
E-bike bikepacking often takes you on exciting journeys through unpredictable weather conditions. Waterproof panniers act as your gear’s first line of defense against rain, mud, and even splashes from puddles. They ensure your clothes stay dry, your sleeping bag stays warm, and your electronics function flawlessly, keeping your adventure comfortable and worry-free.
Ample Cargo Space for E-bike Essentials:
While standard panniers might suffice, e-bike adventures often require additional cargo space. E-bike specific items like chargers and spare batteries can add bulk to your setup. Look for panniers with ample cargo capacity to comfortably accommodate all your essentials without feeling cramped.
3 Popular Waterproof Bikepacking Panniers for E-bikes:
Here are three excellent options to consider, each offering impressive waterproof protection and ample cargo space:
Ortlieb Back-Roller Classic (around $150 per pannier):
- Overview: A timeless classic for bikepackers, the Ortlieb Back-Roller Classic is renowned for its exceptional durability and waterproof construction.
- Features: Heavy-duty, waterproof materials with seam welding, roll-top closure for a customizable fit, reflective accents for improved visibility at night.
- Pros: Legendary waterproof performance, highly durable, user-friendly roll-top closure system, various sizes available to suit your needs.
- Cons: Pricier than some options, might be heavier than some ultra-lightweight panniers.
- Where to Buy: Online retailers like REI: https://www.rei.com/ or authorized Ortlieb dealers.
Arkel Rollpacker (around $200 per pannier):
- Overview: This versatile pannier system boasts a modular design and exceptional waterproof capabilities.
- Features: Durable waterproof materials with a unique RF-welded construction, expandable main compartment, removable inner dry bag for extra organization.
- Pros: Highly waterproof and lightweight, modular design allows for customization, expandable storage for bulky gear.
- Cons: Pricier than some traditional panniers, the modular design might require some setup time.
- Where toBuy: Arkel website: https://arkel.ca/ or authorized Arkel retailers.
Sea to Summit Lightweight Dry WP Pannier (around $120 per pannier):
- Overview: This option prioritizes lightweight performance while maintaining excellent waterproof protection.
- Features: Lightweight waterproof materials with a TPU coating, waterproof roll-top closure, compression straps for securing your load.
- Pros: Ultralight design for weight-conscious e-bikers, waterproof construction keeps gear dry, compression straps for optimal packing.
- Cons: Simpler design with fewer compartments compared to some options, might not be the most durable for rugged terrain.
- Where to Buy: Sea to Summit website: https://www.seatosummit.com/ or outdoor gear retailers.
Choosing the Right Waterproof Panniers:
When selecting waterproof bikepacking panniers for your e-bike, consider these factors:
- Size and Capacity: Choose a size that offers enough space for all your gear, including e-bike specific items like chargers and spare batteries.
- Waterproof Rating: Look for panniers with a high IPX rating (e.g., IPX6) for maximum protection against rain and splashes.
- Attachment System: Ensure the panniers have a secure and compatible mounting system that works with your e-bike’s rack.
- Features: Consider additional features like roll-top closures, compression straps, and reflective accents for added convenience and safety.
- Price: Waterproof panniers range in price depending on brand, size, and features.
By keeping these factors in mind and exploring the options above, you can find the perfect waterproof bikepacking panniers to keep your gear dry and your adventures rolling, rain or shine!
The Ultimate Guide to Bikepacking Essentials for Long-Distance E-bike Tours
Conquering long distances on your e-bike opens up a world of exploration for bikepacking adventures. But beyond the specialized racks and bags discussed earlier, there’s a whole other checklist of essential gear to ensure a comfortable, safe, and enjoyable journey. Here’s a breakdown of the must-have items for your long-distance e-bike bikepacking trip:
Clothing:
- Cycling Apparel: Pack breathable jerseys, padded cycling shorts, and a windproof jacket for changing weather conditions.
- Base Layers: Moisture-wicking base layers are crucial for comfort and temperature regulation during rides.
- Insulating Layers: Pack warmer layers like a fleece jacket or insulating vest for cool nights at camp.
- Rain Gear: A high-quality rain jacket and pants are essential for protecting yourself from unexpected downpours.
- Footwear: Sturdy cycling shoes with good grip are ideal for pedaling and comfortable for off-the-bike activities.
- Spare Clothing: Pack an extra set of clothes, including socks, to stay fresh throughout your trip.
Shelter:
- Tent: Choose a lightweight, one-person tent specifically designed for bikepacking to minimize weight and bulk.
- Sleeping Bag: Select a sleeping bag with a temperature rating appropriate for the climate of your chosen route.
- Sleeping Pad: A comfortable sleeping pad provides insulation and keeps you warm off the ground.
Cooking and Hydration:
- Camp Stove: A lightweight, backpacking stove allows you to cook hot meals on the go.
- Fuel Canister: Ensure you have enough fuel canisters for the duration of your trip, considering proper disposal regulations.
- Cookware: Pack a minimalist cooking set, including a pot, cup, and utensils.
- Water Reservoir: A hydration bladder in your backpack keeps you conveniently hydrated throughout the day.
- Water Bottles: Carry additional water bottles in your frame cages for easy access during rides.
Tools and Repair Kit:
- Multi-tool: A good multi-tool is essential for fixing minor mechanical issues on the road.
- Spare Tube(s): Pack at least one (or two for longer trips) spare inner tube for flat tire repair.
- Tire Pump: A compact bike pump allows you to inflate your tires after a flat tire fix.
- Chain Lube: Keep your chain lubricated for smooth operation and prevent rust.
- Patch Kit: A patch kit helps repair small punctures in your inner tubes.
Safety and Navigation:
- Helmet: A properly fitted bike helmet is crucial for protecting your head in case of a fall.
- Headlamp and Tail Light: Ensure you have reliable lights for nighttime visibility and safe riding in low-light conditions.
- First-Aid Kit: Pack a comprehensive first-aid kit to address minor injuries and emergencies.
- Sunscreen and Insect Repellent: Protect yourself from the sun and pesky insects throughout your journey.
- Navigation Tools: A GPS device or a reliable map and compass are essential for route planning and navigation.
- Power Bank: A portable power bank can be a lifesaver for keeping your phone charged for navigation and communication, especially in remote areas.
E-bike Specific Essentials:
- Charger: Don’t forget your e-bike charger to keep your battery topped up during your trip.
- Spare Battery (Optional): Consider carrying a spare battery for extended adventures or areas with limited charging options.
Remember: This is just a general checklist. You might need to adjust it based on the specific route, weather conditions, and your personal preferences. Be sure to research your chosen route and pack accordingly for a successful and enjoyable long-distance e-bike bikepacking adventure!
Affordable Bikepacking Setup for Budget-Conscious E-bike Trips
E-bike bikepacking can be an amazing adventure, but the initial gear investment can seem daunting. Fear not, budget-conscious explorers! Here are some tips to outfit your e-bike for bikepacking without breaking the bank:
Embrace the Second-Hand Market:
- Online Marketplaces: Websites like Craigslist, Facebook Marketplace, and eBay offer a treasure trove of gently used bikepacking gear at significantly lower prices. You can find everything from panniers and racks to tents and sleeping bags.
- Cycling Communities: Local cycling clubs and forums often have gear swaps or used gear sales where you can score great deals from fellow enthusiasts.
DIY Repairs and Maintenance:
- Learn Basic Bike Maintenance: With a little know-how and some online tutorials, you can tackle many minor repairs yourself instead of relying on expensive bike shops. Mastering skills like fixing a flat tire or adjusting your brakes can save you money in the long run.
- Invest in Basic Tools: A good multi-tool and a compact bike pump are essential for making minor repairs on the road.
Multi-functional Gear is Your Friend:
- Gear with Multiple Uses: Look for items that can serve multiple purposes. For example, a bandana can act as a sweat rag, dust mask, or makeshift towel. A lightweight cooking pot can double as a mug. By choosing versatile gear, you can minimize the amount you need to pack.
Resourcefulness is Key:
- Get Creative with Storage: Instead of buying expensive handlebar bags, consider using dry bags secured with straps. Ziplock bags can be surprisingly effective for organizing smaller items and protecting them from the elements.
- Think Outside the Box: Repurpose everyday items for bikepacking use. A sturdy grocery bag with a waterproof liner can transform into a functional handlebar bag.
Additional Money-Saving Tips:
- Plan Your Meals: Cooking your own meals on the go is much cheaper than relying on restaurants. Invest in a simple camp stove and plan meals with shelf-stable ingredients.
- Wild Camping: Consider free camping options like national forests or designated camping spots instead of always relying on paid campgrounds.
By following these tips and adopting a resourceful mindset, you can assemble a fantastic and affordable e-bike bikepacking setup. Remember, the adventure is all about the journey, not how much you spend on gear. So, get creative, hit the road, and explore the world on your trusty e-bike!
Best Bikepacking Gear List for Lightweight E-bike Travel
Shaving weight off your e-bike setup translates to increased efficiency and a more enjoyable ride. Here’s a breakdown of lightweight gear options for various categories to optimize your e-bike bikepacking adventure:
Shelter:
- Tent: Opt for a lightweight, one-person backpacking tent. Look for models with high-quality, lightweight materials like Dyneema® Composite Fabric (DCF) or Silnylon. These tents can weigh less than 2 lbs (1 kg) and pack down to a minimal size.
- Sleeping Bag: Choose a down sleeping bag with a high fill-power ratio. Down offers superior warmth-to-weight performance compared to synthetic alternatives. A 20-degree Fahrenheit (-6°C) sleeping bag is a good starting point for most three-season adventures.
Sleep System:
- Sleeping Pad: Ultralight inflatable sleeping pads are the way to go. They offer excellent comfort and insulation while minimizing weight and packed size. Look for pads with high R-values (resistance to heat loss) for colder temperatures. Some ultralight pads can weigh as little as 10 oz (280 grams).
Cooking Kit:
- Backpacking Stove: A lightweight, canister stove is ideal for bikepacking. Look for options made from titanium or aluminum for their excellent strength-to-weight ratio. Some minimalist backpacking stoves can weigh under 3 oz (85 grams).
- Cookware: Ditch the bulky pots and pans. A single, lightweight pot with a heat exchanger can handle most boiling and cooking tasks. You can also opt for a folding spork to save even more space.
Clothing:
- Base Layers: Choose lightweight, moisture-wicking merino wool or synthetic base layers for optimal comfort and temperature regulation.
- Insulating Layers: A fleece jacket or a down vest are excellent choices for cool evenings. Look for packable options that compress to a small size.
- Rain Gear: Opt for a lightweight, packable rain jacket and pants made from high-quality, waterproof materials like Gore-Tex® Paclite® or similar technologies. These options offer excellent protection from the elements while remaining breathable and minimizing weight.
Bags and Racks:
- Racks: As discussed earlier, lightweight aluminum racks are a good balance between weight and strength. You can also explore options made from titanium for the ultimate weight savings, although they come at a premium price.
- Panniers: Similar to racks, lightweight panniers made from waterproof materials like Dyneema® Composite Fabric (DCF) can significantly reduce weight compared to traditional options. Ultra-light stuff sacks can be used within your panniers for additional organization.
Remember: When choosing lightweight gear, prioritize high-quality materials and construction. While ultralight options might seem tempting, ensure they are durable enough to withstand the rigors of bikepacking.
By carefully selecting lightweight gear from each category, you can significantly reduce the overall weight of your e-bike setup, maximizing your efficiency and enjoying a more comfortable ride on your long-distance adventures!
FAQs
The range of your e-bike on a bikepacking trip depends heavily on several factors:
Battery capacity: Larger battery capacities will naturally offer a greater range.
Terrain: Hilly terrain will drain your battery faster than flat paths.
Assist level: Using a higher assist level will deplete your battery quicker.
Weight: Carrying more weight (including yourself and your gear) reduces your e-bike’s range.
Weather conditions: Cold weather can negatively impact battery performance.
Most e-bikes have a weight limit specified in the owner’s manual. This limit includes the weight of the rider, cargo, and the bike itself. It’s crucial not to exceed this limit for safety reasons and to avoid straining the motor.
Generally, e-bikes tend to be heavier than traditional bikes due to the motor and battery. This means you might have a bit less cargo capacity compared to a regular bike. Consult your e-bike’s manual for the specific weight limit and plan your gear accordingly.
E-bike regulations can vary depending on your location. Some bikepacking routes might restrict e-bikes altogether, while others might have specific speed limitations.
Here are some tips for staying informed:
Research your chosen route: Check the official website or contact the managing agency to confirm e-bike regulations for the specific route.
Familiarize yourself with local e-bike laws: General e-bike regulations in your area might also apply to bikepacking routes.
Be prepared to adapt: If a route prohibits e-bikes, consider alternative routes or using your e-bike in pedal-assist mode only (depending on local regulations).
Conclusion
E-bike bikepacking opens a door to a world of possibilities for cyclists of all fitness levels. With the help of electric assist, you can conquer challenging terrains, explore remote destinations, and embark on longer, more fulfilling adventures. This guide has equipped you with the knowledge to choose the right gear, optimize your setup for efficiency, and plan your e-bike bikepacking adventure with confidence.
Remember, the most important ingredient for a successful e-bike bikepacking trip is your sense of adventure! So, get out there, explore new horizons, and experience the joy of self-supported travel with a touch of electric power.
We invite you to share your thoughts and experiences!
- Have you tried e-bike bikepacking? What are your favorite aspects of it?
- Do you have any questions or tips to share with fellow e-bike adventurers?
- What kind of e-bike bikepacking content would you be interested in seeing in the future?
Leave a comment below and let’s get the conversation rolling! Together, we can build a thriving community of e-bike bikepacking enthusiasts.
External Sources
- E-bike Battery Range: Estimating how far your e-bike can travel on a single charge can be tricky. This article on Ebikes.org provides a helpful guide to consider various factors affecting e-bike range:
- E-bike Safety: Safety is paramount while riding your e-bike. PeopleForBikes offers a comprehensive e-bike safety course that covers important tips and regulations:
Kristina Grant is not just an enthusiast but a true authority on electric bikes. Nestled in the coastal beauty of Virginia, Kristina has found the perfect backdrop for her passion for electric biking. As a dedicated wife and homeschooling mom, her life revolves around family, faith, and the thrill of adventure.
Originally hailing from Ohio, Kristina's journey with electric bikes began as a curiosity and quickly evolved into a deep expertise. Her blog is a testament to her love for electric biking, combining her fascination for eco-friendly transportation with her coastal lifestyle.
When she's not cruising the beach on her electric bike, you'll find Kristina indulging in her other loves: long walks along the shore, getting lost in a good book, and cherishing moments with her loved ones. With a heart as big as her love for animals, especially cats, Kristina brings a unique perspective to the electric bike world, grounded in her strong faith in God and her dedication to a sustainable lifestyle.
Through her blog, Kristina shares her extensive knowledge of electric bikes, offering valuable insights, tips, and recommendations to fellow enthusiasts. Whether you're a seasoned rider or a newcomer to the electric bike scene, Kristina's blog is your go-to source for all things electric biking, fueled by her passion, expertise, and the scenic beauty of coastal Virginia.