Confident E-Riding Starts Here: Upgrade Your Brakes!
Last Updated on June 22, 2024 by Kristina Grant
Electric bikes are revolutionizing how we get around. They offer a thrilling blend of eco-friendly power and effortless cruising. But with that exhilarating boost comes the crucial need for reliable stopping power. Here’s where some e-bikes equipped with drum brakes can fall short.
Drum brakes, while functional, can struggle to keep pace with the demands of an e-bike. Imagine cruising down a hill with a charged battery and needing to come to a sudden stop. Drum brakes may not provide the immediate and confident stopping power you crave. They can also be susceptible to factors like:
- Reduced effectiveness in wet conditions: Rain can cause the braking surface inside the drum to become slick, compromising stopping power.
- Heat buildup: Extended braking, especially on descents, can lead to heat buildup within the drum, further reducing effectiveness.
- Higher maintenance requirements: Adjusting and maintaining drum brakes can be more complex compared to disc brakes.
Upgrading to disc brakes can unlock a whole new level of control and confidence on your rides. Disc brakes offer a plethora of advantages that perfectly complement the electric riding experience:
- Superior Stopping Power: Disc brakes deliver significantly more stopping force compared to drum brakes. This translates to shorter braking distances and a reassuring sense of control, especially at higher speeds or when carrying additional weight.
- All-Weather Performance: Unlike drum brakes, disc brakes maintain their bite rain or shine. The exposed rotors shed water effectively, ensuring consistent stopping power in any condition.
- Reduced Maintenance: Disc brakes generally require less frequent adjustments compared to drum brakes. This translates to less time tinkering and more time enjoying the ride.
By making the switch to disc brakes, you’re essentially upgrading your e-bike’s safety and performance. It’s an investment that translates to a more confident, controlled, and ultimately, more enjoyable riding experience.
Key Takeaways
- Night and Day Difference: Disc brakes offer significantly more stopping power compared to drum brakes on e-bikes. This translates to shorter braking distances and a dramatic improvement in overall control, especially crucial for higher speeds or steeper inclines.
- Rain or Shine, You’ll Be Fine: Unlike drum brakes that can be susceptible to moisture, disc brakes maintain their effectiveness in wet conditions. The exposed rotors shed water efficiently, ensuring consistent stopping power rain or shine.
- Less Tinkering, More Riding: Disc brake systems generally require less frequent adjustments compared to drum brakes. This translates to less time spent maintaining your e-bike and more time enjoying the ride.
- Future-Proof Your Ride: E-bikes with disc brakes are considered more versatile and hold a higher resale value compared to those with drum brakes. Upgrading now can enhance your riding experience and potentially benefit you down the line.
- DIY or Pro, There’s a Way: The complexity of a disc brake upgrade can vary. For the mechanically inclined, a DIY approach with proper research and tools can be rewarding. However, seeking professional help from a qualified e-bike mechanic is always an option for a guaranteed safe and flawless installation.
- The Investment Pays Off: While the initial cost of a disc brake upgrade might seem high, consider it a long-term investment. The safety and performance benefits translate to a more enjoyable and confident riding experience for years to come.
- Resources at Your Fingertips: Don’t be discouraged if you’re new to e-bike maintenance. Numerous online resources exist to guide you through the process. Video tutorials, repair manuals, and consultations with mechanics are all readily available to help you navigate a successful disc brake upgrade.
Before You Begin: Compatibility and Considerations
Upgrading your e-bike to disc brakes is an exciting prospect, but before you dive headfirst into the world of rotors and calipers, there are a few crucial things to consider.
Ensuring Compatibility: Not All E-bikes Are Created Equal
The first and most important step is verifying compatibility. Not all e-bikes are initially designed to accommodate disc brakes. This is especially true for older models or budget-friendly e-bikes that may come equipped with drum brakes as standard.
Here’s the good news: There’s a high chance your e-bike can be upgraded! However, it’s essential to do your research first. The best way to determine compatibility is to:
- Consult your e-bike’s manual: This should explicitly state whether your e-bike has disc brake compatibility or not.
- Look for frame mounts: Most disc brake compatible e-bikes will have designated mounting points on the frame for calipers. These are typically found on the front fork and the rear triangle near the wheel dropout.
- Seek expert advice: If you’re unsure after consulting the manual, don’t hesitate to reach out to a qualified e-bike mechanic. They can assess your specific e-bike and confirm compatibility.
DIY or Pro? Assessing Your Mechanical Skills
Upgrading to disc brakes can involve some mechanical know-how. While the process can be tackled as a DIY project, it’s important to be honest with yourself about your skillset. Here’s a breakdown to help you decide:
- The Adventurous DIYer: If you’re comfortable working on bikes, enjoy a challenge, and have a good set of tools, then a DIY disc brake upgrade might be right up your alley. There are plenty of online resources and video tutorials [YouTube] to guide you through the process.
- The Safety-First Rider: If mechanical tasks aren’t your forte, or you prioritize a guaranteed safe installation, then enlisting the help of a professional mechanic is the way to go. They have the experience and expertise to ensure your disc brakes are installed correctly and functioning optimally.
The Investment: Cost Considerations
The cost of upgrading to disc brakes can vary depending on several factors:
- The quality of components: Higher-end components will naturally cost more than budget-friendly options. However, they often offer better performance and durability.
- The complexity of the upgrade: If your e-bike requires additional mounting adapters or other modifications, the cost may increase.
- DIY vs. Professional Installation: While a DIY approach can save on labor costs, remember to factor in the cost of tools you might need. Professional installation will typically incur additional labor charges.
While the upfront cost might seem daunting, consider it an investment in the safety and performance of your e-bike. Upgraded disc brakes will enhance your riding experience for years to come. Remember, a confident and controlled ride is priceless!
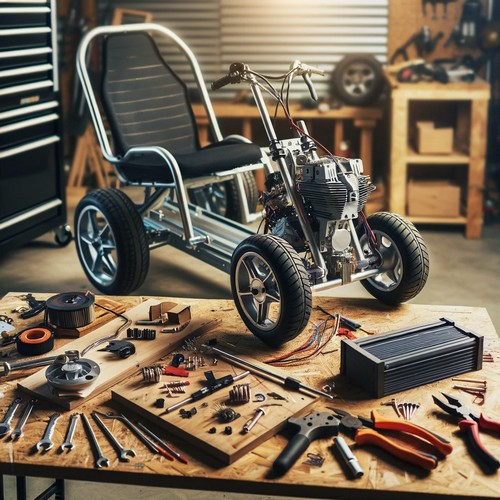
Deep Dive: Upgrading Your E-Bike Brakes
Now that you’ve confirmed compatibility and considered the factors involved, it’s time to dive into the exciting world of disc brake upgrades! Here’s a comprehensive guide to equip your e-bike with the stopping power it deserves.
Gathering the Parts: Building Your Brake Arsenal
Equipping your e-bike with a top-notch disc brake system requires a few key components. Here’s your shopping list:
- Calipers: These are the workhorses of your braking system, clamping down on the rotors to slow down the wheels. You’ll have a choice between:
- Hydraulic Calipers: These utilize brake fluid for a powerful and progressive stopping feel. They’re generally considered the best option for e-bikes due to their superior power modulation.
- Mechanical Calipers: These rely on cables for braking actuation. They offer a more budget-friendly option but may require more hand strength for sufficient stopping power.
Pro Tip: When choosing calipers, opt for reputable brands known for their e-bike compatibility, such as Shimano, Tektro, or SRAM.
- Rotors: These are the disc-shaped components that the calipers clamp onto. Their size is crucial, so consider your e-bike’s motor power. Larger rotors (typically 180mm or greater) are recommended for e-bikes due to the increased braking demands.
Remember: Always double-check the rotor diameter recommended by your e-bike’s manufacturer or the new caliper set you purchase.
- Levers: These are the control levers on your handlebars that you squeeze to activate the brakes. Ensure they’re compatible with your chosen calipers (hydraulic or mechanical) and offer a comfortable reach for your hands.
- Mounting Adapters (if necessary): Not all e-bikes come with pre-existing mounting points for disc brakes. If yours doesn’t, you might need specific adapters to attach the calipers to your frame. These adapters are typically available from your e-bike’s manufacturer or aftermarket retailers.
RELATED CONTENT – Ebike Maintenance for Beginners
Disassembly: Bidding Farewell to Drum Brakes
With all the necessary parts assembled, it’s time to remove your existing drum brakes. Here’s a simplified breakdown to guide you through this process:
- Safety First! Secure your e-bike in a repair stand or on a sturdy work surface.
- Identify the Drum Brake Components: Locate the axle nuts, brake cable (if applicable), and any retaining clips holding the drum brake assembly in place.
- Loosen the Axle Nuts: Using the appropriate wrenches, loosen the axle nuts on both sides of the wheel.
- Disconnect the Brake Cable (if applicable): Carefully detach the brake cable from the brake arm on the frame.
- Remove the Drum Brake Assembly: Once the axle nuts are loose and the cable disconnected (if applicable), you should be able to slide the entire drum brake assembly off the wheel hub.
If you encounter any difficulties during disassembly, refer to your e-bike’s manual or a detailed repair guide for specific instructions on your particular model. Don’t hesitate to seek help from a qualified mechanic if needed.
We’ll tackle the exciting installation process of your new disc brake system in the next step!
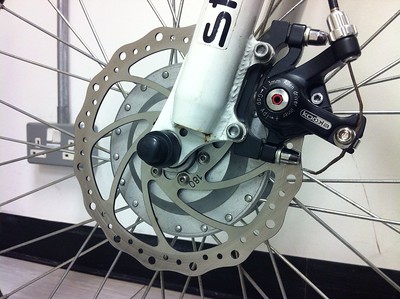
Installation: Mounting Your Disc Brake Powerhouse
Now that you’ve successfully removed your old drum brakes, it’s time to install the new disc brake system and unleash the stopping power of your e-bike! Here’s a breakdown of the installation process for each key component:
- Calipers:
- Refer to the Manual: Each caliper model might have slight variations in the installation process. For specific instructions, consult the user manual that came with your new calipers.
- Mounting the Calipers: Generally, you’ll need to position the caliper on the designated mount on your frame (usually on the front fork and rear triangle near the wheel dropout). Secure the caliper using the provided bolts and washers, following the recommended torque specifications in the manual.
- Rotors:
- Clean and Prep the Hub: Ensure the rotor mounting surface on your wheel hub is clean and free of any dirt or debris.
- Attach the Rotor: Most rotors utilize bolts that thread directly onto the hub. Tighten the bolts to the recommended torque specification (refer to the rotor or caliper manual).
Pro Tip: Some rotors come with a lockring that needs to be secured after tightening the bolts. Double-check the rotor instructions for proper lockring installation.
- Levers:
- Remove the Old Levers: Carefully remove your existing brake levers from the handlebars.
- Install the New Levers: Following the instructions for your specific levers, position them comfortably on your handlebars and tighten the clamps securely.
- Mounting Adapters (if applicable):
- Adapter Installation: If your e-bike requires mounting adapters, install them between the caliper and the frame mount, following the adapter manufacturer’s instructions.
Crucial Reminder: Throughout the installation process, always refer to the user manuals for your specific disc brake components. They’ll provide detailed instructions and torque specifications to ensure everything is properly mounted and safe for riding.
Bleeding the Brakes (Hydraulic Systems Only):
If you opted for hydraulic disc brakes, there’s one crucial step remaining: bleeding the brakes. Bleeding removes air bubbles that might be trapped within the hydraulic system, ensuring optimal brake performance. Air bubbles can lead to a spongy brake feel and diminished stopping power – not ideal for your e-bike!
Here’s a simplified overview of the bleeding process:
- Gather the Essentials: You’ll need a bleed kit specific to your hydraulic brake system, which typically includes a bleed funnel, bleed hose, and brake fluid.
- Open the System: Following the manufacturer’s instructions, open the bleed port at the caliper to allow air bubbles to escape.
- Pump and Squeeze: Using the bleed kit, you’ll pump fresh brake fluid through the system while simultaneously squeezing the brake lever to force out any trapped air bubbles.
- Close the System: Once clear, bubble-free fluid flows through, tighten the bleed port securely.
Bleeding can be a bit intricate, so here’s some honest advice:
- Consult a Professional: If you’re unfamiliar with bleeding brakes, it’s highly recommended to seek help from a qualified e-bike mechanic. They have the experience and expertise to ensure your brakes are bled correctly and functioning optimally for safe riding.
- Detailed Guides are Your Friend: If you’re a confident DIYer, there are many excellent online resources and video tutorials [YouTube] available that provide detailed bleeding guides specific to your brake brand and model.
By following these steps and prioritizing proper installation, you’ll be well on your way to experiencing the superior stopping power and control that disc brakes offer on your e-bike.
Testing and Adjustment: The Final Checkpoint for Peak Performance
You’ve successfully installed your new disc brake system, and your e-bike is itching to unleash its newfound stopping power. But before you hit the trails, there’s one crucial step remaining: testing and adjustment.
Safety First: The Importance of Thorough Testing
Consider this: you’ve invested time, effort, and maybe even a few calluses into upgrading your brakes. Now’s not the time to cut corners on testing. Here’s why:
- Verifying Functionality: A thorough test ensures your brakes are working correctly and delivering the confident stopping power you deserve.
- Identifying Issues: Testing might reveal minor adjustments needed to optimize brake performance and eliminate any potential squeaking or rubbing.
- Peace of Mind: Knowing your brakes are dialed in will boost your confidence and allow you to focus on enjoying the ride, not worrying about your stopping power.
So, how do you properly test your upgraded brakes?
- Find a Safe Testing Area: Locate a flat, traffic-free area with a soft surface (like grass) in case of initial over-braking.
- Low-Speed Checks: Start by gently squeezing the brakes at slow speeds to get a feel for the lever pressure and stopping power.
- Progressive Braking: Gradually increase your speed and practice applying the brakes progressively. Feel free to consult your e-bike’s manual for recommended brake bed-in procedures specific to your components.
- Inspect for Issues: Pay attention to any unusual sounds like squeaking or grinding. Look for proper rotor alignment and ensure the calipers aren’t rubbing against the rotors.
Tweaking for Perfection: Making Adjustments
After your initial test ride, you might find some minor adjustments are needed to fine-tune your brakes for optimal performance. Here’s a basic overview of common adjustments:
- Lever Reach: Some levers allow for reach adjustment to ensure a comfortable grip for your hands.
- Pad Contact: Minor adjustments might be needed to ensure the brake pads make even contact with the rotors. Consult your caliper manual for specific instructions.
- Cable Tension (Mechanical Brakes Only): If you opted for mechanical brakes, slight cable tension adjustments can fine-tune the braking feel.
Remember: If you’re unsure about making adjustments yourself, don’t hesitate to consult a qualified e-bike mechanic. They can ensure your brakes are perfectly dialed in for safe and confident riding.
By carefully testing and making any necessary adjustments, you’ll be maximizing the performance of your new disc brake system. Get ready to experience the thrill of confident stopping power and take your e-bike adventures to the next level!
What Are the Advantages of Converting Drum Brakes to Disc Brakes in Terms of Heat Dissipation?
Converting brake drum systems to disc brakes offers significant advantages in terms of heat dissipation. The brake drum overheating effects are reduced, as disc brakes are more effective in dissipating heat. This ultimately leads to improved braking performance, increased safety, and reduced maintenance costs.
FAQs
A: Absolutely! Disc brakes offer significantly more stopping power compared to drum brakes. This is especially true in wet conditions or when riding at higher speeds or on inclines. With disc brakes, you’ll experience shorter braking distances and a more confident feeling in control of your e-bike.
A: While disc brakes offer numerous advantages, there are a couple of things to consider. Disc brakes typically require more initial investment compared to drum brakes. Additionally, they might add a slight bit of weight to your e-bike. However, the performance benefits often outweigh these minor drawbacks for many e-bike riders.
A: Upgrading to disc brakes is generally recommended for most e-bikes, regardless of motor wattage. In fact, it’s especially beneficial for e-bikes with higher powered motors due to the increased braking demands. Just ensure your chosen disc brake system is compatible with the weight and power of your e-bike.
A: Absolutely! Many e-bike shops and mechanics specialize in upgrading brakes. They have the experience and expertise to ensure a safe and proper installation. This can be a great option if you’re unsure about tackling the project yourself or simply prefer professional service.
Conclusion:
Upgrading your e-bike to disc brakes is an investment that pays off in spades. Let’s recap the exciting benefits you’ll reap:
- Superior Stopping Power: Experience shorter braking distances and a reassuring sense of control, especially at higher speeds or when carrying additional weight. No more white-knuckled moments on descents!
- All-Weather Performance: Unlike drum brakes, disc brakes maintain their bite rain or shine. Disc brakes shed water effectively, ensuring consistent stopping power in any condition. No more surprises when the skies open up!
- Reduced Maintenance: Disc brakes generally require less frequent adjustments compared to drum brakes. This translates to less time tinkering and more time enjoying the ride.
By making the switch to disc brakes, you’re essentially upgrading the safety and performance of your e-bike. It’s a transformation that will elevate your riding experience for years to come.
The Satisfaction of a Job Well Done (or Professionally Done!)
Whether you tackled the upgrade yourself or enlisted the help of a qualified mechanic, the feeling of a successful disc brake installation is truly rewarding. Knowing your e-bike is equipped with the best possible braking system fosters confidence and allows you to fully embrace the thrill of e-bike adventures.
External Sources:
Feeling inspired to upgrade your e-bike to disc brakes? Here are some resources to get you started:
- Video Tutorials: Dive deeper with visual guides! Search YouTube for terms like “e-bike disc brake installation” or “how to bleed [your brand of brakes] e-bike brakes” to find helpful video tutorials [YouTube].
- Repair Manuals: Consult your e-bike’s manual or invest in a reputable e-bike repair manual for detailed instructions and troubleshooting tips.
- Mechanic Advice: Don’t hesitate to seek help from a qualified e-bike mechanic. They can assess your specific e-bike, recommend compatible components, and even handle the installation for you.
Photo credit via Flickr
Kristina Grant is not just an enthusiast but a true authority on electric bikes. Nestled in the coastal beauty of Virginia, Kristina has found the perfect backdrop for her passion for electric biking. As a dedicated wife and homeschooling mom, her life revolves around family, faith, and the thrill of adventure.
Originally hailing from Ohio, Kristina's journey with electric bikes began as a curiosity and quickly evolved into a deep expertise. Her blog is a testament to her love for electric biking, combining her fascination for eco-friendly transportation with her coastal lifestyle.
When she's not cruising the beach on her electric bike, you'll find Kristina indulging in her other loves: long walks along the shore, getting lost in a good book, and cherishing moments with her loved ones. With a heart as big as her love for animals, especially cats, Kristina brings a unique perspective to the electric bike world, grounded in her strong faith in God and her dedication to a sustainable lifestyle.
Through her blog, Kristina shares her extensive knowledge of electric bikes, offering valuable insights, tips, and recommendations to fellow enthusiasts. Whether you're a seasoned rider or a newcomer to the electric bike scene, Kristina's blog is your go-to source for all things electric biking, fueled by her passion, expertise, and the scenic beauty of coastal Virginia.