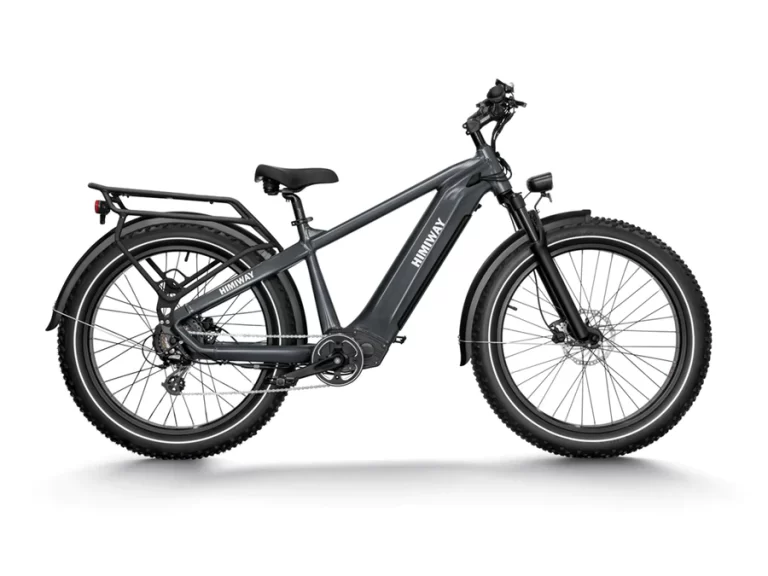
A Comprehensive Guide to Troubleshooting and Resetting Electric Bikes
Electric bikes have surged in popularity in recent years, offering riders a convenient and eco-friendly mode of transportation. With their electric motors providing an extra boost to pedaling power, electric bikes have revolutionized urban commuting, outdoor adventures, and fitness routines alike. However, like any sophisticated piece of machinery, electric bikes are not immune to occasional glitches and hiccups.
While the convenience of electric bikes is undeniable, riders must also be prepared for the occasional need for troubleshooting and resetting. Just as you would with a car or a computer, understanding how to diagnose and address issues with your electric bike is essential for maintaining its performance and longevity.
In this comprehensive guide, we’ll delve into the intricacies of electric bike troubleshooting and resetting. Whether you’re a seasoned rider or new to the world of electric bikes, having a grasp of these fundamental maintenance tasks will ensure that you get the most out of your two-wheeled investment.
Throughout this guide, we’ll explore common issues that riders may encounter with their electric bikes, ranging from motor controller malfunctions to battery woes and speedometer inaccuracies. We’ll provide clear and practical instructions on how to troubleshoot these issues and, when necessary, reset various components to restore your electric bike to optimal functioning.
So, saddle up and join us on this journey to demystify the troubleshooting and resetting process for electric bikes. By the end of this guide, you’ll be equipped with the knowledge and confidence to tackle any challenges that come your way, ensuring that your electric bike remains a reliable companion on your adventures, commute, or leisurely rides.
Key Takeaways
- Regular Maintenance Prevents Issues:
- Regularly checking and maintaining your electric bike components is crucial for preventing issues and ensuring a smooth riding experience. Simple tasks such as keeping your bike clean, inspecting electrical connections, and lubricating moving parts can go a long way in preserving the longevity of your electric bike.
- Understanding Component Roles Enhances Troubleshooting:
- Understanding the role of each component in the electric bike system is essential for effective troubleshooting. By familiarizing yourself with the function of components such as the motor controller, battery, and display screen, you can quickly identify potential issues and take appropriate action to resolve them.
- Don’t Hesitate to Reset for Persistent Issues:
- If you encounter persistent issues with your electric bike, don’t hesitate to perform a reset. Resetting the bike’s components can often clear software glitches or calibration errors that may be affecting performance. Trust your intuition and follow manufacturer guidelines for safe and effective resets.
- Follow Manufacturer Guidelines for Safety:
- When performing resets on your electric bike, always follow manufacturer guidelines and safety precautions to avoid accidents or damage to the system. Adhering to recommended procedures minimizes the risk of unintended consequences and ensures that resets are performed safely and effectively.
- Monitor Performance Changes After Resetting:
- After resetting your electric bike, pay close attention to any changes in performance or behavior. Monitor factors such as battery life, motor responsiveness, and display screen functionality to ensure that the reset has had the desired effect. Keeping track of these changes allows you to assess the effectiveness of the reset and address any lingering issues promptly.
- Consider Professional Assistance When Unsure:
- If you’re unsure about troubleshooting or resetting procedures for your electric bike, don’t hesitate to seek professional assistance. Certified electric bike technicians have the expertise and tools necessary to diagnose and resolve complex issues safely and efficiently. Investing in professional assistance ensures that your electric bike receives proper care and maintenance, prolonging its lifespan and performance.
- Enjoy the Benefits of Your Electric Bike While Staying Informed:
- Lastly, enjoy the convenience and benefits of your electric bike while staying informed about maintenance and troubleshooting techniques. By staying proactive and informed, you can maximize the enjoyment of your rides and tackle any challenges that may arise with confidence.
RELATED – Electric Bike Buying Guide
Troubleshooting and Resetting Electric Bike Motor Controller
Explanation of the Motor Controller’s Role:
The motor controller serves as the brain of your electric bike’s propulsion system, responsible for regulating the flow of electrical power from the battery to the motor. It interprets signals from the throttle or pedal assist sensor and adjusts the motor’s output accordingly, ensuring smooth acceleration and efficient power delivery.
When functioning properly, the motor controller seamlessly coordinates the interaction between the battery, motor, and rider input, resulting in a seamless riding experience. However, if the motor controller encounters issues, it can disrupt the bike’s performance and even render it inoperable.
Step-by-Step Guide on Troubleshooting Common Motor Controller Issues:
- Check for Loose Connections: Start by inspecting the electrical connections between the motor controller, battery, and motor. Loose or corroded connections can impede electrical flow and cause erratic behavior. Ensure all connections are snug and free of debris.
- Test the Throttle: If your electric bike’s throttle response feels sluggish or unresponsive, test the throttle for faults. Disconnect the throttle from the motor controller and use a multimeter to check for proper voltage output when the throttle is engaged. Replace the throttle if voltage readings are inconsistent or nonexistent.
- Inspect for Water Damage: Exposure to moisture or water ingress can damage the motor controller’s components and lead to malfunctions. Inspect the motor controller for signs of corrosion or water damage, especially if you’ve ridden in wet conditions. If water damage is suspected, dry the controller thoroughly and consider applying a protective coating.
- Diagnose Error Codes: Many electric bikes are equipped with diagnostic systems that display error codes when issues arise. Refer to your bike’s user manual to interpret these codes and identify potential causes. Common error codes may indicate overheating, overcurrent, or communication errors between components.
RELATED – How to Start Electric Bike Without Key
RELATED – How to Change a Tire on Electric Bike
Detailed Instructions on Resetting the Motor Controller:
Resetting the motor controller can often resolve minor software glitches or calibration errors that may be affecting its performance. Follow these steps to reset the motor controller:
- Power Off the Bike: Ensure the electric bike is powered off and disconnected from the battery to prevent electrical shock or damage during the reset process.
- Locate the Reset Button: Depending on the make and model of your electric bike, the motor controller may have a reset button or sequence. Consult your bike’s user manual or contact the manufacturer for specific instructions on locating the reset mechanism.
- Perform the Reset: Press and hold the reset button for a few seconds, or follow the prescribed reset sequence as outlined in the user manual. You may need to engage the bike’s power switch or cycle the battery’s power to initiate the reset process.
- Verify Reset Success: After performing the reset, power on the electric bike and test its functionality. Pay attention to any improvements in motor responsiveness, throttle behavior, or error code displays. If the issue persists, consider seeking professional assistance for further diagnosis and repair.
By following these troubleshooting steps and performing a motor controller reset when necessary, you can address common issues and restore your electric bike to optimal performance. Remember to exercise caution and refer to your bike’s user manual for specific guidance tailored to your model.
RELATED – Can Electric Bikes Be Easily Serviced at Local Repair Bike Shops?
RELATED – Why Does My Electric Bike Keep Cutting Out?
Resetting Electric Bike Display Screen After Issues
Importance of the Display Screen:
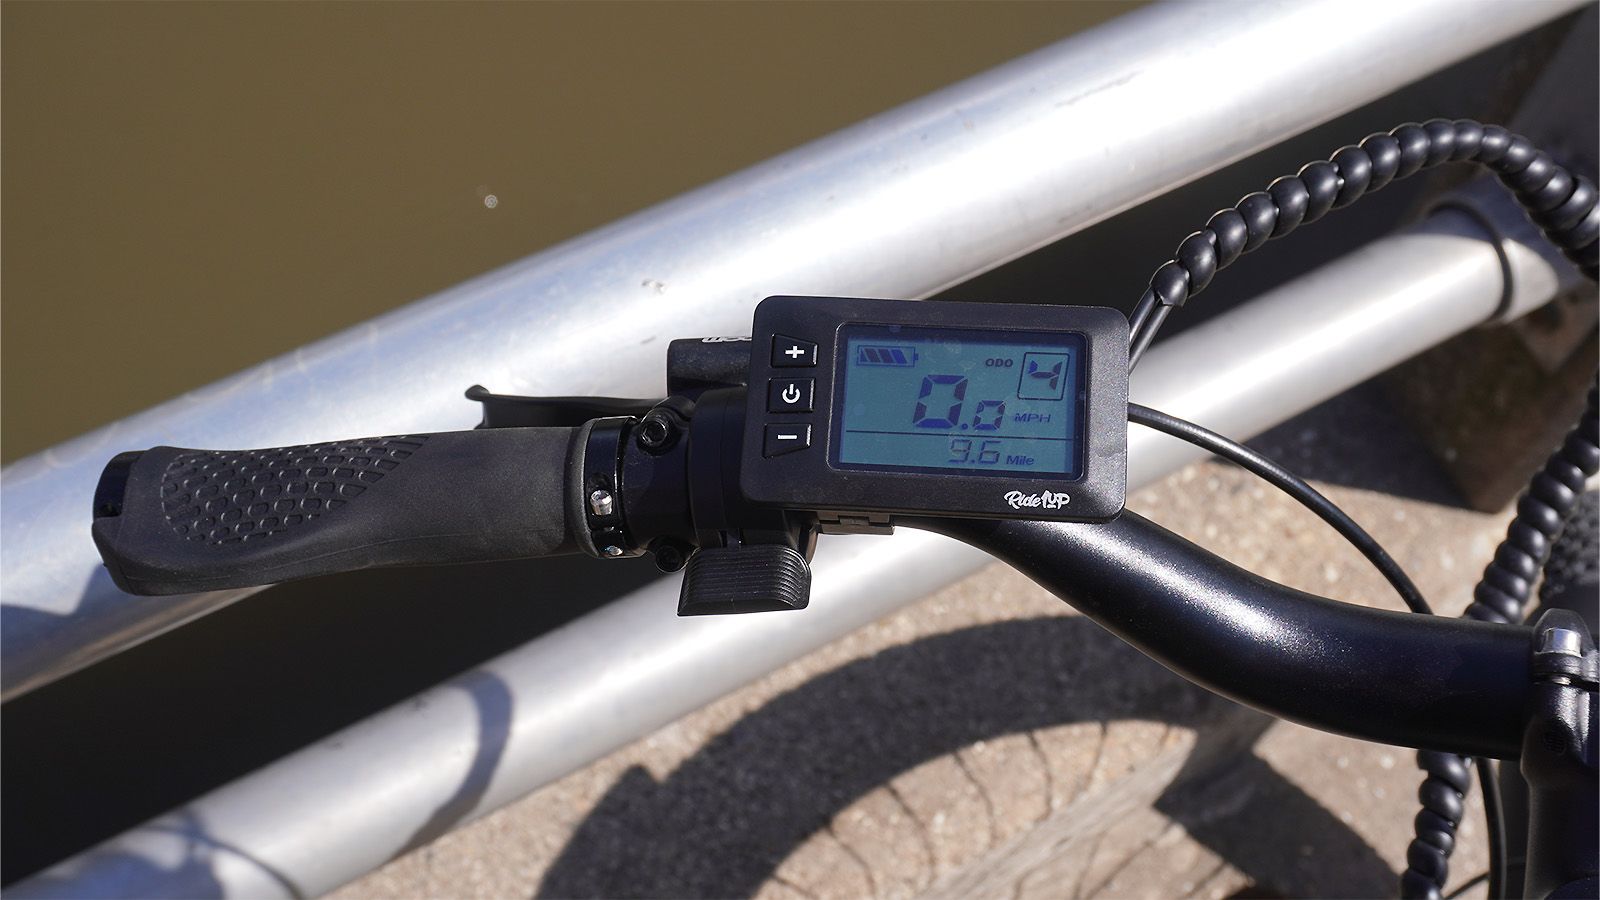
The display screen on your electric bike serves as a vital interface between you and your bike’s electronic systems. It provides essential information such as speed, distance traveled, battery level, assist mode, and more, allowing you to monitor your ride and adjust settings as needed. With intuitive controls and real-time feedback, the display screen enhances your riding experience by keeping you informed and in control.
Common Display Screen Issues and How to Troubleshoot Them:
- Blank Screen: If your display screen fails to power on or remains blank, start by checking the battery connection. Ensure the battery is securely attached and fully charged. If the issue persists, inspect the display screen for visible damage or signs of water ingress. Water damage can cause corrosion and disrupt electrical connections.
- Intermittent Display: An intermittently functioning display screen may indicate loose connections or a faulty display unit. Check the wiring harness connecting the display screen to the motor controller for any loose or damaged wires. Re-seat connectors and tighten screws as needed to ensure a secure connection.
- Unresponsive Controls: If the display screen’s buttons or touchscreen are unresponsive, try cleaning the surface with a soft, dry cloth to remove any dirt or debris. Avoid using harsh chemicals or abrasive cleaners, as these can damage the screen. If cleaning doesn’t improve responsiveness, the display unit may need to be replaced.
- Error Messages: Error messages displayed on the screen can provide valuable insight into underlying issues with your electric bike. Refer to your bike’s user manual to interpret error codes and follow recommended troubleshooting steps. Common error messages may indicate issues with the battery, motor, or sensor systems.
Clear Instructions on Resetting the Display Screen to Resolve Issues:
Resetting the display screen can often resolve software glitches or calibration errors that may be causing issues. Follow these steps to reset the display screen:
- Power Off the Bike: Ensure the electric bike is powered off and disconnected from the battery to prevent electrical shock or damage during the reset process.
- Locate the Reset Button: Depending on the make and model of your electric bike, the display screen may have a reset button or sequence. Consult your bike’s user manual or contact the manufacturer for specific instructions on locating the reset mechanism.
- Perform the Reset: Press and hold the reset button for a few seconds, or follow the prescribed reset sequence as outlined in the user manual. You may need to engage the bike’s power switch or cycle the battery’s power to initiate the reset process.
- Verify Reset Success: After performing the reset, power on the electric bike and test the display screen’s functionality. Ensure all buttons and touchscreen controls respond correctly, and check for any error messages or abnormal behavior. If the issue persists, consider seeking professional assistance for further diagnosis and repair.
Addressing common issues and ensuring reliable functionality of your electric bike’s interface during rides can be achieved by following these troubleshooting steps and performing a display screen reset when necessary. Remember to handle the display screen with care and refer to your bike’s user manual for specific reset instructions tailored to your model to avoid complications.
Solving E-Bike Error Codes Through Reset Methods
Overview of Common Error Codes:
Error codes are your electric bike’s way of communicating potential issues with its various components. Understanding these codes can help you diagnose and resolve problems efficiently. Some common error codes include:
- Error Code 5: Battery voltage too low. This error typically occurs when the battery charge is depleted or when there’s a fault in the battery management system.
- Error Code 21: Throttle signal error. This error indicates a problem with the throttle sensor or its wiring, leading to issues with motor response.
- Error Code 30: Motor phase detection error. This error suggests a fault in the motor or its connections, resulting in irregular motor operation.
- Error Code 99: General system error. This generic error code can signal various issues, including communication errors between components or software malfunctions.
Guide on Troubleshooting Error Codes:
- Refer to User Manual: Your electric bike’s user manual is your first point of reference when encountering error codes. It often includes a list of error codes and their meanings, along with recommended troubleshooting steps.
- Check Connections: Inspect all electrical connections, including those between the battery, motor, controller, and display screen. Loose or corroded connections can trigger error codes and affect system performance.
- Test Components: Use a multimeter to test the voltage and continuity of components such as the battery, throttle, motor, and sensors. Replace any faulty components identified during testing.
- Reset System: If troubleshooting steps fail to resolve the error, performing a system reset may clear the code and restore normal operation. Follow manufacturer guidelines for resetting your specific electric bike model.
Techniques for Resetting the Bike to Clear Error Codes:
- Power Cycle: Turn off the electric bike and disconnect the battery. Wait a few minutes before reconnecting the battery and powering on the bike. This simple power cycle can sometimes clear transient error codes.
- Reset Controller: Many electric bikes feature a reset button on the motor controller or display screen. Press and hold the reset button for a few seconds to initiate a system reset. Follow any additional instructions provided by the manufacturer.
- Reprogram System: Some error codes may require reprogramming or recalibration of the electric bike’s electronic systems. Refer to the user manual or contact customer support for guidance on reprogramming procedures.
- Professional Diagnosis: If error codes persist despite troubleshooting and reset attempts, it may indicate a more serious underlying issue. Consider seeking professional assistance from a certified electric bike technician to diagnose and repair the problem.
To effectively address error codes and ensure smooth and reliable operation of your electric bike, utilize reset methods when necessary. Remember to consult your bike’s user manual and exercise caution when performing resets to prevent further damage to the system.
Factory Reset Process for Electric Bike Components
Explanation of Factory Reset:
A factory reset, also known as a hard reset or master reset, restores your electric bike’s components to their original factory settings. It wipes out any custom configurations or changes you’ve made to the system, reverting it to the state it was in when it left the factory. This process can be useful for troubleshooting persistent issues, resolving software glitches, or restoring optimal performance.
When a Factory Reset is Necessary:
- Persistent Issues: If your electric bike continues to experience recurring problems despite other troubleshooting attempts, a factory reset may be necessary to eliminate any underlying software issues.
- System Malfunctions: Software glitches or bugs within the bike’s electronic systems can disrupt normal operation and performance. A factory reset can help resolve these issues by clearing corrupted data and restoring default settings.
- Performance Optimization: Over time, accumulated software clutter or outdated configurations may degrade your electric bike’s performance. A factory reset can refresh the system, improving responsiveness and efficiency.
Step-by-Step Instructions for Performing a Factory Reset:
- Backup Data (if applicable): Before proceeding with a factory reset, consider backing up any important data or custom settings stored on your electric bike, such as ride logs or personalized preferences.
- Identify Reset Procedure: Different electric bike models may have varying methods for performing a factory reset. Refer to your bike’s user manual or contact the manufacturer for specific instructions tailored to your model.
- Power Off the Bike: Ensure the electric bike is powered off and disconnected from the battery to prevent electrical shock or damage during the reset process.
- Access Settings Menu (if applicable): If your electric bike has a display screen with settings menus, navigate to the “Reset” or “Factory Reset” option within the settings menu.
- Initiate Reset: Follow the prompts on the display screen or use the designated reset button to initiate the factory reset process. Confirm your decision when prompted.
- Wait for Completion: Depending on the complexity of the system and the amount of data to be reset, the process may take several minutes to complete. Exercise patience and avoid interrupting the reset process.
- Verify Reset Success: Once the factory reset is complete, power on the electric bike and verify that the system has been restored to its factory default settings. Test the bike’s functionality and monitor for any improvements in performance or issues resolved.
Cautionary Advice on Potential Consequences:
- Loss of Custom Settings: Performing a factory reset will erase any customized settings or configurations you’ve applied to your electric bike, including assist levels, display preferences, and sensor calibrations. Be prepared to reconfigure these settings after the reset.
- Risk of Data Loss: If your electric bike stores ride data or other information, performing a factory reset will erase this data unless it has been backed up beforehand. Consider exporting or saving any important data before proceeding with the reset.
- Follow Manufacturer Guidelines: Always follow manufacturer guidelines and recommendations when performing a factory reset to avoid unintended consequences or damage to your electric bike’s components. If you’re unsure about the reset process, consult the user manual or contact customer support for assistance.
Consider these step-by-step instructions and weigh the potential consequences of a factory reset. This approach allows you to effectively restore your electric bike to its factory default settings, addressing persistent issues or performance concerns. Before proceeding with the reset, exercise caution and ensure to back up any crucial data.
RELATED – A Guide to Choosing the Right Electric Bike Battery
Electric Bike Battery Reset Instructions for Beginners
Basic Overview of Electric Bike Batteries:
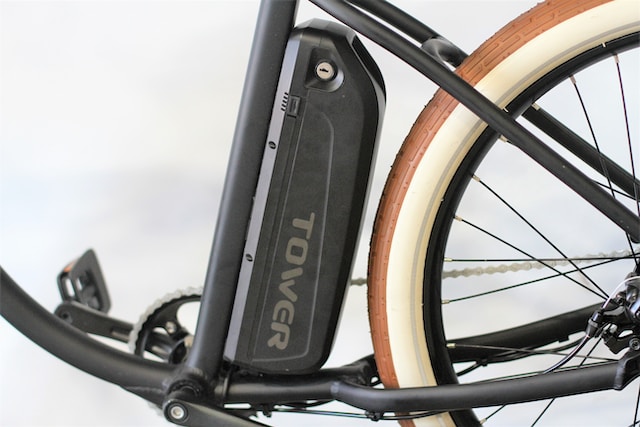
Electric bike batteries are the powerhouse behind your ride, providing the energy needed to propel your bike’s motor and electronics. Typically, electric bike batteries are lithium-ion or lithium-polymer and come in various shapes and sizes, depending on the bike’s design and manufacturer. The battery’s capacity, measured in watt-hours (Wh), determines how far you can ride on a single charge.
The importance of the battery cannot be overstated, as it directly impacts your electric bike’s range, performance, and overall riding experience. Proper care and maintenance of the battery are essential for maximizing its lifespan and ensuring consistent performance.
RELATED – Affordable Electric Bikes Under $500
RELATED – Do You Need a License For Electric Bike?
Common Battery-Related Issues and Troubleshooting Tips:
- Reduced Range: If you notice a significant decrease in your electric bike’s range, it could indicate that the battery’s capacity has degraded over time. To troubleshoot this issue, ensure that you’re charging the battery fully and avoiding prolonged exposure to extreme temperatures, which can accelerate degradation.
- Charging Problems: Difficulty charging the battery or inconsistent charging behavior may stem from issues with the charger, charging port, or battery management system. Try using a different charger or outlet to rule out these possibilities, and inspect the charging port for any debris or damage.
- Sudden Power Loss: Unexpected power loss during rides can be alarming and potentially dangerous. Check the battery connections and wiring harness for any loose or damaged components that may be causing intermittent power supply issues.
- Error Codes: Some electric bikes feature diagnostic systems that display error codes when battery-related issues arise. Refer to your bike’s user manual to interpret these codes and follow recommended troubleshooting steps.
Beginner-Friendly Instructions on Resetting the Electric Bike Battery:
Performing a battery reset can help recalibrate the battery management system and restore optimal performance. Follow these beginner-friendly instructions to reset the electric bike battery:
- Power Off the Bike: Ensure the electric bike is powered off and safely parked in a stable location.
- Disconnect Battery: Depending on your electric bike’s design, locate the battery compartment and remove the battery from its housing. Be sure to follow any specific instructions provided by the manufacturer for safely disconnecting the battery.
- Inspect Connections: Take a moment to inspect the battery terminals and wiring connections for any signs of corrosion, damage, or looseness. Clean the terminals with a soft brush or cloth if necessary to ensure good electrical contact.
- Reset Battery Management System: Some electric bike batteries are equipped with a reset button or sequence to recalibrate the battery management system. Consult your bike’s user manual or contact the manufacturer for instructions on initiating a battery reset.
- Reinstall Battery: Once the battery reset is complete, carefully reinsert the battery into its housing, ensuring that it is securely seated and the connections are properly aligned.
- Test Performance: Power on the electric bike and test its performance, paying attention to any improvements in battery life, power delivery, or error codes displayed. Take your bike for a test ride to assess its performance under normal riding conditions.
By following these beginner-friendly instructions and resetting the electric bike battery as needed, you can address common battery-related issues and optimize your riding experience. Remember to handle the battery with care and refer to your bike’s user manual for specific reset instructions tailored to your model.
FAQs
If your electric bike fails to respond after a reset, there are several troubleshooting steps you can take:
Check Connections: Ensure all electrical connections are securely seated and free of debris. Loose or damaged connections can disrupt the bike’s functionality.
Inspect Battery: Verify that the battery is fully charged and properly connected. Low battery voltage or a faulty connection can prevent the bike from powering on.
Reset Again: Try performing the reset process again, following the instructions carefully. It’s possible that the initial reset attempt was not completed successfully.
If the issue persists, consider seeking professional assistance from a certified electric bike technician to diagnose and address the problem.
The frequency of resetting your electric bike components depends on various factors, including usage patterns, environmental conditions, and the presence of any persistent issues. In general, it’s not necessary to reset your electric bike components regularly unless you encounter specific problems or notice a decline in performance.
If you experience recurring issues such as error codes, erratic behavior, or decreased battery life, performing a reset may help resolve these issues and restore optimal performance. However, it’s essential to follow manufacturer guidelines and recommendations for resetting your electric bike components to avoid unintended consequences.
While resetting your electric bike can often resolve software glitches and improve performance, there are some potential risks to be aware of:
Loss of Custom Settings: Performing a reset may erase any customized settings or configurations you’ve applied to your electric bike, such as assist levels or display preferences. Be prepared to reconfigure these settings after the reset.
Data Loss: If your electric bike stores ride data or other information, performing a reset may erase this data unless it has been backed up beforehand. Consider exporting or saving any important data before proceeding with the reset.
Component Damage: Improperly resetting your electric bike components or performing resets too frequently may cause damage to the system or void the warranty. Follow manufacturer guidelines and recommendations to minimize the risk of damage.
In most cases, performing a reset on your electric bike will revert it to its factory default settings, erasing any customized configurations or settings you’ve applied. However, some electric bike models may offer options for partial resets or backups of custom settings.
Before performing a reset, check your bike’s user manual or consult with the manufacturer to see if there are any provisions for preserving customized settings. If not, be prepared to reconfigure your settings after the reset to restore your preferred riding experience.
Resetting your electric bike components according to manufacturer guidelines should not void the warranty, as long as the reset process is performed correctly and does not result in damage to the system. However, it’s essential to follow manufacturer recommendations and avoid unauthorized modifications or resets that may void the warranty.
If you have concerns about how resetting your electric bike may affect the warranty, refer to your bike’s warranty documentation or contact the manufacturer for clarification. Additionally, keep records of any maintenance or reset procedures performed on your electric bike for future reference.
Yes, the same method used to remove speed limiter on electric bike can also be used to reset it. By following the specific steps outlined for the “remove speed limiter electric bike” process, it is possible to either completely eliminate or reset the speed limiter on an electric bike.
Conclusion
In conclusion, understanding how to troubleshoot and reset your electric bike is essential for maintaining its performance and reliability. Whether you’re dealing with motor controller issues, display screen malfunctions, or battery-related concerns, the troubleshooting techniques and reset methods outlined in this guide can help you address common problems and keep your electric bike running smoothly.
By following the step-by-step instructions provided for each component and considering the potential risks and benefits of resetting your electric bike, you can confidently tackle any challenges that arise and enjoy uninterrupted rides. Remember to consult your bike’s user manual and seek professional assistance if needed, especially for complex issues or if you’re unsure about performing resets.
We hope this guide has empowered you to take control of your electric bike’s maintenance and troubleshooting needs. If you found this information helpful or have any questions, we’d love to hear from you! Feel free to leave a comment below, and don’t forget to share this guide with fellow electric bike enthusiasts who may benefit from it.
Keep riding, stay safe, and enjoy the journey with your electric bike!
External Sources
1. Electric Bike Forums:
- Electric bike forums such as ElectricBike.com and EBR (Electric Bike Review) Forum are valuable resources for connecting with fellow electric bike enthusiasts and accessing a wealth of knowledge on troubleshooting and maintenance tips. Participating in forum discussions allows you to learn from the experiences of others and seek advice on specific issues you may encounter with your electric bike.
2. Manufacturer Websites:
- Visit the official websites of electric bike manufacturers for detailed guides, FAQs, and support resources related to troubleshooting and resetting procedures. Many manufacturers provide comprehensive documentation and instructional videos tailored to their specific electric bike models, making it easier to navigate through troubleshooting steps and perform resets with confidence.
3. Instructional Videos and Guides:
- YouTube channels such as ElectricBikeReview and Global Cycling Network (GCN) Electric offer a treasure trove of instructional videos on electric bike maintenance and repair techniques. From basic troubleshooting tips to advanced repair tutorials, these videos provide visual demonstrations that complement written guides and manuals, making it easier to understand and implement the recommended procedures.
- Websites like Park Tool and REI offer detailed guides and articles on bicycle maintenance, including sections dedicated to electric bikes. Whether you’re looking for step-by-step instructions on resetting components or general maintenance advice, these resources provide valuable insights from experts in the field of bicycle maintenance and repair.
Kristina Grant is not just an enthusiast but a true authority on electric bikes. Nestled in the coastal beauty of Virginia, Kristina has found the perfect backdrop for her passion for electric biking. As a dedicated wife and homeschooling mom, her life revolves around family, faith, and the thrill of adventure.
Originally hailing from Ohio, Kristina's journey with electric bikes began as a curiosity and quickly evolved into a deep expertise. Her blog is a testament to her love for electric biking, combining her fascination for eco-friendly transportation with her coastal lifestyle.
When she's not cruising the beach on her electric bike, you'll find Kristina indulging in her other loves: long walks along the shore, getting lost in a good book, and cherishing moments with her loved ones. With a heart as big as her love for animals, especially cats, Kristina brings a unique perspective to the electric bike world, grounded in her strong faith in God and her dedication to a sustainable lifestyle.
Through her blog, Kristina shares her extensive knowledge of electric bikes, offering valuable insights, tips, and recommendations to fellow enthusiasts. Whether you're a seasoned rider or a newcomer to the electric bike scene, Kristina's blog is your go-to source for all things electric biking, fueled by her passion, expertise, and the scenic beauty of coastal Virginia.

