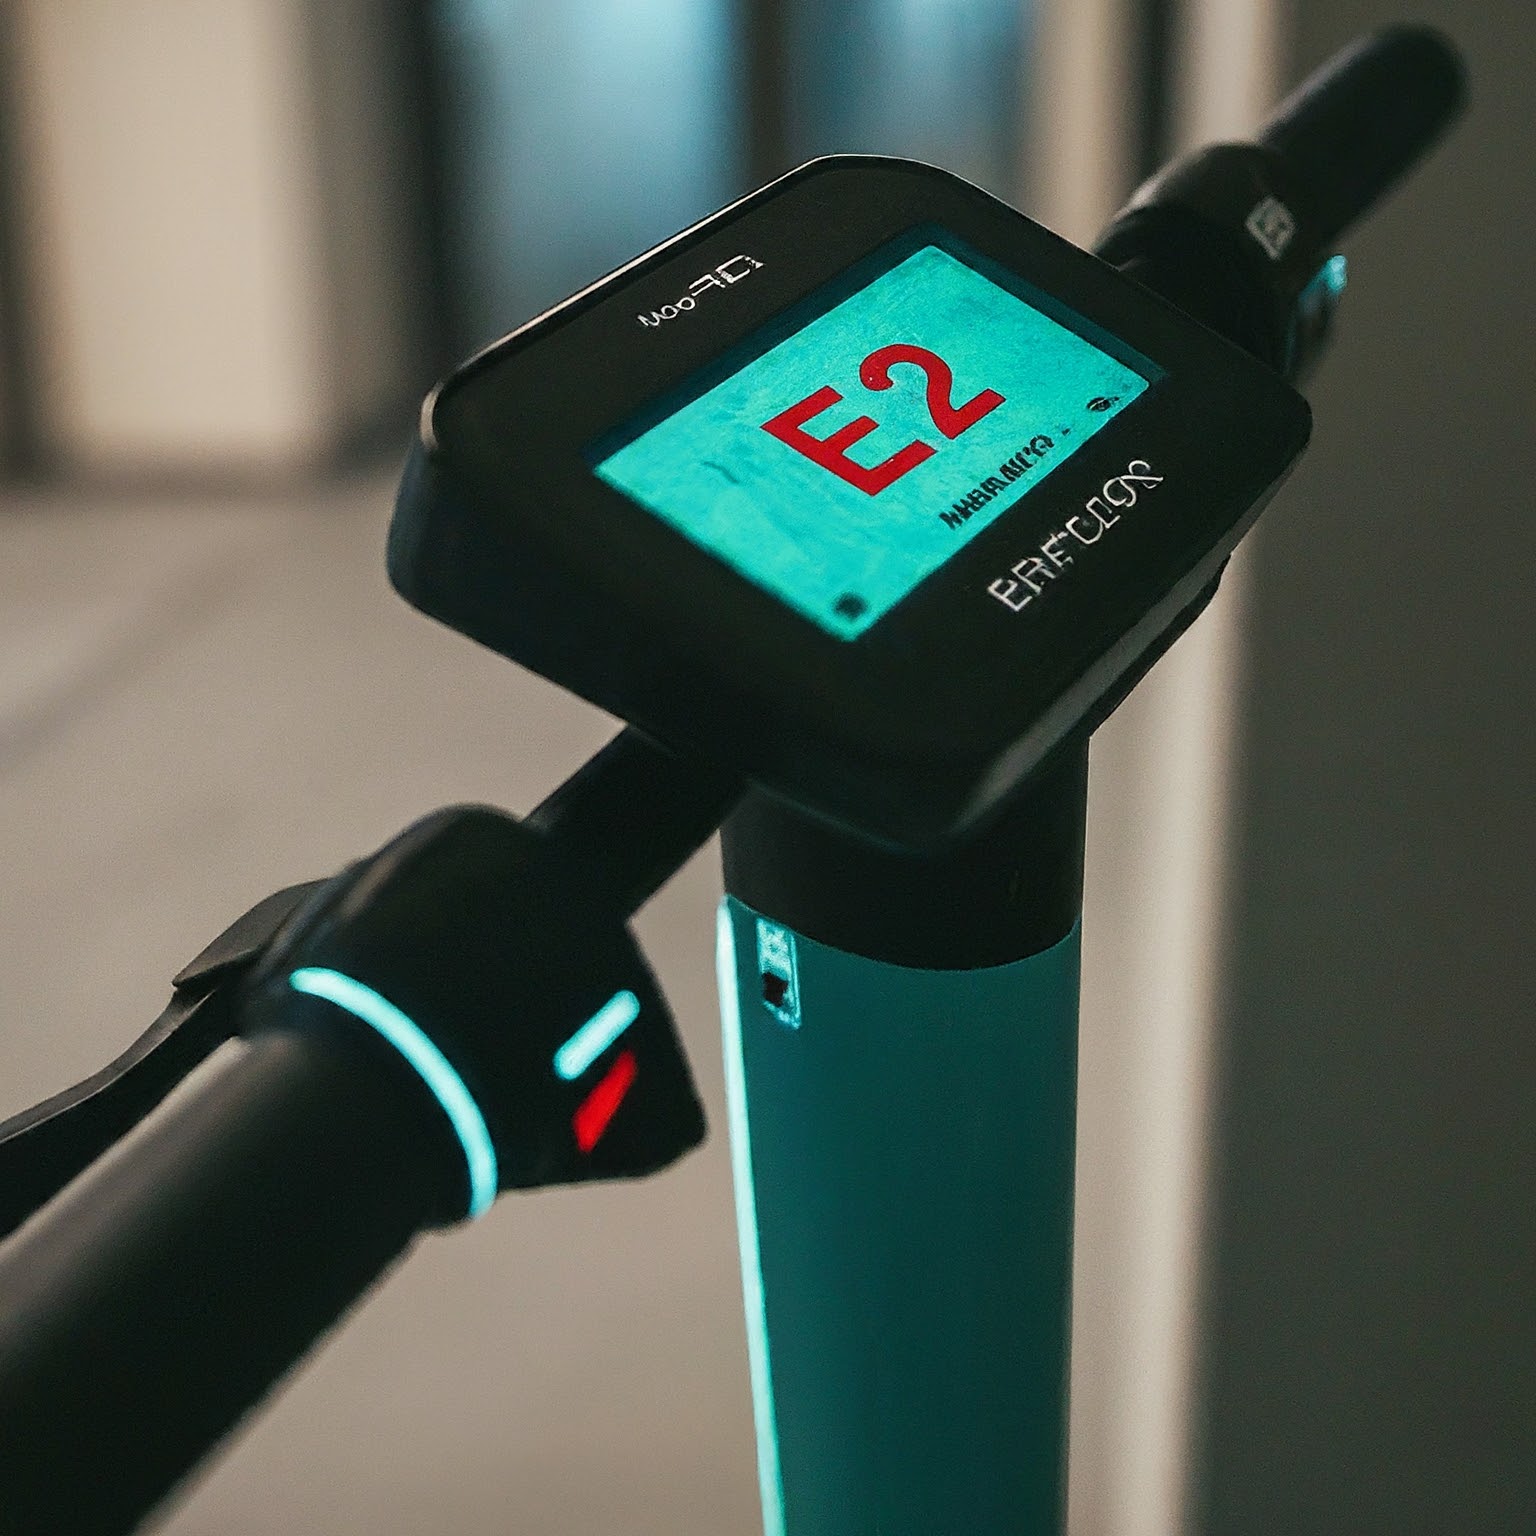
Fix E2 Error & Keep Your Electric Scooter Rolling
Last Updated on June 22, 2024 by Kristina Grant
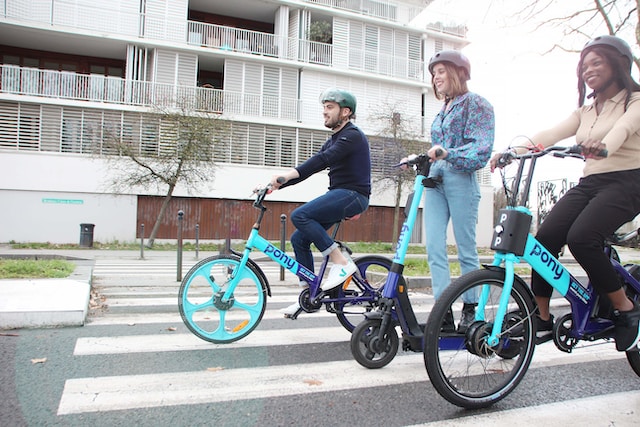
Electric scooters have become a popular choice for commuters and leisure riders alike. They offer a convenient, eco-friendly, and often times, fun way to get around town. They’re relatively simple machines, but like any machine, regular maintenance is key to ensure they keep running smoothly and safely. One issue that can disrupt your ride is an E2 error code.
This error code can be frustrating, as it often brings your scooter to a complete halt. Let’s dive into what the E2 error means and how to get your scooter back up and running.
Key Takeaways
The E2 error might seem like a mysterious message from your electric scooter, but fear not! Here are 7 key takeaways to help you diagnose and fix the issue, getting you back on the road in no time:
- E2 Often Points to the Throttle: The E2 error typically indicates a problem with the accelerator, also known as the throttle. This is the component you twist or press to control your scooter’s speed. If the throttle malfunctions or encounters issues, communication with the scooter’s brain (the controller) gets disrupted, triggering the E2 error.
- Check the Basics First: Before diving into complex troubleshooting, perform some simple checks. Ensure your scooter is powered off and dry. Visually inspect the throttle for damage and check the connections for looseness. Avoiding water damage is crucial as it can lead to electrical problems.
- Reset Might Do the Trick: Believe it or not, some electric scooter models allow a simple reset to clear the E2 error. Think of it as a soft reboot for your scooter’s system. Consult your user manual for specific reset instructions for your model. A quick reset could be all it takes to get you back in action.
- Multimeter for Advanced Users: For those comfortable with a little more technical troubleshooting, a multimeter can be a helpful tool. This device measures electrical properties like voltage and resistance. By following a guide and using caution, you can test the resistance of the wires within the throttle assembly to identify potential faults.
- Consider Part Replacements: If the E2 error persists, replacing faulty components might be necessary. In some cases, a loose connection or a faulty throttle itself might be the culprit. Replacing these parts can often resolve the issue. For more complex problems like controller or hall sensor issues, consult a professional.
- Consult the Experts: The user manual and the scooter brand’s website are your best friends when it comes to specific repair information. These resources will provide instructions on part replacements specific to your model and ensure you get the correct components.
- Seek Help When Needed: There’s no shame in seeking professional help! If you’re unsure about any step, uncomfortable with repairs, or suspect a complex issue, don’t hesitate to consult a qualified electric scooter mechanic. Their expertise can ensure your scooter is repaired safely and effectively.
RELATED CONTENT – Top Electric Scooters for Adults in 2024
Understanding the E2 Error: Demystifying the Code
When your electric scooter sputters and displays an E2 error code, it can be like receiving a cryptic message. But fear not! This section will translate that message and explain what the E2 error typically signifies.
The most common culprit behind an E2 error is an issue with the accelerator, also known as the throttle. This is the component you twist or press to control your scooter’s speed. If the throttle malfunctions or encounters problems, the communication between it and the scooter’s brain (the controller) gets disrupted, leading to the E2 error.
However, the E2 error isn’t as straightforward as a broken throttle all the time. Sometimes, it can be caused by:
- Loose connections: Just like a loose wire in your house lamp can cause flickering, loose connections between the throttle and the controller can confuse the system and trigger the E2 error.
- Controller problems: The controller acts as the brain of your electric scooter, receiving signals from the throttle and sending instructions to the motor. If the controller itself malfunctions, it might misinterpret signals and display the E2 error.
- Hall sensor issues: Tucked away near the motor, the hall sensor is a small but important component. It essentially acts like a tiny magnet reader, keeping the controller informed about the motor’s position and rotation. A faulty hall sensor can also disrupt communication and lead to an E2 error.
While these are the main culprits behind the E2 error, understanding their roles will help you troubleshoot the problem more effectively. In the next section, we’ll explore some steps you can take to get your scooter back in working order.
RELATED CONTENT – Electric Bikes for Teens Buying Guide
Troubleshooting the E2 Error: Taking Charge of the Fix
The E2 error might seem daunting, but often the fix is relatively simple. Before we delve into any deep troubleshooting, let’s address some basic checks that can sometimes resolve the issue quickly:
Safety First! Always ensure your electric scooter is powered off and unplugged before attempting any troubleshooting steps.
1. A Visual Inspection: Grab a flashlight and take a close look at your throttle. Are there any visible signs of damage like cracks, exposed wires, or excessive wear? If so, this could be the culprit behind the E2 error.
2. Connection Check: Many E2 errors arise from a simple case of loose connections. Carefully examine where the throttle connects to the scooter’s wiring harness. Make sure the connection is secure and hasn’t come loose due to vibrations or bumps during your rides.
3. Keeping it Clean and Dry: Electric scooters are fantastic for zipping around town, but avoid riding them through puddles or exposing them to excessive moisture. Water damage can lead to electrical issues and potentially trigger the E2 error. If you suspect your scooter might have gotten wet, dry it thoroughly before attempting to turn it back on.
These basic checks might be all it takes to resolve the E2 error. However, if the issue persists, fret not! The next section will explore some more advanced troubleshooting techniques to get your scooter back up to speed.
RELATED CONTENT – Can Electric Bikes Be Easily Serviced at Local Repair Shop?
Advanced Troubleshooting (for Comfortable DIYers): Diving Deeper
If the basic checks haven’t solved the E2 error, don’t worry! We can delve a little deeper into troubleshooting for those comfortable with some DIY fixes. Remember, if you’re unsure about any step, it’s always best to consult a professional mechanic.
1. The Power of the Reset: Believe it or not, some electric scooter models allow a simple reset to clear the E2 error. This is essentially a soft reboot for your scooter’s system. Consult your scooter’s user manual for specific instructions on resetting your model. A quick reset might be all it takes to get your scooter back in action.
2. Unveiling Resistance with a Multimeter: For those comfortable with a little more technical troubleshooting, a multimeter can be a helpful tool. This handy device measures electrical properties like voltage and resistance. By following a guide on using a multimeter, you can test the resistance of the wires within the throttle assembly. Consult your scooter’s user manual for the expected resistance values specific to your model. Deviations from these values might indicate a faulty throttle wire.
3. The Hall Sensor: A Tiny but Mighty Component: The hall sensor, though small, plays a crucial role in your scooter’s operation. It acts like a tiny magnet reader, keeping the controller informed about the motor’s position and rotation. While testing a hall sensor can be done, it often involves specialized tools and knowledge. If you suspect a faulty hall sensor is the culprit behind the E2 error, it’s best to consult a professional mechanic for proper diagnosis and replacement.
Important Note: The troubleshooting steps mentioned here, particularly those involving the multimeter and hall sensor, are intended for comfortable DIYers who possess the necessary tools and knowledge. If you’re unsure about any step, don’t hesitate to seek help from a qualified electric scooter mechanic. Their expertise can ensure your scooter is repaired safely and effectively.
The next section will explore some solutions for fixing the E2 error, whether through simple fixes or part replacements.
RELATED CONTENT – Troubleshooting Overheating Electric Bike Motors
Fixing the E2 Error: Putting the Solution into Action
By following the troubleshooting steps in the previous section, you’ve hopefully identified the cause of the E2 error on your electric scooter. Now, let’s explore some solutions to get your scooter back on the road.
The Joy of Easy Fixes:
Sometimes, the fix for an E2 error is delightfully simple, and resolving it yourself brings a sense of accomplishment. Here’s how to address the common culprits identified during troubleshooting:
- Loose Connection: If the culprit was a loose connection between the throttle and the wiring harness, all you need to do is secure it properly. Often, a simple click or a snug fit is all it takes to re-establish a strong connection and eliminate the error code. Imagine the satisfaction of getting your scooter back in action with just a quick fix!
- Reset Did the Trick: If a reset according to your scooter’s user manual successfully cleared the E2 error, then congratulations! You’ve successfully diagnosed and fixed the issue yourself. Pat yourself on the back and enjoy a smooth ride on your electric scooter. Not only did you save time by avoiding a trip to the mechanic, but you also gained valuable knowledge about your scooter’s inner workings.
Beyond the Basics: Preventive Maintenance Tips
While these easy fixes can resolve the E2 error in the short term, consider these preventive maintenance tips to minimize the chances of encountering it again:
- Regular Inspections: Develop a habit of regularly inspecting your throttle for signs of wear and tear, such as frayed wires or loose connections. Addressing these minor issues early on can prevent them from escalating into bigger problems.
- Keep it Clean: While electric scooters are built for outdoor use, avoid exposing them to excessive moisture or dirt. A clean and well-maintained scooter is less likely to experience electrical problems like the E2 error. You can use a damp cloth to wipe down your scooter after rides, focusing on areas around the throttle and wiring harness.
- Consult the User Manual: Your scooter’s user manual is a treasure trove of information. Refer to it for recommended maintenance intervals and specific cleaning instructions for your model. Following these guidelines will help keep your scooter in top shape and prevent future errors.
By following these simple steps, you can celebrate the joy of easy fixes and keep your electric scooter running smoothly for a long time. However, if the E2 error persists after addressing these solutions, don’t hesitate to explore the part replacement options in the next section.
RELATED CONTENT – Folding Mobility Scooter for 300 Lbs
Part Replacements: Addressing Faulty Components
If the E2 error remains after the easy fixes, it might be necessary to replace faulty components within your electric scooter.
Throttle Replacement:
In some cases, the root cause of the E2 error might be a malfunctioning throttle itself. The throttle might have internal wear and tear, or it could have sustained damage from a fall or collision. Here’s a closer look at what to consider when replacing the throttle:
- Identifying the Culprit: How can you tell if a faulty throttle is behind the E2 error? Here are some indicators to watch for:
- Sticky Throttle: A throttle that feels sticky or sluggish when you twist it can be a sign of internal friction or worn components. This can disrupt the signal sent to the controller and potentially trigger the E2 error.
- Erratic Acceleration: If your scooter accelerates inconsistently, jerks unexpectedly, or has a mind of its own when you twist the throttle, it might be due to faulty throttle components sending erratic signals.
- No Response: If twisting the throttle produces no response from the motor whatsoever, it could be a sign of a completely malfunctioning throttle.
- Consult the User Manual Before Replacing: Before diving into a throttle replacement, refer to your scooter’s user manual for troubleshooting steps specific to your model. The manual might offer solutions to address common throttle issues that don’t necessitate a replacement. For instance, the manual might recommend cleaning the throttle contacts or resetting the scooter.
- Finding the Right Replacement Throttle: Scooter throttles are not one-size-fits-all. Ensure you purchase a throttle replacement specifically designed for your scooter model. Here’s how to find the correct part:
- Model Number Magic: Locate your scooter’s model number, which is usually printed on a sticker somewhere on the frame. Search online using the model number along with keywords like “throttle replacement.” This should lead you to compatible throttle replacements from reputable retailers.
- Manufacturer’s Website: The scooter brand’s website often has a parts section where you can find replacement parts specific to your model. You can search for your model number or browse through exploded diagrams to locate the correct throttle.
- Authorized Retailers: Authorized retailers that sell your scooter brand can also be a reliable source for finding the right replacement throttle. They can look up the part based on your scooter model and ensure compatibility.
- DIY or Professional Installation: Replacing the throttle can be a relatively straightforward process, especially for those comfortable with disassembling and reassembling electronic components. However, if you’re unsure about any steps, especially when dealing with electrical components, don’t hesitate to seek help from a qualified mechanic. They can ensure the throttle is installed correctly and safely, preventing any potential issues down the road.
The controller acts as the brain of your electric scooter. It’s the central processing unit that receives signals from the throttle, interprets them, and sends corresponding commands to the motor, regulating your scooter’s speed. A faulty controller can disrupt this communication and trigger the E2 error.
RELATED CONTENT – Electric Bikes vs Electric Scooters: Which is Better?
Controller Replacement:
Here’s a deeper dive into why controller replacements are best left to qualified mechanics:
Symptoms of a Faulty Controller: Diagnosing controller issues can be tricky, but some signs might point towards a malfunction. These can include:
- Inconsistent Performance: Erratic acceleration, sudden stops, or a complete lack of response from the motor when you twist the throttle could be indicative of a faulty controller sending incorrect signals.
- Error Codes Beyond E2: While the E2 error often points towards throttle or connection issues, some scooters might display other error codes on the display panel if the controller is malfunctioning. Consult your user manual for specific error code meanings.
- Visible Damage: In rare cases, a physically damaged controller might be evident. Signs like burn marks or melted components can indicate a severe electrical issue within the controller.
Specialized Tools and Knowledge: Diagnosing controller problems often requires specialized tools and in-depth knowledge of electrical systems. Mechanics possess these tools and expertise to accurately pinpoint the problem within the controller. This ensures they’re not simply replacing a controller unnecessarily.
Controller Replacement is a Delicate Process: Replacing the controller itself requires careful handling and precise installation. Mechanics ensure proper compatibility between the replacement controller and your scooter model. They also have the expertise to program the new controller if necessary, ensuring seamless communication with other scooter components.
Why Consulting a Mechanic is Wise:
While replacing a throttle might be a manageable DIY project for some, controller replacements are best left to professionals. Here’s why:
- Safety Matters: Controllers deal with electrical currents. Improper handling or installation can lead to safety hazards. A qualified mechanic has the experience and knowledge to ensure safe repairs.
- A Fix You Can Trust: A mechanic’s expertise guarantees a proper diagnosis and repair. This gives you peace of mind knowing the E2 error is truly resolved and your scooter is functioning safely and efficiently.
The next section will discuss another potential culprit for the E2 error – the hall sensor – and why seeking professional help for replacements is often recommended.
RELATED CONTENT – Ebike Maintenance for Beginners
Hall Sensor:
Nestled within the electric scooter motor lies a tiny but crucial component called the hall sensor. This sensor acts like a guardian, constantly monitoring the position and rotation of the motor. It relays this information to the controller, which then regulates the motor’s speed and ensures smooth operation. While a malfunctioning hall sensor is less frequent than throttle or controller issues, it can still contribute to the E2 error.
Here’s why seeking professional help for diagnosing and replacing a faulty hall sensor is recommended:
The Nuances of Diagnosis: Symptoms of a failing hall sensor can be subtle and mimic other problems. For instance, erratic acceleration or stuttering motor performance could be caused by a faulty hall sensor, but it could also be a throttle or controller issue. A qualified mechanic possesses the expertise to distinguish between these possibilities and pinpoint the hall sensor as the culprit if that’s the case.
Technical Expertise Required: Replacing the hall sensor itself can be a delicate task. It often involves disassembling the motor, which can be intricate and requires knowledge of the specific motor model and scooter brand. Mechanics have the experience and tools to disassemble and reassemble the motor safely and efficiently.
Calibration Might Be Necessary: In some cases, replacing the hall sensor might not be enough. The new sensor might need calibration to ensure it communicates seamlessly with the controller. Mechanics have the tools and knowledge to perform this calibration process, guaranteeing your scooter operates optimally.
Why Consulting a Mechanic is Wise:
While replacing a throttle might be a manageable DIY project for some, hall sensor replacements are best left to professionals. Here’s why:
- Preserving Your Scooter’s Health: The motor is a vital component of your electric scooter. Improper handling during disassembly or replacement of the hall sensor can lead to unintended damage to the motor itself. Mechanics have the expertise to ensure the motor remains healthy throughout the repair process.
- Safety First: Like controllers, hall sensors deal with electrical components. A qualified mechanic can ensure safe handling and prevent any electrical hazards during the repair.
Consult the Experts: Before attempting any part replacements yourself, it’s crucial to consult your scooter’s user manual and the scooter brand’s website. These resources will provide specific instructions on part replacements and ensure you get the correct components for your model. They might also offer helpful guides or videos on the replacement process.
Considering the Costs: The cost of replacing parts will vary depending on the specific component and your scooter model. Generally, throttles tend to be the most affordable replacement part. For reference, you can find resources online that provide insights into average electric scooter repair costs . These resources can give you a rough idea of the potential expenses involved.
The Importance of Professional Help: If you’re unsure about diagnosing the problem, uncomfortable replacing parts yourself, or suspect a complex issue like a faulty controller or hall sensor, don’t hesitate to seek help from a qualified electric scooter mechanic. Their expertise can ensure your scooter is repaired correctly and safely, getting you back on the road in no time.
The next section will discuss when it’s best to call a professional for help with your E2 error.
When to Call a Professional:
The beauty of electric scooters lies in their relative simplicity. However, troubleshooting the E2 error can sometimes feel overwhelming. So, when should you consider seeking professional help?
Don’t Be a Hero: If you’re uncomfortable with any of the troubleshooting or repair steps mentioned earlier, it’s always best to err on the side of caution. A qualified electric scooter mechanic possesses the expertise and tools to diagnose the E2 error efficiently and accurately. They can also ensure any repairs are completed safely and effectively.
Exhausted All Options: You’ve meticulously followed the troubleshooting steps, meticulously checked connections, and even consulted a multimeter (if comfortable). Yet, the E2 error persists. This might indicate a more complex issue that requires the attention of a professional. Don’t waste time and frustration – let a mechanic diagnose the problem and get your scooter back in top shape.
Suspect a Controller or Hall Sensor Issue: While the troubleshooting section provided a brief overview of the hall sensor, diagnosing and replacing it can be intricate. Similarly, controller problems often necessitate a professional touch. If you suspect either of these components might be the culprit behind the E2 error, it’s best to leave the repairs to a qualified mechanic.
Peace of Mind: Sometimes, even if you’re comfortable with basic repairs, there’s value in the peace of mind that comes with professional service. A mechanic can not only fix the E2 error but also ensure your scooter is in overall good health, preventing future problems.
Ultimately, the decision of whether to tackle the E2 error yourself or seek professional help rests with you. However, by understanding your comfort level and the complexity of the potential fixes, you can make an informed choice that gets your scooter back up and running as quickly and safely as possible.
FAQs
A: Absolutely! Electric scooters are not designed for wet conditions. Water damage can disrupt electrical connections and potentially trigger the E2 error. If you suspect your scooter got wet, dry it thoroughly before attempting to turn it on. For future rides, avoid puddles and heavy rain whenever possible.
A: The timeframe for fixing an E2 error depends on the cause. If it’s a loose connection, it can be a matter of minutes. Replacing a throttle might take a comfortable DIYer 30-60 minutes, while complex repairs involving the controller or hall sensor could take a professional longer.
A: Many electric scooters have a designated error code system. If you encounter a code other than E2, consult your user manual for specific troubleshooting steps or error code meanings. The user manual might also direct you to the manufacturer’s website for additional resources.
A: Regular maintenance is crucial for keeping your electric scooter healthy and preventing errors like E2. Here are some quick tips:
Regularly inspect the throttle and wiring for signs of wear or damage.
Keep the connection points between the throttle and scooter clean and free of debris.
Avoid exposing your scooter to excessive moisture or extreme temperatures.
Refer to your user manual for recommended cleaning and maintenance intervals.
Conclusion:
An E2 error on your electric scooter can bring your ride to a screeching halt. However, by understanding what the error code signifies and following the troubleshooting steps outlined in this guide, you’re well-equipped to diagnose and potentially fix the issue yourself.
Whether it’s a simple loose connection or a faulty throttle requiring replacement, the solutions provided can get your scooter back up and running smoothly. Remember, if you’re ever unsure about any step or suspect a complex problem, don’t hesitate to seek help from a qualified electric scooter mechanic.
But the fight against the E2 error doesn’t end there! Regular maintenance is vital for keeping your electric scooter in top shape and preventing future errors. By following the recommended maintenance tips, you can ensure a smooth and enjoyable riding experience.
So, the next time you encounter the E2 error, take a deep breath, refer back to this guide, and conquer the challenge! With a little troubleshooting know-how and some routine maintenance, you can keep your electric scooter scooting for miles to come.
Ready to conquer the E2 error and keep your electric scooter rolling smoothly?
Here are some ways to put your newfound knowledge into action:
- Bookmark this guide! This way, you’ll have a handy reference whenever the E2 error rears its head.
- Share this guide with fellow electric scooter riders! Help them troubleshoot and fix the E2 error too.
- Leave a comment below! Did this guide help you fix your E2 error? Share your experience or ask any lingering questions.
Happy scooting!
External Sources:
Conquering the E2 error equips you to troubleshoot your electric scooter, but remember, prevention is key! Here are some helpful resources to keep your scooter running smoothly:
- Electric Scooter Maintenance Guide: – This comprehensive guide provides tips for maintaining various aspects of your electric scooter, promoting optimal performance and longevity.
- Using a Multimeter: Guide on using a multimeter – If you’re comfortable using a multimeter for troubleshooting, this guide will help you understand its functions and how to take electrical measurements.
- Average Electric Scooter Repair Costs: Guide to electric scooter repair costs. There are resources like industry reports or service center websites that might offer this information.) – This resource can give you a rough idea of the potential costs associated with various electric scooter repairs, including parts and labor.
- Manufacturer’s User Manuals and Repair Guides: Always refer to your specific electric scooter model’s user manual for the most accurate troubleshooting steps and maintenance recommendations. Many scooter brands also offer downloadable user manuals and repair guides on their websites.
Here are some additional tips for finding relevant resources:
- Search online using the brand name and model number of your electric scooter along with keywords like “user manual,” “repair guide,” or “maintenance tips.”
- Check the scooter brand’s official website for a support section or downloadable resources.
- Online electric scooter forums or communities can be a treasure trove of information and user experiences.
Kristina Grant is not just an enthusiast but a true authority on electric bikes. Nestled in the coastal beauty of Virginia, Kristina has found the perfect backdrop for her passion for electric biking. As a dedicated wife and homeschooling mom, her life revolves around family, faith, and the thrill of adventure.
Originally hailing from Ohio, Kristina's journey with electric bikes began as a curiosity and quickly evolved into a deep expertise. Her blog is a testament to her love for electric biking, combining her fascination for eco-friendly transportation with her coastal lifestyle.
When she's not cruising the beach on her electric bike, you'll find Kristina indulging in her other loves: long walks along the shore, getting lost in a good book, and cherishing moments with her loved ones. With a heart as big as her love for animals, especially cats, Kristina brings a unique perspective to the electric bike world, grounded in her strong faith in God and her dedication to a sustainable lifestyle.
Through her blog, Kristina shares her extensive knowledge of electric bikes, offering valuable insights, tips, and recommendations to fellow enthusiasts. Whether you're a seasoned rider or a newcomer to the electric bike scene, Kristina's blog is your go-to source for all things electric biking, fueled by her passion, expertise, and the scenic beauty of coastal Virginia.