E-Bike Display Turns On but Speedometer Shows Zero: Causes and Fixes
Last Updated on July 21, 2026 by Kristina
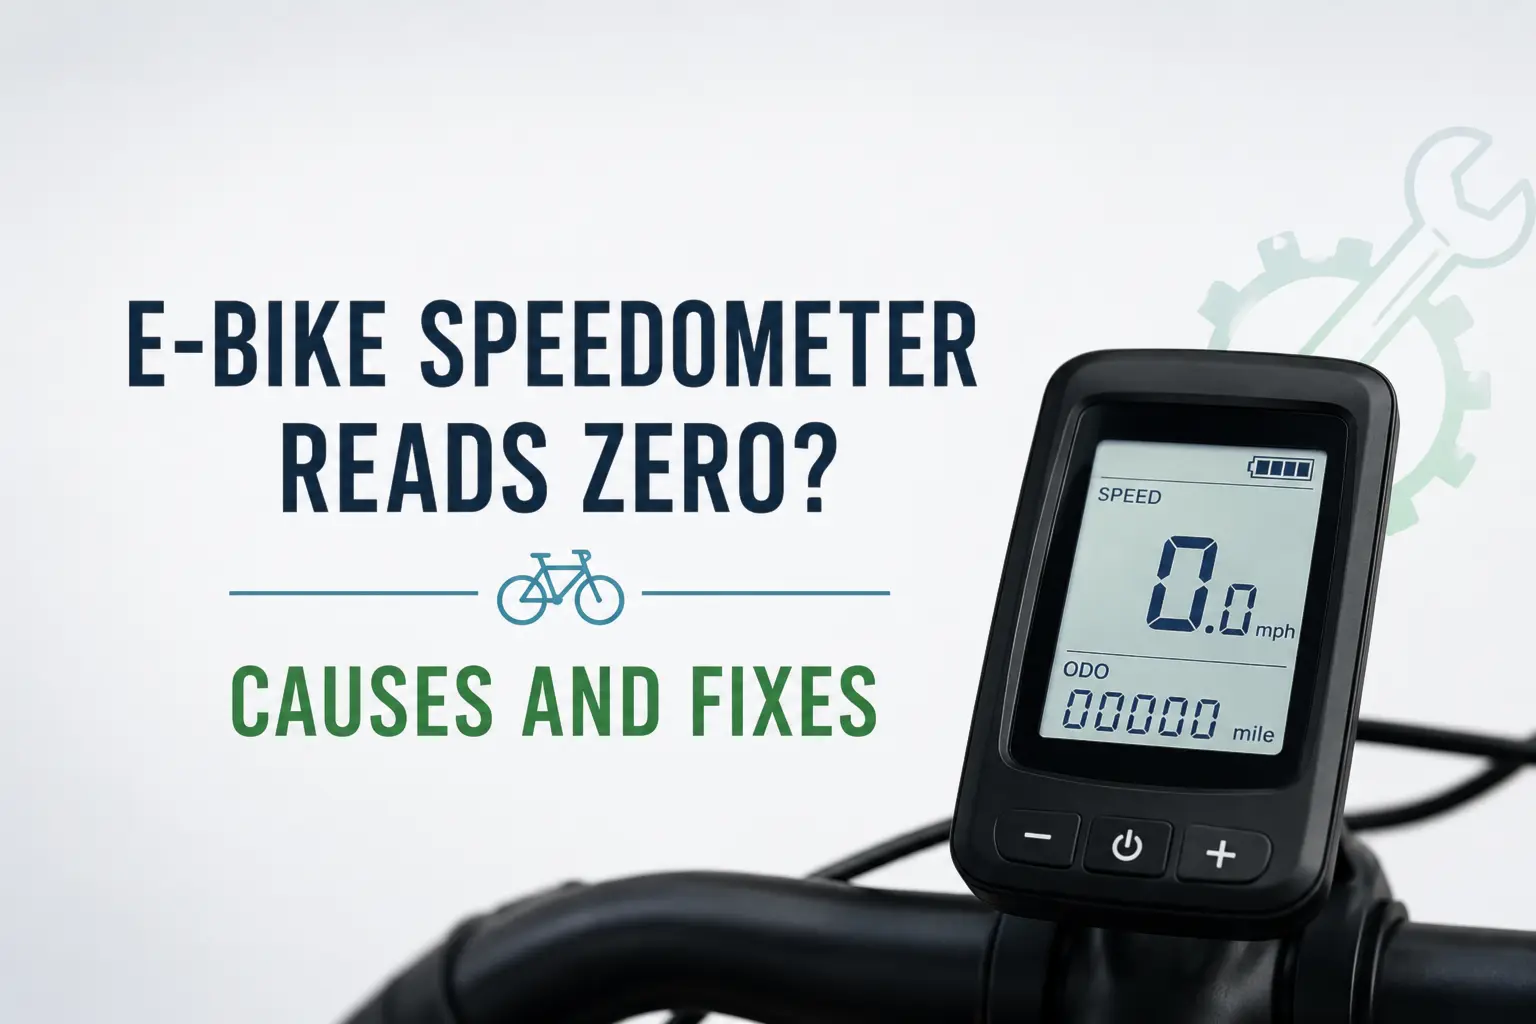
When an e-bike display turns on but the speedometer shows zero, the electrical system is receiving enough power to operate the screen, but it is usually not receiving a usable wheel-speed signal. Common reasons include a shifted or missing wheel magnet, a misaligned speed sensor, damaged wiring, or a connector disturbed during wheel or brake work.
I recommend starting with the simple rear-wheel checks before replacing the display, controller, sensor, or motor. For help with other electrical symptoms, visit my e-bike troubleshooting and maintenance guide. My e-bike motor guide also explains how the display, controller, motor, and sensors work together.
What a Zero Speed Reading Usually Means
A speedometer that remains at 0 mph usually means the display or controller is not receiving valid information about wheel rotation. On many e-bikes, a magnet attached to a rear-wheel spoke, brake rotor, rotor adapter, or lockring passes a speed sensor once per wheel revolution.
If the magnet moves out of position, falls off, passes too far from the sensor, or the sensor wiring becomes damaged, the bike may no longer calculate speed or distance correctly.
What happens to motor assistance depends on the drive system. Some systems reduce assistance or enter an emergency mode, while others stop motor assistance completely. Follow the error-code instructions for the exact motor and display model.
🔍 Why You Can Trust Electric Bike Explorer
Electric Bike Explorer is dedicated to providing honest, well-researched, and easy-to-understand information for e-bike riders. Whenever possible, I personally test the e-bikes, accessories, and products I review. When I can’t test something directly, I rely on careful research, manufacturer specifications, real-world rider feedback, official sources, and trusted industry information.
For law guides, I review state statutes, local ordinances, transportation agencies, park rules, and official government resources whenever possible. For e-bike news, I review the original reporting along with available town documents, meeting agendas, proposed ordinances, police statements, government notices, and other primary sources. I also make a clear distinction between a proposal, an approved rule, and a law that has already taken effect.
For troubleshooting and safety guides, I focus on practical explanations, common rider experiences, manufacturer guidance, and safe maintenance practices.
My goal is to help you make informed decisions, understand the rules where you ride, solve common e-bike problems, and get the most out of your electric bike safely.
Want to know how I score bikes and research my guides? Read my full review and ranking process
Want to See More Electric Bike Explorer in Google Search?
Add Electric Bike Explorer as a preferred source to see more of our e-bike law guides, safety updates, reviews, buying guides, and troubleshooting posts when they are relevant to your searches.
Symptoms and the Most Likely Causes
| What You Notice | Likely Cause | First Safe Check |
|---|---|---|
| Display stays at 0 mph and the odometer does not increase | No usable wheel-speed signal | Inspect the wheel magnet, speed sensor, and visible wiring. |
| Speed reads zero and motor assistance is restricted or unavailable | Missing speed signal or a related system fault | Record the error code and check the official manual. |
| Problem started after fixing a flat or removing the rear wheel | Magnet moved, sensor cable was pulled, or a connector was disturbed | Inspect the wheel, magnet, sensor, and cable routing. |
| Problem started after brake rotor service | Rotor magnet, magnet adapter, or magnetic lockring is missing or incorrectly installed | Compare the rotor assembly with the manufacturer’s diagram. |
| Speed flickers, jumps, or works only sometimes | Loose magnet, excessive sensor gap, wheel movement, or an intermittent connection | Check whether the magnet passes the sensor consistently. |
| Speed is consistently too high or too low | Incorrect wheel diameter or circumference setting | Compare the setting with the bike or display manual. |
| Speed stays at zero after replacing the display or controller | Incompatible component, incorrect configuration, or communication mismatch | Confirm the exact compatible part number with the manufacturer. |
| The problem appears after rain or washing | Moisture in a damaged connector, sensor, or cable | Power off the bike, let it dry naturally, and inspect for damage. |
Start with the check that best matches when and how the problem began.
Safety First
Turn the e-bike off before touching a sensor, magnet, cable, or electrical connector. Remove the battery only when it can be removed normally and the manufacturer’s instructions tell you to do so. Wait until the display and system have shut down completely before inspecting any user-accessible connector.
Do not continue riding if the motor surges, assistance cuts in unpredictably, the rear wheel or brake rotor is loose, or a wire is cut, crushed, or exposing conductors.
Stop using or charging the bike if you notice unusual heat, smoke, swelling, sparks, leaking, a strong chemical odor, or damaged battery wiring. The U.S. Consumer Product Safety Commission recommends checking the handlebars, brakes, throttle, bell, lights, tires, cables, and frame for damage before riding.
Quick Diagnostic Path
- The problem started after wheel or brake work: Check wheel seating, the magnet, sensor alignment, and cable routing first.
- You can see a spoke magnet and chainstay sensor: Compare their alignment and clearance with the manual for the exact sensor.
- There is no visible magnet or sensor: Identify whether speed is measured through the hub motor, drive unit, rotor, rim, or another integrated system.
- An error code is displayed: Use the official code definition for the exact motor, display, and model year.
- The reading remains at zero: Stop replacing parts by trial and error and request manufacturer or dealer diagnostics.
Why an E-Bike Display Turns On but the Speedometer Shows Zero
The connection that powers the display and the information used to calculate speed are not necessarily the same signal. A display can show the battery level, assist mode, lights, or trip menu while receiving no usable information about wheel rotation.
Depending on the bike, speed may be detected through:
- A spoke magnet passing a sensor mounted near the rear chainstay
- A magnet built into the brake rotor
- A magnet adapter installed with the brake rotor
- A magnetic CenterLock lockring
- A rim magnet or another drive-unit-specific magnet
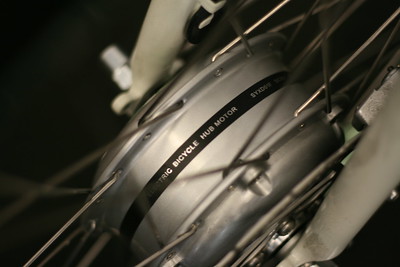
- A hub-motor or controller system that obtains speed information through the motor cable
Do not confuse the wheel-speed sensor with the pedal-assist sensor. A cadence or torque sensor measures pedaling activity at the crank or drive unit. A wheel-speed sensor measures how quickly the bicycle is moving.
What If There Is No Visible Speed Sensor or Magnet?
Do not assume that a part has fallen off. Some hub-motor systems obtain their speed information through the motor and main motor cable instead of a separate spoke magnet and chainstay sensor.
Write down the bike model, motor brand, motor model, display model, and any error code before troubleshooting further. Check the official manual to determine how that particular system measures speed.
You may inspect an external motor cable and connector for a loose connection or visible damage when the system is completely powered off. Do not open the hub motor, controller, or sealed drive unit.
🎥 Watch: How to Check an E-Bike Speed Sensor and Wheel Magnet
This short video from Fly Rides demonstrates how a misplaced wheel magnet can trigger a speed-sensor error, stop the display from showing your speed, or affect motor assistance. The sensor design and recommended gap vary by e-bike, so use the video as a visual example and confirm the correct positioning in your bike manufacturer’s manual.
Brand-Specific Speed Sensor Examples
Error codes, magnet clearances, and motor behavior vary between brands, drive-system generations, displays, and model years. These examples can help you recognize a possible speed-sensor fault, but the manual for your exact system remains the controlling source.
| System Example | What the Official Guidance Says | First Check |
|---|---|---|
| Shimano STEPS W011 | The traveling speed cannot be detected, and the maximum speed at which assistance is provided may decrease. | Check the speed-sensor position and confirm that the rotor or spoke magnet is present and correctly aligned. |
| Bosch BDU4xx standard or slim sensor | An incorrect gap or disconnected sensor can cause the speedometer to fail and the drive unit to operate in emergency mode. | Identify the exact sensor type. The cited Bosch manual lists a gap of 5–17 mm for its standard sensor and 2–8 mm for its slim sensor. |
| Bafang DP E162 or E163 code 21 | The recommended checks differ between hub- and mid-motor systems. Hub systems direct attention to the motor cable, while mid-motor systems direct attention to the spoke magnet and sensor cable. | Identify whether the bike has a hub motor or mid-drive before looking for a separate spoke magnet. |
| Giant RideControl F3 or I3 | The indicator identifies a speed-sensor issue. Giant states that assistance stops during most system events. | Switch off the system, visually inspect for an obvious cause, restart it, and stop riding if the fault persists. |
Brand examples are not interchangeable. Always use the manual for the exact drive system and sensor.
How to Fix an E-Bike Speedometer That Shows Zero
1. Write Down the Error Code and Other Symptoms
Before moving anything, photograph the display and record any error or warning code. Also note whether:
- The throttle still works
- Pedal assist still works
- The odometer adds distance
- The speed appears briefly when the wheel turns
- The problem began after a repair, crash, transport, or wet ride
- The display, controller, motor, or rear wheel was recently replaced
An error code can narrow the problem considerably. Shimano, for example, identifies W011 as a condition in which traveling speed cannot be detected. Its guidance lists an incorrectly positioned speed sensor and a missing brake-rotor magnet among the possible causes. Check the official Shimano error and warning code resource for the current code definition that applies to your system.
2. Power Down the Bike
Switch off the display and battery. Remove the key, and remove a user-removable battery only when the manufacturer instructs you to do so. Wait until the system has shut down completely.
Place the bike in a stable work stand or have another adult hold it securely. Do not work near an elevated drive wheel with the throttle, walk mode, or powered assistance active.
3. Check What Changed Immediately Before the Problem
A speedometer that suddenly reads zero after a flat-tire repair, brake service, wheel removal, transportation, or crash often points toward the area that was disturbed.
Check that the rear wheel is seated correctly and that the axle or thru-axle is secure according to the bicycle manufacturer’s instructions. Inspect the brake rotor for looseness before spinning the wheel.
Stop and use a qualified shop if the wheel, axle, rotor, brake caliper, or other safety-critical component is loose.
4. Find the Speed Sensor and Magnet
On a bike with a traditional external sensor, look near the rear chainstay and axle. The sensor is usually a small component with a wire leading toward the drive unit or controller. The matching magnet may be clamped to a spoke.
Some systems use a magnetic brake rotor, rotor adapter, or CenterLock lockring instead. Other systems obtain speed information through the hub motor and motor cable.
Do not add a spoke magnet merely because you cannot find one. Identify the motor and display model and check the correct manual first.
5. Check the Magnet’s Position and Gap
The magnet must pass the correct sensing area and remain within the clearance specified for that exact sensor. Make sure it has not rotated around the spoke, slid toward the rim or hub, turned away from the sensor, or fallen off.
Sensor measurements are not universal. Shimano specifies a 3-17 mm clearance for its EW-SS300 and SM-DUE01 generic speed sensors, with the center of the spoke magnet aligned with the tip of the triangle marking. Other Shimano sensor designs use rotors, adapters, or lockrings and have different installation requirements. See the official Shimano speed-sensor manual for the listed models.
The cited Bosch BDU4xx drive-unit manual lists a 5-17 mm clearance for its standard sensor and 2-8 mm for its slim sensor. Other Bosch systems and model years may differ, so use the Bosch drive-unit help center to find the correct documentation.
If a spoke magnet is only slightly out of position and the owner’s manual permits adjustment, loosen its fastener only enough to realign it. Tighten it to the torque specified for the exact magnet. Do not guess the torque or overtighten a small clamp against a spoke.
6. Perform a Careful Wheel-Spin Test
After confirming that the wheel, axle, brake rotor, magnet, and sensor are secure, make sure all tools, clothing, hair, and hands are clear of the wheel. Turn the bike on with motor assistance set to OFF.
Securely lift the wheel used for speed detection and rotate it forward by hand through several complete revolutions. Some displays need more than one revolution or a minimum wheel speed before the displayed number changes.
Do not use the throttle, walk mode, or powered assistance during this test.
- If speed appears consistently, magnet alignment or clearance was probably the problem.
- If speed appears only intermittently without touching the wiring, check for an excessive sensor gap, a loose magnet, wheel movement, or an intermittent connection.
- If the speed remains at zero, switch the system off before inspecting the cable and connectors.
7. Inspect the Sensor or Motor Cable
For an external speed sensor, follow the wire from the rear wheel toward the motor or controller. On a hub-motor system without a separate sensor, inspect the external motor cable where it exits the axle and follows the frame.
Look for:
- Cuts, abrasions, or exposed conductors
- A cable stretched tightly around the chainstay or axle
- A wire pinched by the wheel, axle, fender, rack, motor cover, or brake assembly
- A connector pulled partly apart
- Bent, pushed-back, or broken connector pins
- Corrosion, dirt, or water inside a damaged connector
- A cracked connector shell or damaged seal
- Missing cable clips that allow the wire to rub against the tire or rotor
Only disconnect a user-accessible connector when the owner’s manual allows it. The system must be completely powered off. Grip the connector bodies rather than pulling the wires, align any arrows or keyed sections, and push the connection together straight.
Do not twist or force a waterproof connector. My guide to finding loose electrical connections on an e-bike explains how to inspect accessible wiring without immediately replacing expensive components.
If the sensor cable enters the motor, frame, or controller housing without an accessible connector, stop at the visual inspection. Opening a sealed drive unit can damage its weather sealing and may affect warranty coverage.
8. Restart the System and Reseat Removable Components
A complete power cycle may clear a temporary communication fault. With the bike off, remove and reinstall a user-removable display or battery only according to the manufacturer’s instructions, then restart the system.
Some displays have a manufacturer-approved reset procedure. Record trip data and settings before resetting anything. Avoid entering hidden menus and changing several values at once because that can create a second problem while you are trying to diagnose the first one.
9. Check the Wheel-Size Setting
An incorrect wheel diameter or circumference normally causes a speed reading that is too high or too low rather than a reading that remains permanently at zero. It is still worth checking when the problem began after replacing a display, controller, wheel, tire, or motor.
Compare the setting with the value specified by the bike or display manufacturer. Do not deliberately enter a false wheel size to alter the assistance cutoff. That can make the displayed speed and distance inaccurate and may affect safety, warranty coverage, system fault detection, and the bike’s legal classification.
10. Check Replacement-Part Compatibility
A display that physically plugs into the wiring harness is not necessarily electronically compatible. Displays and controllers may use different operating voltages, communication protocols, connector pin arrangements, firmware, or speed-signal sources.
If the zero-speed problem appeared immediately after installing a new display or controller, reinstall the original part when it is safe to do so. Ask the bike or drive-system manufacturer to confirm the exact compatible model number before purchasing another component.
11. Use Manufacturer or Dealer Diagnostics
Brand-specific systems may store diagnostic information that is not visible on the display. An authorized dealer may be able to confirm whether the drive unit is receiving a speed-sensor signal, check firmware and configuration, and test the sensor without replacing several parts by trial and error.
The E-Bike Tools Hub can help you organize other symptoms and narrow down likely electrical or mechanical causes before contacting support.
Helpful Tools & Accessories for Troubleshooting Your E-Bike
Before replacing expensive parts, I recommend having a few basic tools on hand. They’re inexpensive, useful for routine maintenance, and can make diagnosing common e-bike problems much easier.
- Digital Multimeter – Helps check basic voltage at the battery or charger, but it does not prove the battery is healthy under load. Only use one if you know how to avoid shorting the terminals.
- Portable Bike Pump – Keeps your tires properly inflated, reducing strain on the motor when climbing hills.
- Digital Tire Pressure Gauge – Lets you verify your tire pressure for better efficiency and hill-climbing performance.
- Hex Key (Allen Wrench) Set – Useful for tightening loose components, battery mounts, and accessories.
- Bike Repair Multi-Tool – A compact tool for making quick adjustments at home or on the trail.
- Electrical Contact Cleaner – Helps clean battery terminals and electrical connectors if dirt or corrosion is causing poor contact.
- Dielectric Grease – Can help protect some connector seals from moisture, but use it sparingly and only where appropriate. Do not pack random electrical plugs or battery terminals with grease.
- Head Lamp or Small Flashlight – Helps you inspect battery contacts, wiring plugs, and connector pins more clearly.
- Zip Ties – Good for securing loose wires after you confirm everything is working correctly.
- Bike Repair Stand – Can hold your e-bike steady while you inspect the pedal sensor, wiring, and crank area.
➡️ View all recommended e-bike accessories
Still Stuck After Trying These Steps?
Some electrical issues aren’t obvious and can take time to track down – especially with controllers, wiring harnesses, or battery systems.
👉 Get help from a verified e-bike expert and pinpoint the issue faster
Before You Buy a New Display, Sensor, or Controller
Check these items first:
- The rear wheel and axle are installed securely
- The correct speed-sensing design has been identified
- The magnet is present, when the system uses one
- The magnet passes the correct part of the sensor
- The clearance matches the exact manufacturer manual
- The sensor or motor cable is not pinched, cut, stretched, or disconnected
- The exact error code has been recorded
- The wheel-size setting has not been changed
- Any recently installed display or controller is confirmed compatible
- The bike is not still covered by its original warranty
Replacing parts without completing these checks can leave the original problem unresolved and make diagnosis more difficult.
What Not to Do
- Do not attach extra magnets to trick the speed sensor or raise the assistance cutoff.
- Do not enter random display settings copied from an unrelated bike.
- Do not manipulate or move wiring while the powered wheel is turning.
- Do not probe powered connectors with a screwdriver, paper clip, or uninsulated meter lead.
- Do not cut and splice a sensor wire without the correct wiring information and appropriate repair experience.
- Do not replace the display merely because it turns on but shows zero speed.
- Do not open the battery pack, motor, controller, or sealed drive unit.
- Do not pressure-wash the sensor, motor, connectors, battery, or display.
- Do not ride with a loose wheel, axle, brake rotor, brake component, or damaged electrical cable.
When to Call a Bike Shop or Manufacturer
Stop owner-level troubleshooting and contact the bike manufacturer, drive-system provider, or a qualified e-bike technician when:
- The correct magnet position and clearance do not restore the speed reading
- The sensor, motor cable, or connector is visibly damaged
- The relevant connection is inside a sealed motor or controller housing
- A rotor magnet, magnetic lockring, or proprietary adapter is missing
- The problem began after a crash, deep-water exposure, or significant wheel damage
- The rear wheel, axle, brake rotor, caliper, or brake is loose
- The motor surges, cuts out repeatedly, or provides unpredictable assistance
- The display shows a persistent sensor, communication, controller, or drive-unit error
- The bike remains under warranty
- A replacement display or controller needs dealer pairing, configuration, or firmware
Send support a clear photo of the display, error code, rear-wheel sensor area, motor label, display model number, and visible connectors. Also explain what work was performed immediately before the problem began.
How to Prevent Another Zero-Speed Reading
- Photograph the sensor and magnet before removing the rear wheel.
- Inspect the magnet after repairing a flat or transporting the bike.
- Check sensor and motor cables during monthly maintenance.
- Keep wiring away from the tire, brake rotor, chain, axle, and moving suspension parts.
- Use only replacement sensors, magnets, rotors, displays, and controllers approved for the system.
- Keep the motor, display, controller, and sensor model numbers with the owner’s manual.
- Avoid pressure washing and let wet components dry naturally.
- Confirm wheel-size settings after replacing a display, controller, motor, wheel, or tire.
For a broader maintenance schedule, use the checklists in my complete e-bike troubleshooting and maintenance guide. You can also browse the Electric Bike Explorer resource library for guides covering batteries, motors, controls, safety, and everyday ownership.
FAQs
I would not rely on powered assistance until the cause is identified. A missing speed signal can make assistance restricted, unavailable, or unpredictable depending on the system.
If the bike is mechanically safe, some models may still be pedaled with the electrical assistance switched off. Follow the manufacturer’s instructions, and do not ride with a loose wheel, rotor, brake, axle, or damaged wire.
Some drive systems continue providing limited assistance or enter a reduced-function mode when the speed signal is missing. Other systems stop assistance completely. The behavior depends on the controller, drive unit, firmware, and applicable error response.
Rear-wheel removal can move a spoke magnet, alter the sensor gap, pull or pinch a sensor cable, or disturb a motor connector. A rotor-based magnet or adapter can also be left out or installed incorrectly during brake or wheel work.
A weak battery is not the first suspect when the display powers on normally and only the speed reading is missing. Battery or voltage problems commonly cause broader symptoms such as shutdowns, dimming, communication errors, or loss of several functions.
An incorrect wheel-size setting normally produces an inaccurate speed rather than a permanent zero. A zero reading more strongly suggests that no valid speed information is reaching the display or controller.
A speed that is consistently too high or too low may result from an incorrect wheel diameter or circumference setting. A loose magnet or excessive sensor gap is more likely to cause intermittent, jumping, or missing readings.
No. Some systems use a rotor magnet, magnet adapter, magnetic lockring, rim magnet, or a speed signal obtained through the hub motor and motor cable.
Not necessarily. A functioning display cannot calculate speed when the speed signal is missing. Check the magnet, sensor, motor cable, accessible connectors, recent wheel work, settings, and error codes before replacing the display.
My Take
When the display lights up but speed remains at zero, I would not buy a new display first. I would begin near the rear wheel or motor cable, especially when the problem started after a flat repair, wheel removal, brake work, transportation, or a rough ride.
A shifted spoke magnet is inexpensive and easy to overlook, but not every e-bike uses one. That is why identifying the exact speed-sensing design is more important than applying a generic magnet adjustment to every bike.
If the correct magnet, sensor, cable, and settings all check out, I would use manufacturer or dealer diagnostics rather than opening the motor or replacing components by trial and error.
Disclosure: As an Amazon Associate, I earn from qualifying purchases. This comes at no extra cost to you and helps support the content on this site.
📖 Read Next
E-Bike Troubleshooting & Maintenance Guide
E-Bike Battery Guide: Types, Charging, Range, Lifespan, and Care
Understanding eBike Voltage: 36V vs 48V vs 52V — Which Is Right for You?
Top 10 E-Bike Maintenance Mistakes That Damage Your Motor (and How to Avoid Them)
E-Bike Software Updates: Why They Matter & How to Get Them
How to Build Your Own Ebike From Scratch
Sources and Safety References
- Shimano E-Bike Systems Speed Sensor Dealer’s Manual – sensor types, model-specific magnet alignment, installation, and clearance information.
- Shimano Error and Warning Code Resource – current Shimano system error-code lookup.
- Shimano STEPS E6000 Dealer’s Manual – W011 speed-detection warning and recommended checks.
- Bosch BDU4xx Drive Unit Manual – standard and slim speed-sensor clearances, cable routing, and emergency-mode information.
- Bosch eBike Systems Drive Unit Help Center – model-specific support and manual access.
- Bafang DP E162 and DP E163 Display Manual – code 21 guidance for hub- and mid-motor systems.
- Bafang Error Code 21 Diagnostic Guide – speed-sensor connector, cable, magnet, and diagnostic checks for the covered configuration.
- Giant E-Bike User Manual – RideControl speed-sensor indicators and system-event troubleshooting.
- U.S. Consumer Product Safety Commission Micromobility Information Center – pre-ride inspections and lithium-ion safety guidance.

Kristina is not just an enthusiast but a true authority on electric bikes. Nestled in the coastal beauty of Virginia, Kristina has found the perfect backdrop for her passion for electric biking. As a dedicated wife and homeschooling mom, her life revolves around family, faith, and the thrill of adventure.
Originally hailing from Ohio, Kristina's journey with electric bikes began as a curiosity and quickly evolved into a deep expertise. Her blog is a testament to her love for electric biking, combining her fascination for eco-friendly transportation with her coastal lifestyle.
When she's not cruising the beach on her electric bike, you'll find Kristina indulging in her other loves: long walks along the shore, getting lost in a good book, and cherishing moments with her loved ones. With a heart as big as her love for animals, especially cats, Kristina brings a unique perspective to the electric bike world, grounded in her strong faith in God and her dedication to a sustainable lifestyle.
Through her blog, Kristina shares her extensive knowledge of electric bikes, offering valuable insights, tips, and recommendations to fellow enthusiasts. Whether you're a seasoned rider or a newcomer to the electric bike scene, Kristina's blog is your go-to source for all things electric biking, fueled by her passion, expertise, and the scenic beauty of coastal Virginia.