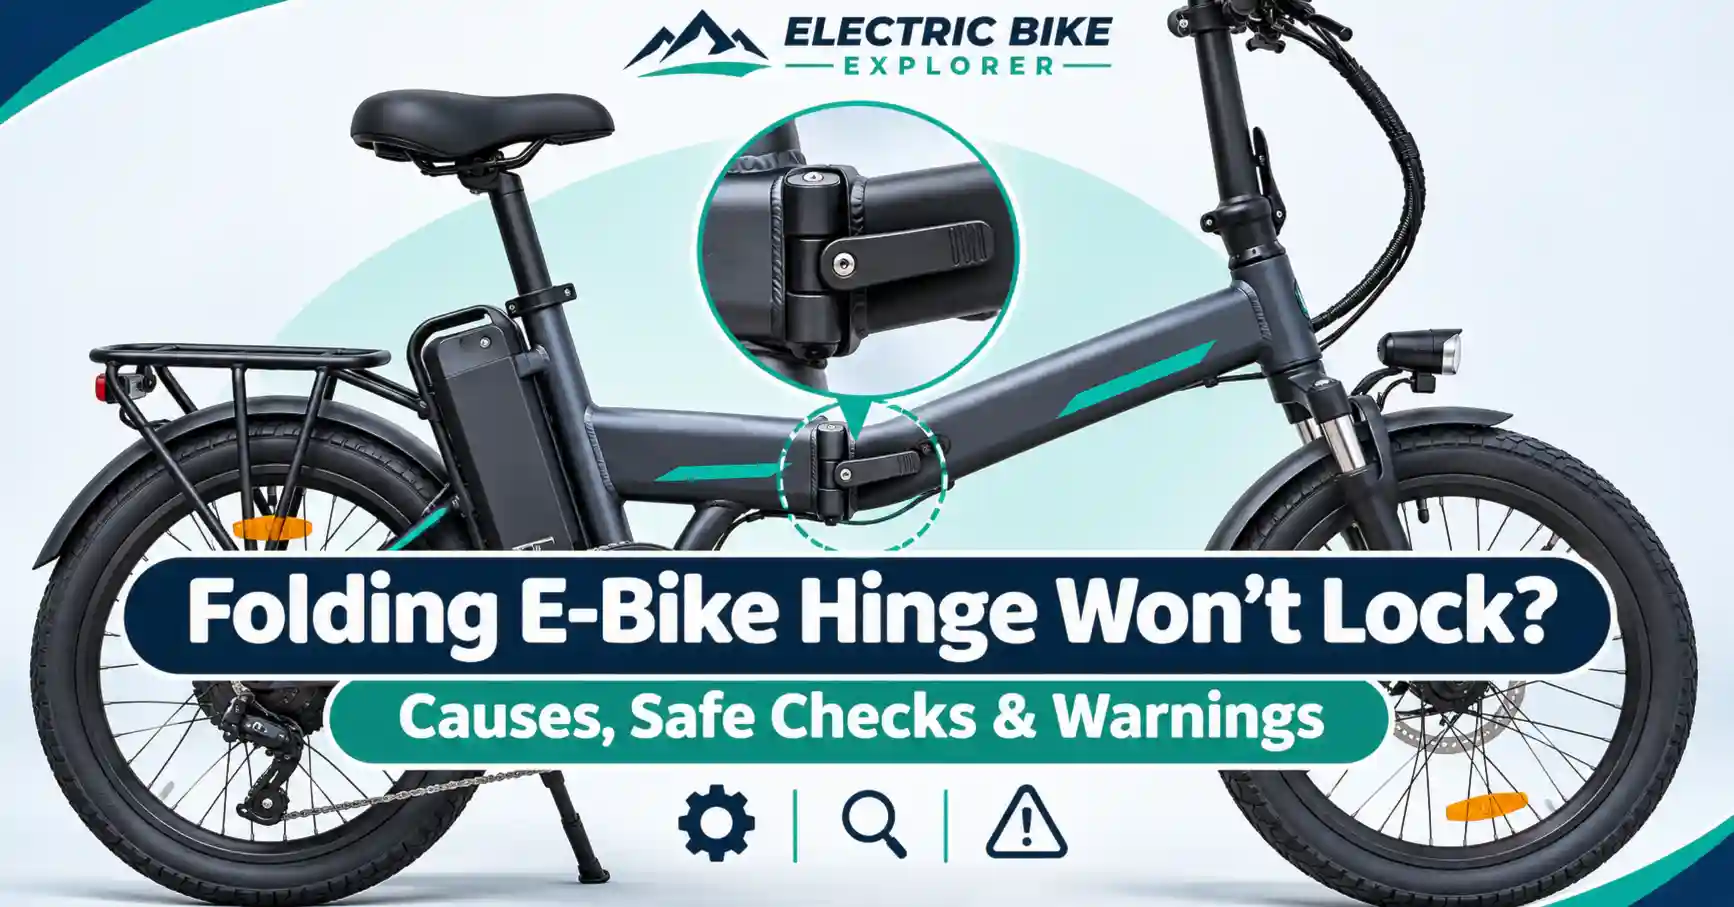
Folding E-Bike Hinge Won’t Lock or Feels Loose? Causes, Safe Checks, and When to Stop Riding
Last Updated on November 5, 2026 by Kristina

When a folding e-bike hinge will not close, the frame latch refuses to lock, or the handlebar folding joint suddenly feels loose, do not ride until you know the joint is properly secured. A simple obstruction or incorrect unfolding sequence may explain the problem, but worn hardware or a damaged locking mechanism can look similar at first.
I’ll walk through the safest checks you can make without forcing the latch or guessing at an adjustment. For general e-bike problems, see my E-Bike Troubleshooting and Maintenance Guide. If you’re researching folding-bike durability rather than dealing with a stuck latch, my guide to whether folding e-bikes break more often covers that question separately.
Quick Answer: Why Won’t My Folding E-Bike Hinge Lock?
The safest first step is to turn the bike off, stabilize it, and check the correct folding and unfolding sequence for your exact model. Sometimes a cable, accessory, dirt, or a partly engaged secondary catch prevents the joint from closing normally. Other times, a loose-feeling latch can point to wear, damaged parts, or a joint that needs manufacturer-specific service.
A frame folding hinge and a folding handlebar stem or handlepost are different components. Some e-bikes have both, and each can use a different latch and safety device. Do not assume the adjustment process shown for one bike applies to another.
Keep the e-bike turned off and parked while checking the problem.
- Won’t close: Check the correct unfolding sequence and look for visible debris or a trapped cable. Do not force the joint. If it still will not close, seek service.
- Lever closes but safety catch will not lock: Stop. The riding lock is not fully secured; ask the manufacturer or an approved technician for help.
- Feels loose or moves after locking: Do not ride. Have the frame or handlepost joint inspected for wear, incorrect adjustment, or damage.
- Looks cracked, bent, or incomplete: Stop immediately, photograph the damage, and arrange manufacturer or qualified-shop evaluation.
Important: These checks help decide the next safe action; they do not prove which component has failed.
Symptoms, Possible Causes, and What to Check First
| What you notice | What it may indicate | Safe next step |
|---|---|---|
| Latch will not close completely | Incorrect unfolding position, obstruction, misalignment, or latch damage | Stop; check the model’s unfolding instructions and look for visible interference |
| Latch closes but safety catch will not engage | Incomplete closure or safety-lock problem | Do not ride; compare its position with the manufacturer’s instructions |
| Frame hinge or handlepost feels loose | Joint wear, a locking problem, or loose or damaged hardware | Keep the bike parked; have unexplained movement inspected |
| Hinge has become unusually stiff | Dirt, corrosion, interference, or a mechanical problem | Check for obvious debris without forcing the mechanism |
| Clicking or creaking near the fold | Movement at a joint or another nearby part | Locate the sound while stationary; stop riding if joint security is uncertain |
| Visible crack, bent lever, missing pin, or damaged weld | Potential structural or locking-system failure | Stop riding and request professional or manufacturer inspection |
| Latch started acting differently after transport or a fall | Possible impact damage or shifted parts | Do not assume it is merely out of adjustment; arrange inspection |
This chart points to possible causes, not confirmed diagnoses. Several problems can produce the same symptom, and the exact hinge design matters.
Understand the Parts Before Troubleshooting
Folding e-bikes do not all use the same hardware. The following parts guide describes common positions and functions, not a universal assembly diagram:
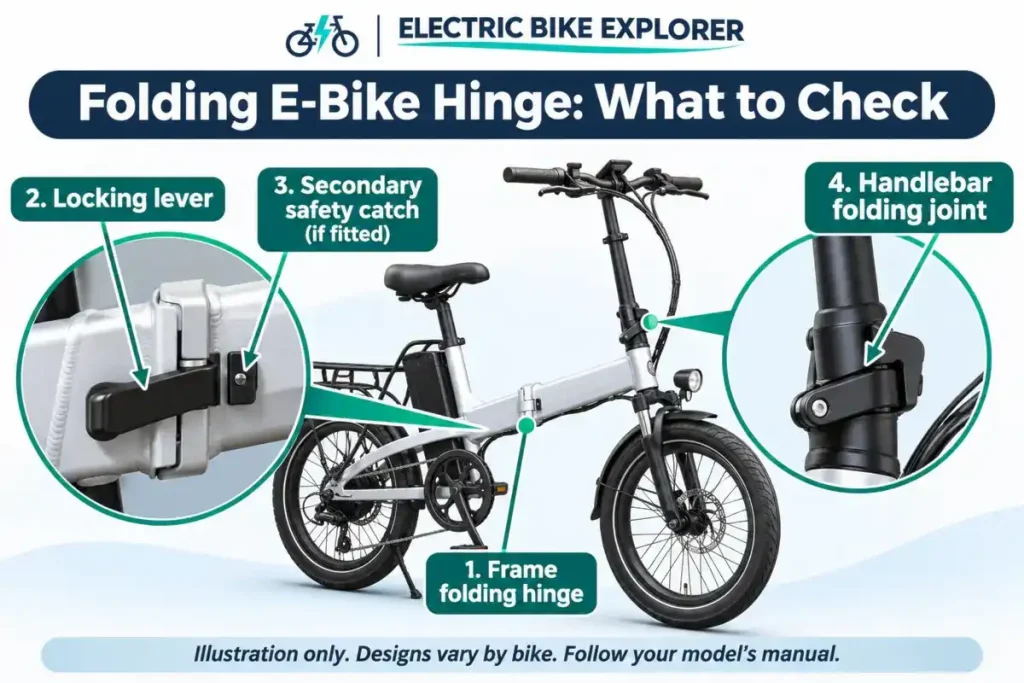
- Frame folding hinge: The joint that lets the main frame fold, usually near the center of a folding-frame e-bike.
- Locking lever or clamp: A component intended to secure that riding joint when unfolded. Its required position and closure feel vary by model.
- Secondary safety catch (when fitted): A separate knob, catch, pin, or interlock used by some designs to help prevent accidental lever release.
- Handlebar folding joint: A separate joint used on some folding handleposts or stems; it may have a different locking mechanism from the frame hinge.
Your e-bike may omit or arrange some of these parts differently. Use its manual or manufacturer-provided illustration to identify the actual mechanisms.
Watch: How Folding E-Bike Hinges and Locks Work
This demonstration from Tern Bicycles shows how its folding-frame and handlebar locking mechanisms operate. Hinge designs vary between brands, so use this video to understand the components, not as universal adjustment instructions. Always follow the manual for your particular e-bike.
How to Check a Folding E-Bike Hinge Safely
1. Turn the e-bike off and put it somewhere stable
Switch off the motor assistance and place the bike on firm, level ground where it cannot tip over. Keep your fingers out of the folding joint’s pinch points. If your owner’s manual calls for removing the battery during maintenance and it is safe to do so, follow those instructions. There is no need to open the battery or electrical system to inspect a folding latch.
2. Identify the exact joint and check the correct unfolding sequence
Find your bike’s model and applicable owner’s manual. Check whether the problem is at the center frame hinge, handlebar folding joint, telescoping handlepost lock, or another folding component. Look for a secondary security knob, catch, pin, or other interlock specified for your model.
For example, Tern’s folding-joint documentation shows several locking systems and emphasizes using the security mechanism in the prescribed sequence. Lectric describes a reinforced center-frame latch on its XP Lite3. These examples show why there is no single universal way to close or adjust every folding e-bike hinge.
3. Check for something blocking the hinge
With the joint in the position permitted by your owner’s manual, look for grit, a trapped cable, a bag strap, or an accessory interfering with closure. Use a flashlight to see the contact surfaces. Remove loose surface debris with a dry, soft brush or clean cloth, taking care not to push dirt deeper into the mechanism.
Do not pry the hinge apart, force a stiff lever, apply an unapproved product to an unfamiliar locking mechanism, or allow lubricant or cleaning products onto brake rotors and pads. Lubrication guidance differs by model: Brompton permits particular lubricants at specified hinge locations, but those instructions must not be copied onto another brand’s latch. Follow your maker’s care instructions.
4. Check that the locking parts look complete and undamaged
Look closely at any accessible lever, safety catch, retaining pin, clamp plate, and surrounding frame. Are the parts visibly intact? Is a lever bent? Are there cracks near the hinge or weld? Has a pin gone missing? Does a part appear unusually worn or distorted?
If you find visible damage, stop here. A cracked frame or broken safety catch is not an ordinary adjustment job. Contact the manufacturer or a qualified e-bike technician.
5. Verify full engagement using the owner’s manual
If there is no visible damage or obstruction, follow the manufacturer’s exact unfolding and locking directions. Make sure all required locking mechanisms reach their specified secured positions. A lever that looks shut is not necessarily fully locked; some joints have a separate safety feature.
Never treat a cable tie, strap, tape, extra bolt, or improvised pin as a substitute for the original locking system. If the latch still will not engage completely, do not ride.
6. Check for unexpected movement without riding
With the bike supported and the prescribed locks engaged, inspect for obvious looseness using only the non-forceful checks recommended by your manufacturer. Do not shake the frame aggressively, stand on pedals, apply the throttle, or load the joint to test its strength. Any new movement at a supposedly locked frame hinge or handlepost is reason to stop and seek service.
If the bike shakes while riding but the folding joints appear secure, there may be a different cause. My guide to e-bike shaking and vibration covers other possibilities. Do not assume a wheel or headset problem without checking the folding joints first.
7. Decide whether the bike needs professional attention
If the joint now closes correctly after following the approved unfolding sequence or removing a harmless obstruction, complete the manufacturer’s entire pre-ride inspection before considering use. If it remains stiff, loose, difficult to latch, or different from normal, have it inspected. When the issue followed an impact or involved structural damage, professional clearance is particularly important.
Can You Adjust a Loose Folding E-Bike Hinge Yourself?
Not without specific instructions for your exact bike and hinge system. Some manufacturers publish adjustment procedures, while others recommend authorized dealer service. Incorrect adjustment can create a hinge that appears closed but does not hold correctly, or can place damaging stress on the frame.
Tern, for example, explicitly warns that incorrectly adjusted folding joints can damage the frame or injure the rider and cautions against adjustment without the proper knowledge and tools. Its particular closure-force guidance applies to the listed Tern joint types, not every folding e-bike. Brompton describes wear of aluminum hinge-clamp plates on certain of its own folding-bike designs and explains when those plates need replacement. This is not a universal wear test. Neither instruction should be copied onto a different brand’s mechanism.
A video showing someone turning an adjustment nut on a different folding bike is not enough. Before any adjustment, verify the model, joint type, approved procedure, required tools, and any service or warranty restrictions. If any of that is unclear, use a qualified shop instead of guessing.
Why a Folding Hinge Might Feel Loose or Become Difficult to Close
Normal folding wear versus a safety problem
Hinges and clamps are moving mechanical parts, so manufacturers may specify periodic inspection and replacement of worn components. But new play at a locked folding joint should not be dismissed as normal break-in. A latch that has become easier to close, a joint that shifts, or a new gap at the mechanism deserves attention.
Dirt, moisture, and corrosion
Outdoor riding and storage may expose a folding joint to dirt and moisture. Visible grit can sometimes obstruct movement, but stiffness can also reflect corrosion or mechanical damage. Clean only as directed by the manufacturer; seek service if movement does not return to normal.
Damage after a fall or during transport
A folded bike can be bumped, trapped under luggage, or dropped while being loaded. If hinge operation changed after an incident, inspect for bent or damaged hardware and arrange service rather than trying to compensate with extra latch tension.
Confusing the frame hinge with the handlebar joint
On folding e-bikes with separate frame and handlepost joints, a clicking sound or movement may come from either location. Check both locking mechanisms according to the manual. A properly closed frame latch does not make an unsecured handlepost safe.
How to Recognize Hinge Clamp Wear
A latch or clamp can change with repeated folding, but appearance alone does not reveal whether it is safe. Look for a change from normal operation: a lever that suddenly closes much more easily, a clamp that does not hold securely, unusual movement at a locked joint, visible deformation, or components that no longer engage as intended. These warning signs justify inspection; none identifies the exact failed part by itself.
What Brompton’s hinge-clamp guidance actually means
On certain Brompton designs using aluminum hinge clamp plates, Brompton explains that the gap between the clamp plate and hinge can become smaller as the plate wears, eventually requiring clamp plate replacement. That gap is a Brompton-specific wear indicator, not a measurement you should apply to a Lectric, Tern, Mooncool, or other folding e-bike. Refer to the correct Brompton instructions and parts for the exact model. If a different brand has no published wear limit, do not invent one or try to restore the gap with extra tightening.
The correct next step for suspected wear is to contact the manufacturer or a technician familiar with that folding-joint design. A damaged frame or hinge body may not be repairable by replacing a clamp plate.
When to Stop Riding Immediately
- The frame hinge or handlebar folding latch does not fully lock.
- A safety catch, retaining pin, or other required locking component is damaged, missing, or not engaged.
- You can see a crack, bent structural part, damaged weld, or obvious deformation.
- The locked joint moves or has developed new play, even if the bike still seems rideable.
- The mechanism changed after a crash, fall, or significant impact and has not been inspected.
- You cannot determine whether the folding lock is actually secured.
Do not ride with any of these conditions. For a suspected structural or folding-lock failure, arrange safe transport rather than trying to ride the e-bike to a shop.
Riding Lock Versus Folded-Bike Retaining Strap or Magnet
These components can be easy to confuse, but they have different jobs. A riding lock is the manufacturer-specified frame or handlepost mechanism that must engage to secure the bike in its unfolded riding position. A folded-bike retainer – such as a strap, magnetic clip, hook, or storage clasp – may simply keep the already-folded bicycle compact during carrying or storage.
For example, Tern’s folding instructions describe a handlepost strap and Magnetix clip system used while the bicycle is folded. These are not substitutes for its riding-position folding-joint locks. Some bikes have neither kind of retainer or use a different arrangement. Follow your manual to identify what must be locked before riding and what only holds the bike while folded.
A bike can stay neatly folded for storage and still have a damaged or unsecured riding latch. Never rely on a luggage strap, magnet, zip tie, or other folded-bike accessory to make an open hinge safe to ride.
When to Contact the Manufacturer or an E-Bike Repair Shop
Contact the maker if you need the correct folding-joint instructions, replacement latch parts, compatibility details, or warranty guidance. Ask a qualified technician to inspect a hinge that remains loose or difficult to secure, particularly if it shows wear, damage, or signs of previous improper adjustment.
Tell the shop the brand and exact model, which joint is affected, whether its safety catch works, and whether the issue began after a fall, shipment, or routine folding. A clear photo of the closed joint can help the manufacturer understand the problem, but a photo alone cannot establish that the mechanism is safe.
Need hands-on repair help?
Find e-bike repair shops and mobile mechanics. Confirm that the shop works on your particular brand and folding-joint system before visiting.
Find E-Bike RepairWhat If Your Brand-New Folding E-Bike Arrived With a Hinge Problem?
- Do not ride, force the latch, or experiment with adjustment bolts. A newly delivered bicycle can still have damaged or misassembled parts.
- Check the exact assembly and unfolding instructions. Confirm you are following the specified sequence, including any secondary lock, without applying extra force.
- Document the condition. Take clear photos of the hinge, latch, shipping carton, visible damage, and model label; record the serial number privately for the manufacturer or seller.
- Contact the selling dealer or manufacturer promptly. Ask whether the hinge requires authorized assembly, inspection, replacement components, or a return.
- Get written instructions before attempting repair. Unauthorized modifications or incorrect adjustments may introduce safety risks and can affect warranty remedies depending on the terms and circumstances.
Don’t assume a new hinge is safe just because its lever can be made to close, and don’t discard packaging until you understand the seller’s return or damage-claim process.
Helpful Supplies for a First Inspection
- Small flashlight: Helps you examine the latch, safety catch, and hinge contact areas.
- Soft brush and microfiber cloth: Useful for clearing visible dry dirt without prying on parts.
- Your model’s owner’s manual: The most important reference for the correct folding sequence and allowed maintenance.
- Manufacturer-specified tools, if applicable: Only for adjustments explicitly approved in the model’s service instructions. Do not guess at torque or latch tension.
A folding hinge is a safety-critical part. There is no need to buy an expensive tool or replacement hinge before confirming the actual problem.
Hinge Repair or Replacement: What Makes Sense?
| What you find | Possible next step | Ride? |
|---|---|---|
| Visible grit or accessory interference, no apparent damage | Remove only accessible obstruction using manufacturer-approved care; recheck full locking sequence | Only after all locks engage correctly and the full pre-ride inspection passes |
| Latch is unusually loose, stiff, or will not securely engage | Manufacturer-specific inspection; approved adjustment only if expressly documented and within the owner’s skill and tools | No, until confirmed secure |
| Worn clamp, lever, pin, or other replaceable component | Ask manufacturer or authorized technician about the exact compatible replacement and procedure | No, until repaired and inspected |
| Cracked frame, distorted hinge body, damaged weld, or impact damage | Manufacturer or qualified structural evaluation; replacement of frame/bike may be necessary | No |
| New bike with uncertain hinge operation | Document, contact seller/manufacturer, verify assembly and warranty path | No, until resolved |
Not every hinge component is sold separately, and a replacement latch cannot necessarily make a damaged frame safe. Repair costs and available parts vary by brand and model.
How to Help Prevent Future Folding-Hinge Problems
- Check the frame and handlebar folding locks before every ride, especially after transporting or unfolding the bike.
- Follow the exact folding sequence and avoid letting cables or accessories become trapped.
- Keep the joint visibly clean and follow the manufacturer’s lubrication instructions, where applicable.
- Inspect more frequently if you fold the e-bike daily, transport it often, or ride in wet or gritty conditions.
- Follow the maker’s scheduled joint inspections and have worn parts serviced before they become unreliable.
- Do not exceed the bike’s approved loading limits or continue riding after a suspected structural impact.
For broader upkeep, see the E-Bike Maintenance Schedule Builder. It can help organize routine checks, but it does not test or certify the safety of a folding joint.
Folding E-Bike Hinge Troubleshooting FAQs
Can I ride if the hinge closes but the secondary lock will not engage?
No. If your bike requires a secondary lock or catch, it must be secured exactly as the manufacturer directs before riding.
Should a folding e-bike latch be easy or hard to close?
There is no universal closure-force rule. The correct feel depends on the exact design. If the lever suddenly feels different, refuses to latch, or seems loose, stop and check the manual or have the joint inspected.
Can I put grease or WD-40 on a stuck hinge?
Not without checking the exact manual. Brompton’s published guidance permits specific lubricants for its hinge design, but other manufacturers’ instructions may differ. Keep lubricants away from braking surfaces; if the hinge is seized or damaged, seek service instead of forcing it.
Does a clicking sound prove the hinge is bad?
No. Clicking can originate elsewhere on the bike. However, a new sound near a folding joint, especially with visible movement or a change in latch operation, needs inspection before continued riding.
Can I replace only the hinge latch instead of the whole frame?
Sometimes manufacturers offer replacement clamp, lever, or safety-lock components. Availability and repairability vary by model. Ask the manufacturer or an authorized technician to identify the correct parts and whether the repair is approved.
How often should I inspect a folding e-bike hinge?
Check that all folding joints are properly secured before each ride and follow the manufacturer’s maintenance and professional service schedule. Frequent folding, transport, rough conditions, and any change in operation may justify more frequent checks.
This guidance is based on published folding-joint and maintenance information from manufacturers, alongside established bicycle inspection and safety principles. I distinguish simple owner-visible checks from adjustments that require model-specific instructions or professional service. I have not performed a repair or test on every hinge design. You can read more about how Electric Bike Explorer researches technical guidance.
Want more practical e-bike troubleshooting information in Google? You can add Electric Bike Explorer as a Preferred Source in Google Search.
Disclosure: As an Amazon Associate, I earn from qualifying purchases. This comes at no extra cost to you and helps support the content on this site.
Manufacturer Guidance and Sources
- Tern Bicycles: Introducing Your Folding Joints – joint anatomy, locking operation, adjustment cautions, and service.
- Brompton: Folding Bike Maintenance Guide – Brompton-specific hinge care and aluminum clamp-plate wear.
- Lectric: XP Lite3 Official Product Information – example of a reinforced folding-frame latch; consult the current manual for all joint and safety-lock instructions.

Kristina is not just an enthusiast but a true authority on electric bikes. Nestled in the coastal beauty of Virginia, Kristina has found the perfect backdrop for her passion for electric biking. As a dedicated wife and homeschooling mom, her life revolves around family, faith, and the thrill of adventure.
Originally hailing from Ohio, Kristina's journey with electric bikes began as a curiosity and quickly evolved into a deep expertise. Her blog is a testament to her love for electric biking, combining her fascination for eco-friendly transportation with her coastal lifestyle.
When she's not cruising the beach on her electric bike, you'll find Kristina indulging in her other loves: long walks along the shore, getting lost in a good book, and cherishing moments with her loved ones. With a heart as big as her love for animals, especially cats, Kristina brings a unique perspective to the electric bike world, grounded in her strong faith in God and her dedication to a sustainable lifestyle.
Through her blog, Kristina shares her extensive knowledge of electric bikes, offering valuable insights, tips, and recommendations to fellow enthusiasts. Whether you're a seasoned rider or a newcomer to the electric bike scene, Kristina's blog is your go-to source for all things electric biking, fueled by her passion, expertise, and the scenic beauty of coastal Virginia.