Why Does My E-Bike Chain Skip When I Pedal Hard? Causes and Fixes
An e-bike chain that skips when you pedal hard usually points to wear in the chain or rear cogs, incorrect derailleur adjustment, a damaged chainring, or a slipping freehub or freewheel mechanism. The problem becomes more noticeable under hard pedaling because additional force makes it easier for worn or misaligned drivetrain parts to lose their grip.
Do not repeatedly apply full pedal pressure to test the problem. A sudden skip can throw your foot off the pedal, cause the chain to derail, or damage other drivetrain parts. Start with the low-risk checks below, and use my e-bike troubleshooting and maintenance guide if your bike has additional symptoms.
Motor type also matters. A mid-drive motor sends motor power through the chain and gears, while a hub motor drives the wheel separately. My hub versus mid-drive motor guide explains that difference in more detail.
Why Your E-Bike Chain Skips Under Hard Pedaling
One of the most common reasons an e-bike chain skips under hard pedaling is wear in the chain and rear cogs. The chain may still run smoothly during easy pedaling but climb over worn teeth when more force is applied.
If the skipping happens in only one or two gears, suspect worn cassette or freewheel cogs, incorrect derailleur indexing, or a slightly bent derailleur hanger. If a newly installed chain skips on an older cassette or freewheel, the rear cogs may be too worn to work correctly with the new chain.
If the pedals suddenly move forward but the chain does not visibly jump across the teeth, the problem may be inside the freehub, screw-on freewheel, or internally geared hub rather than the chain itself.
60-Second Chain-Skip Diagnosis
- Skips in one or two gears: Check for worn rear-cog teeth or incorrect derailleur indexing.
- Skips in most gears: Check chain wear, derailleur adjustment, cable condition, chain length, and hanger alignment.
- A new chain skips on the old rear cogs: The cassette or freewheel may also need replacement.
- The pedals move but the chain stays seated: Suspect a freehub, freewheel, or internal-hub engagement problem.
- Motor assistance disappears without a clunk: The problem may be an electrical cutoff rather than chain skipping.
- The chain moves toward the spokes or frame: Stop riding immediately and have the derailleur system inspected.
🔎 Why You Can Trust This Guide
This guide is based on manufacturer instructions, established safety guidance, technical references, and common rider experiences. You can learn more about how Electric Bike Explorer researches troubleshooting guides and other e-bike content.
Stop using or charging the bike if you notice smoke, swelling, unusual heat, damaged wiring, sparks, or a strong chemical odor.
Want to See More Electric Bike Explorer in Google Search?
Add Electric Bike Explorer as a preferred source to see more of our e-bike law guides, safety updates, reviews, buying guides, and troubleshooting posts when they are relevant to your searches.
Safety First
Stop riding if the chain jumps violently, drops toward the spokes, jams between the rear cogs and frame, or causes the pedals to suddenly lose engagement. Continuing to pedal hard can damage the derailleur, wheel, chain, rear cogs, or motor-area components.
Turn off the e-bike. Remove the battery if it is designed for routine removal, or follow the manufacturer’s shutdown and service procedure for an integrated battery. Make sure the electrical system cannot activate before placing your hands near the chain, chainring, derailleur, rear cogs, or wheel.
Never turn on the motor while your fingers, clothing, or tools are near the drivetrain. Have a qualified bike shop inspect the bike if you see a bent derailleur hanger, broken teeth, cracked chain links, a damaged derailleur, loose rear cogs, or signs that the chain has contacted the spokes
Tools to Gather Before You Start
You can perform the basic inspection with a small number of inexpensive tools:
- A clean rag
- A flashlight
- A bicycle chain-wear measuring tool
- A bike-safe drivetrain cleaner
- A lubricant made for bicycle chains
- A soft drivetrain brush
- A repair stand, if one is available
- The bike or drivetrain manufacturer’s manual
Derailleur-hanger alignment, cassette or freewheel removal, freehub service, and many internal-hub repairs require specialized tools. Those jobs are generally better handled by a qualified bicycle technician.
Helpful Tools for Checking a Skipping E-Bike Chain
You do not need a complete workshop to perform the basic checks in this guide. These tools can help you identify chain wear, clean the drivetrain, and handle a damaged connecting link:
- Chain-wear checker: Measures chain wear before it damages the cassette or freewheel.
- Bike-specific chain lubricant: Helps the chain move smoothly after cleaning. Choose a lubricant suited to your normal riding conditions.
- Drivetrain brush and cleaner: Removes dirt and old lubricant from the chain, rear cogs, chainring, and derailleur pulleys.
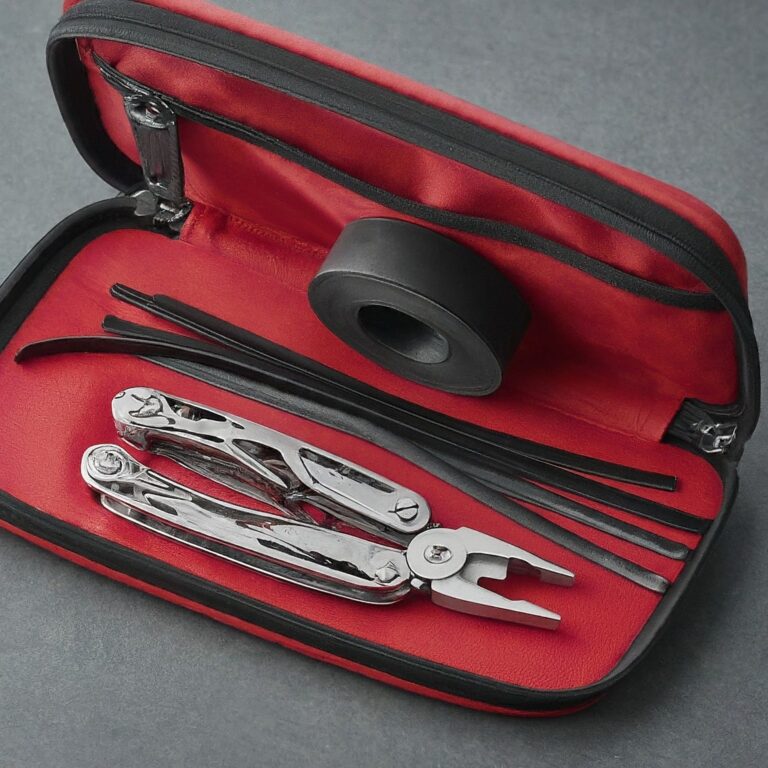
- Master-link pliers and a compatible spare quick link: Useful for removing or reconnecting chains that use a reusable or replacement connecting link. Match the link to the chain brand and number of speeds.
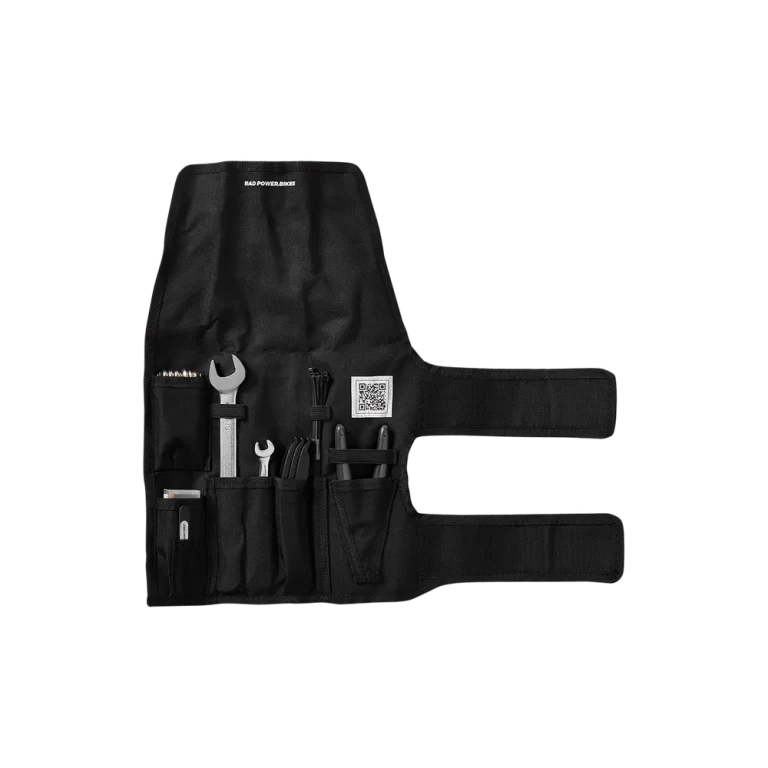
- Basic e-bike repair kit: A portable repair kit can help with common roadside problems, while diagnosing chain wear may require a separate chain-wear gauge, bike-specific lubricant, drivetrain brush, and cleaning supplies.
E-Bike Chain-Skipping Symptoms and Likely Causes
| What you notice | Most likely cause | First check |
|---|---|---|
| The chain skips in one or two rear gears | Worn cassette or freewheel cogs, or incorrect derailleur indexing | Note which gears are affected and inspect those teeth |
| The chain skips across several gears | Worn chain, bent derailleur hanger, cable problem, incorrect chain length, or poor adjustment | Measure chain wear and check derailleur alignment |
| A new chain skips on the old rear cogs | The cassette or freewheel has worn to match the old chain | Have the rear cogs inspected for replacement |
| The skip happens at the front chainring | Worn, bent, loose, or damaged chainring teeth | Inspect the chainring while slowly rotating the crank by hand |
| There is one clunk during each chain revolution | Stiff, damaged, or incorrectly connected chain link | Look for a link that does not bend smoothly |
| The chain falls toward the spokes or frame | Derailleur alignment, limit adjustment, or hanger damage | Stop riding and inspect the derailleur position |
| The pedals move but the chain stays on the same teeth | Freehub, freewheel, or internal-hub engagement problem | Stop riding and arrange professional service |
| Power cuts out without the chain physically jumping | Motor, sensor, battery connection, controller, or electrical issue | Determine whether the drivetrain actually moved |
Why Does My E-Bike Chain Skip When I Pedal Hard?
1. The Chain Is Worn
A bicycle chain does not normally stretch like a rubber band. Wear develops around its pins, rollers, and internal contact surfaces, gradually increasing the effective distance between links.
As the chain wears, it stops fitting the rear cogs and chainring teeth precisely. Light pedaling may feel normal, but hard pedaling can make the chain climb over a tooth and snap forward with a loud clunk.
A chain-wear measuring tool is the easiest way to check this. Measure the chain in several places and follow the replacement guidance supplied by the chain-checker and drivetrain manufacturer.
2. The Cassette or Freewheel Cogs Are Worn
The rear cogs may be part of a cassette fitted to a freehub body or part of a screw-on freewheel. Many lower-priced hub-drive e-bikes use screw-on freewheels, while other e-bikes use cassette systems.
Riders often spend most of their time in a few favorite gears, so those particular cogs can wear faster than the others. This is why an e-bike may skip in the same one or two gears while working normally everywhere else.
The affected teeth may look pointed, hooked, unusually thin, or uneven compared with neighboring cogs. However, some teeth are intentionally shaped differently to help the chain shift, so appearance alone does not always confirm wear.
A common clue is a new chain that begins skipping immediately on older rear cogs. The new chain has the correct spacing, but the cassette or freewheel teeth may have worn to match the previous chain. Replacing the worn rear-cog assembly is often necessary.
3. The Rear Derailleur Is Slightly Out of Adjustment
The rear derailleur must position the chain directly beneath each selected cog. A small indexing error can leave the chain running close to the next gear instead of centered on the selected one.
The bike may shift acceptably in a repair stand but skip when rider and motor torque are applied. Cable settling, housing wear, a bent derailleur hanger, incorrect chain gap, or movement after rear-wheel removal can all affect alignment.
Listen for clicking, rasping, or hesitation before the skip. Those sounds often indicate that the chain is not centered on the cog.
4. The Derailleur Hanger Is Bent
The derailleur hanger is designed to help protect the frame and derailleur during an impact. Even a minor fall, shipping incident, rack accident, or collision with a curb can bend it.
A bent hanger often causes inconsistent shifting. The smallest gears may work correctly while the largest gears skip, or the opposite may happen.
A visual inspection can reveal severe misalignment, but accurate hanger alignment requires a dedicated measuring tool and is usually best handled by a bike shop.
5. The Chain Is Dirty, Dry, or Has a Stiff Link
Dirt and dried lubricant increase friction and may prevent the chain from articulating smoothly. A stiff link may not wrap correctly around the rear cogs or derailleur pulleys, causing a repeated clunk at the same point in each chain revolution.
Clean the chain with a bike-safe drivetrain cleaner, allow it to dry, apply an appropriate bicycle chain lubricant, and wipe off the excess. Lubricant should remain inside the chain joints rather than coating the outside with a dirt-attracting layer.
Keep cleaners and lubricants away from brake rotors and brake pads. Contaminated brake components may lose braking performance and can require replacement.
6. The Chainring Is Worn, Loose, or Damaged
The front chainring can also cause skipping. Look for bent teeth, broken teeth, unusual hooks, side-to-side wobble, looseness, or teeth that appear much thinner than the others.
On a single-chainring drivetrain, alternating tooth shapes may be part of the intended narrow-wide design. Compare suspicious teeth carefully rather than assuming every difference indicates damage.
A loose chainring, loose crank, or damaged motor-area chainring mount can also create movement under load. Stop riding if the chainring visibly shifts from side to side.
7. The Replacement Chain Is Incorrectly Sized or Incompatible
A replacement chain must match the drivetrain’s number of speeds and may have a required direction or installation orientation. The connecting pin or quick link must also be compatible with that chain.
A chain that is too long can reduce derailleur tension. A chain that is too short can overload the derailleur and drivetrain in the largest gear combination. Incorrect chain length, incorrect chain gap, or a mismatched chain can lead to poor engagement and skipping.
Use the sizing method and compatibility guidance specified by the chain and drivetrain manufacturer rather than simply matching the length of a possibly incorrect existing chain.
8. You Are Shifting Under Heavy Motor and Pedal Torque
Shifting while pressing hard on the pedals places a large load on the chain as it moves between cogs. This is especially noticeable on a mid-drive e-bike because motor torque also passes through the chain.
A mid-drive combines the rider’s force with the motor’s force before sending both through the chain, rear cogs, and chainring. That added drivetrain load can make worn parts skip more aggressively and may accelerate wear when the rider frequently climbs in a hard gear or changes gears under full assistance.
Unless the drivetrain manufacturer specifically states that the system is designed to shift under load, briefly ease pedal pressure while changing gears. Some newer electronic and integrated e-bike drivetrains manage motor support during shifts or use drivetrains designed for loaded shifting, so follow the instructions for your exact system.
For a conventional drivetrain, shift into an easier gear before reaching a steep hill. Allow the chain to settle fully onto the new cog before increasing pedal pressure again.
Using a lower gear and a smooth pedaling cadence is generally easier on the drivetrain than climbing slowly in a very hard gear.
9. The Rear Wheel, Cassette, Freewheel, or Axle Is Loose
A rear wheel that is not seated correctly can change the derailleur’s alignment with the rear cogs. A loose axle or movement in the rear-cog assembly can also become more noticeable under load.
On a cassette system, a loose cassette lockring may allow the cogs to move. A screw-on freewheel does not use a cassette lockring, so a technician must diagnose looseness according to the specific freewheel and hub design.
Check that the wheel is seated correctly and that the axle is secured according to the bike manufacturer’s instructions. Cassette or freewheel removal and tightening normally require system-specific tools, so have a shop inspect the bike if you notice looseness.
10. The Freehub, Freewheel, or Internal Gear Hub Is Slipping
If the cranks and chain move but the rear wheel intermittently fails to drive, the problem may be in the drivetrain’s internal engagement mechanism.
On a cassette system, the ratcheting mechanism is normally inside the freehub. On a screw-on freewheel system, it is inside the freewheel. An internally geared hub has its own internal engagement and shifting components.
Worn, dirty, damaged, or poorly engaging internal parts can allow the pedals to move forward without reliably driving the wheel. This can feel like chain skipping even when the chain remains correctly seated on the same teeth.
Stop riding if the pedals repeatedly lose engagement. Freehub, freewheel, and internal-hub repairs require specialized tools and should generally be handled by a qualified technician.
11. An Electrical Cutout Feels Like a Mechanical Skip
Sometimes the chain is not skipping at all. A brake cutoff sensor, battery connection, pedal-assist sensor, controller, or motor problem can briefly interrupt assistance when the bike is under load.
Watch and listen carefully. A mechanical chain skip usually includes a sharp clunk and visible chain movement. An electrical cutout feels more like the motor assistance suddenly disappears while the pedals and chain continue moving normally.
If the bike displays an error code or the electrical assistance repeatedly cuts out, consult the manufacturer’s manual or have the electrical system inspected rather than adjusting the derailleur.
🎬 Watch this short Park Tool video for a visual guide to derailleur problems, worn drivetrain parts, and other causes of chain skipping.
What Worn or Misaligned Parts Look Like
| Part | Normal appearance or behavior | Possible problem signs |
|---|---|---|
| Chain | Every link bends smoothly and the rollers appear evenly positioned | A stiff link, cracked side plate, rust, bent plate, loose connector, or measurable wear |
| Cassette or freewheel cog | Teeth have a consistent profile appropriate for that cog | Hooked, pointed, unusually thin, missing, or visibly uneven teeth |
| Chainring | Runs evenly without obvious side-to-side movement | Bent or broken teeth, severe hooking, looseness, or visible wobble |
| Rear derailleur | The pulley cage appears aligned beneath the selected cog | The derailleur leans inward or outward, shifts inconsistently, or approaches the spokes |
| Freehub or freewheel | The drivetrain engages promptly when forward pedal pressure is applied | The pedals move forward before the wheel engages, or engagement fails under load |
Some cassette, freewheel, and chainring teeth are intentionally shaped differently to improve shifting or chain retention. Compare suspicious teeth with neighboring components and consult the manufacturer’s documentation before concluding that a tooth is damaged.
How to Fix an E-Bike Chain That Skips Under Load
Step 1: Identify Where the Skip Happens
- Turn the motor assistance off.
- Choose a flat, traffic-free area.
- Use light pedal pressure and shift through the gears one at a time.
- Note whether the problem occurs in one gear, several gears, every gear, or only at the front chainring.
- Pay attention to whether the chain physically moves or the pedals simply lose engagement.
- Stop immediately if the chain approaches the spokes or frame.
Do not repeatedly reproduce the problem with maximum assist or full body weight on the pedals.
Step 2: Inspect the Chain
- Turn off the e-bike and make sure the electrical system cannot activate.
- Remove a routinely removable battery when the manufacturer’s instructions allow it.
- Inspect the chain for bent plates, cracks, rust, damaged rollers, or an incorrectly installed connecting link.
- Slowly rotate the crank by hand and watch every link pass through the derailleur.
- Look for a link that stays bent instead of moving freely.
- Measure chain wear in several locations with a compatible chain checker.
Replace a damaged or excessively worn chain before riding again. A chain that breaks under load can contribute to a crash or damage other drivetrain components.
Step 3: Clean and Lubricate the Drivetrain
- Remove surface dirt with a brush and clean rag.
- Use a bicycle drivetrain cleaner when necessary.
- Allow the chain to dry.
- Apply bicycle chain lubricant according to its instructions.
- Rotate the chain to distribute the lubricant.
- Wipe excess lubricant from the outside of the chain.
Cleaning and lubrication can help a stiff or contaminated chain move more smoothly, but lubricant cannot repair a worn chain, rear cogs, or chainring.
Step 4: Check Rear-Derailleur Indexing
With the motor turned off, shift through the rear gears one click at a time. Each shifter click should move the chain cleanly to one neighboring cog.
On many cable-operated rear derailleurs, hesitation when moving toward larger cogs may require a small increase in cable tension. Hesitation toward smaller cogs may require slightly less tension. Make adjustments in small increments and test after each change.
Electronic drivetrains and some integrated e-bike shifting systems use different adjustment procedures. Follow the manufacturer’s instructions for those systems.
Do not turn the high- or low-limit screws as a general skipping fix. Those screws control how far the derailleur can travel, and an incorrect adjustment can send the chain into the spokes or frame.
Step 5: Inspect the Rear Cogs and Chainring
Compare the teeth across the different rear cogs. Look for severe hooking, missing teeth, unusual thinning, burrs, or one cog that appears noticeably more worn than the others.
Inspect the front chainring for damage and check whether it moves from side to side when the crank is rotated. A shop can confirm whether the chain, rear-cog assembly, chainring, or several parts need replacement.
Step 6: Check Wheel and Derailleur Position
Make sure the rear wheel is seated evenly in the frame and that the axle is secured correctly. View the derailleur from behind. Its pulley cage should appear aligned with the selected rear cog rather than leaning noticeably to one side.
A visual check cannot confirm that a hanger is perfectly straight. If shifting remains inconsistent across the rear cogs, have the hanger measured with an alignment tool.
Step 7: Test the Bike Gently
After completing the basic checks, reinstall the battery when applicable and test the bike in a safe area using the lowest practical assist level. Use smooth pedal pressure and avoid shifting during maximum effort unless the manufacturer specifically states that the drivetrain is designed for it.
If the chain still skips, stop testing. Continued hard pedaling can turn a relatively simple chain or rear-cog replacement into a damaged derailleur, chainring, wheel, hub, or motor-area repair.
After-Repair Test Checklist
Use this sequence after cleaning, adjusting, or replacing a drivetrain part:
- Confirm that all tools and cleaning materials have been removed from the bike.
- Verify that the wheel and axle are correctly installed and secured.
- Test the drivetrain with the motor turned off.
- Shift through every gear using light pedal pressure.
- Confirm that the chain remains centered on each selected cog.
- Listen for clicking, rubbing, grinding, or delayed shifts.
- Test again using the lowest motor-assist level.
- Gradually increase pedal pressure without shifting under heavy load.
- Stop if the chain approaches the spokes, jumps again, or the pedals lose engagement.
Do not begin the first test on a steep hill, in traffic, or at maximum assistance. A flat, open area gives you more time to stop if the repair did not solve the problem.
What Not to Do
- Do not keep stomping on the pedals to see whether the problem gets worse.
- Do not repeatedly shift under full motor torque unless the exact drivetrain is designed for loaded shifting.
- Do not turn derailleur limit screws unless you understand their purpose.
- Do not shorten a chain without using the correct sizing method.
- Do not assume a new chain will work with heavily worn rear cogs.
- Do not use a general-purpose cleaner as the chain’s final lubricant.
- Do not spray lubricant near disc-brake rotors or brake pads.
- Do not dismantle a motor, freehub, freewheel, or internally geared hub without the correct service information and tools.
- Do not ride with a chain that has damaged plates, a cracked link, or an incorrectly installed connector.
When to Take the E-Bike to a Shop
Arrange professional service when:
- The pedals lose engagement while the chain remains seated.
- The chain skips after a new chain was installed.
- The derailleur hanger appears bent.
- The chain has fallen between the rear cogs and spokes.
- The cassette, freewheel, chainring, crank, or rear wheel feels loose.
- The chainring or rear cogs have broken or badly hooked teeth.
- The drivetrain skips in several gears after basic indexing adjustments.
- The bike uses an internally geared hub that slips under load.
- You hear grinding, cracking, or knocking from inside a mid-drive motor area.
- You are unsure whether the problem is mechanical or electrical.
Tell the technician which gears are affected, whether the chain was recently replaced, when the problem began, whether the bike uses a cassette or screw-on freewheel, and whether the symptom changes with assist level. Those details can shorten the diagnostic process.
How to Prevent E-Bike Chain Skipping
- Measure chain wear regularly rather than waiting for the drivetrain to skip.
- Check the chain more frequently on high-torque mid-drive e-bikes.
- Clean and lubricate the chain after wet, muddy, sandy, or dusty rides.
- Shift into an easier gear before beginning a steep climb.
- Reduce pedal pressure briefly while shifting unless the drivetrain is specifically designed for loaded shifting.
- Avoid spending every ride in the same one or two rear cogs.
- Make sure the rear axle is correctly secured after wheel removal.
- Have derailleur alignment checked after a fall or impact.
- Use a chain that matches the rear cogs and drivetrain manufacturer’s requirements.
- Address clicking or hesitation before it develops into severe skipping.
For help narrowing down other symptoms, visit the free e-bike tools and diagnostic resources.
Frequently Asked Questions
Can a loose chain cause an e-bike to skip?
It can, but derailleur-equipped bikes do not normally use a simple manual chain-tension adjustment. Excessive looseness may result from an incorrectly sized chain, weak derailleur tension, incorrect drivetrain setup, or damaged parts. Single-speed and internally geared e-bikes may use a different tensioning system.
Why does my new chain skip on the old cassette or freewheel?
The rear cogs may have worn to match the previous chain. A new chain has the correct link spacing and may not seat securely on worn teeth. In that situation, replacing the cassette or freewheel may be necessary.
Can high motor power make a chain skip?
High torque can expose existing wear or misalignment and can make a skip feel more severe. A correctly installed, compatible, and properly maintained drivetrain should not repeatedly skip during normal use.
Mid-drive motors place motor torque through the chain, making proper shifting technique and regular wear checks especially important. Hub motors do not send motor power through the chain, although rider pressure can still expose mechanical wear.
Will adjusting the derailleur fix chain skipping?
It may fix skipping caused by incorrect indexing or alignment. It will not repair a worn chain, worn rear cogs, damaged chainring, slipping freehub or freewheel, or bent derailleur hanger.
If the problem is limited to one heavily used cog, wear may be more likely than a simple cable adjustment.
Should I replace the chain and rear cogs together?
Not automatically. Replacing the chain before it becomes excessively worn may allow the cassette or freewheel to remain in service.
If a new chain skips on the existing rear cogs, the cassette or freewheel probably needs replacement. The chainring should also be inspected when wear is severe.
How do I know whether my e-bike has a cassette or freewheel?
A cassette slides onto a splined freehub body and is normally secured with a lockring. A screw-on freewheel contains both the rear cogs and ratcheting mechanism in one assembly that threads onto the hub.
The difference is not always obvious without removing parts. Check the bike’s specifications or ask a shop before ordering replacement components.
Is it safe to ride an e-bike with a skipping chain?
No repeated skip should be ignored. The sudden loss of pedal resistance can affect balance, particularly while standing, climbing, crossing traffic, or accelerating.
Stop riding if the skip is forceful, unpredictable, or accompanied by a loose part, damaged link, derailment, chain movement toward the spokes, or loss of freehub, freewheel, or hub engagement.
What to Do Next
If your e-bike chain skips in only one or two gears, start by checking chain wear, rear-cog wear, and derailleur indexing. If a new chain skips on older cogs, the cassette or freewheel may also need replacement.
Stop riding and arrange professional service if the pedals lose engagement while the chain remains seated, the chain moves toward the spokes, or any drivetrain component feels loose. The safest repair is the one based on the actual cause, not repeated adjustments or hard test rides.
Disclosure: As an Amazon Associate, I earn from qualifying purchases. This comes at no extra cost to you and helps support the content on this site.
Sources and Technical References
- Park Tool – Rear Derailleur Advanced Troubleshooting: Covers gear-specific skipping, worn sprockets, derailleur alignment, hanger problems, and related shifting symptoms.
- Park Tool – Chain Installation for Derailleur Bikes: Explains chain compatibility, sizing, installation, and problems that may appear when a new chain is used with worn drivetrain parts.
- Shimano – General Operations Dealer Manual: Provides manufacturer guidance on chain damage, compatible connecting components, chain direction, cleaning, maintenance, and professional service.

Kristina is not just an enthusiast but a true authority on electric bikes. Nestled in the coastal beauty of Virginia, Kristina has found the perfect backdrop for her passion for electric biking. As a dedicated wife and homeschooling mom, her life revolves around family, faith, and the thrill of adventure.
Originally hailing from Ohio, Kristina's journey with electric bikes began as a curiosity and quickly evolved into a deep expertise. Her blog is a testament to her love for electric biking, combining her fascination for eco-friendly transportation with her coastal lifestyle.
When she's not cruising the beach on her electric bike, you'll find Kristina indulging in her other loves: long walks along the shore, getting lost in a good book, and cherishing moments with her loved ones. With a heart as big as her love for animals, especially cats, Kristina brings a unique perspective to the electric bike world, grounded in her strong faith in God and her dedication to a sustainable lifestyle.
Through her blog, Kristina shares her extensive knowledge of electric bikes, offering valuable insights, tips, and recommendations to fellow enthusiasts. Whether you're a seasoned rider or a newcomer to the electric bike scene, Kristina's blog is your go-to source for all things electric biking, fueled by her passion, expertise, and the scenic beauty of coastal Virginia.