How to Find Loose Electrical Connections on an E-Bike (Step-by-Step Guide)
Last Updated on June 30, 2026 by Kristina
Electrical problems can be some of the most frustrating issues an e-bike owner faces. Your bike might randomly lose power, refuse to turn on, cut out while riding, or display error codes that seem to disappear as quickly as they appear. When that happens, it’s easy to assume you’ve got a failing battery, controller, or motor, but in many cases, the real problem is much simpler.
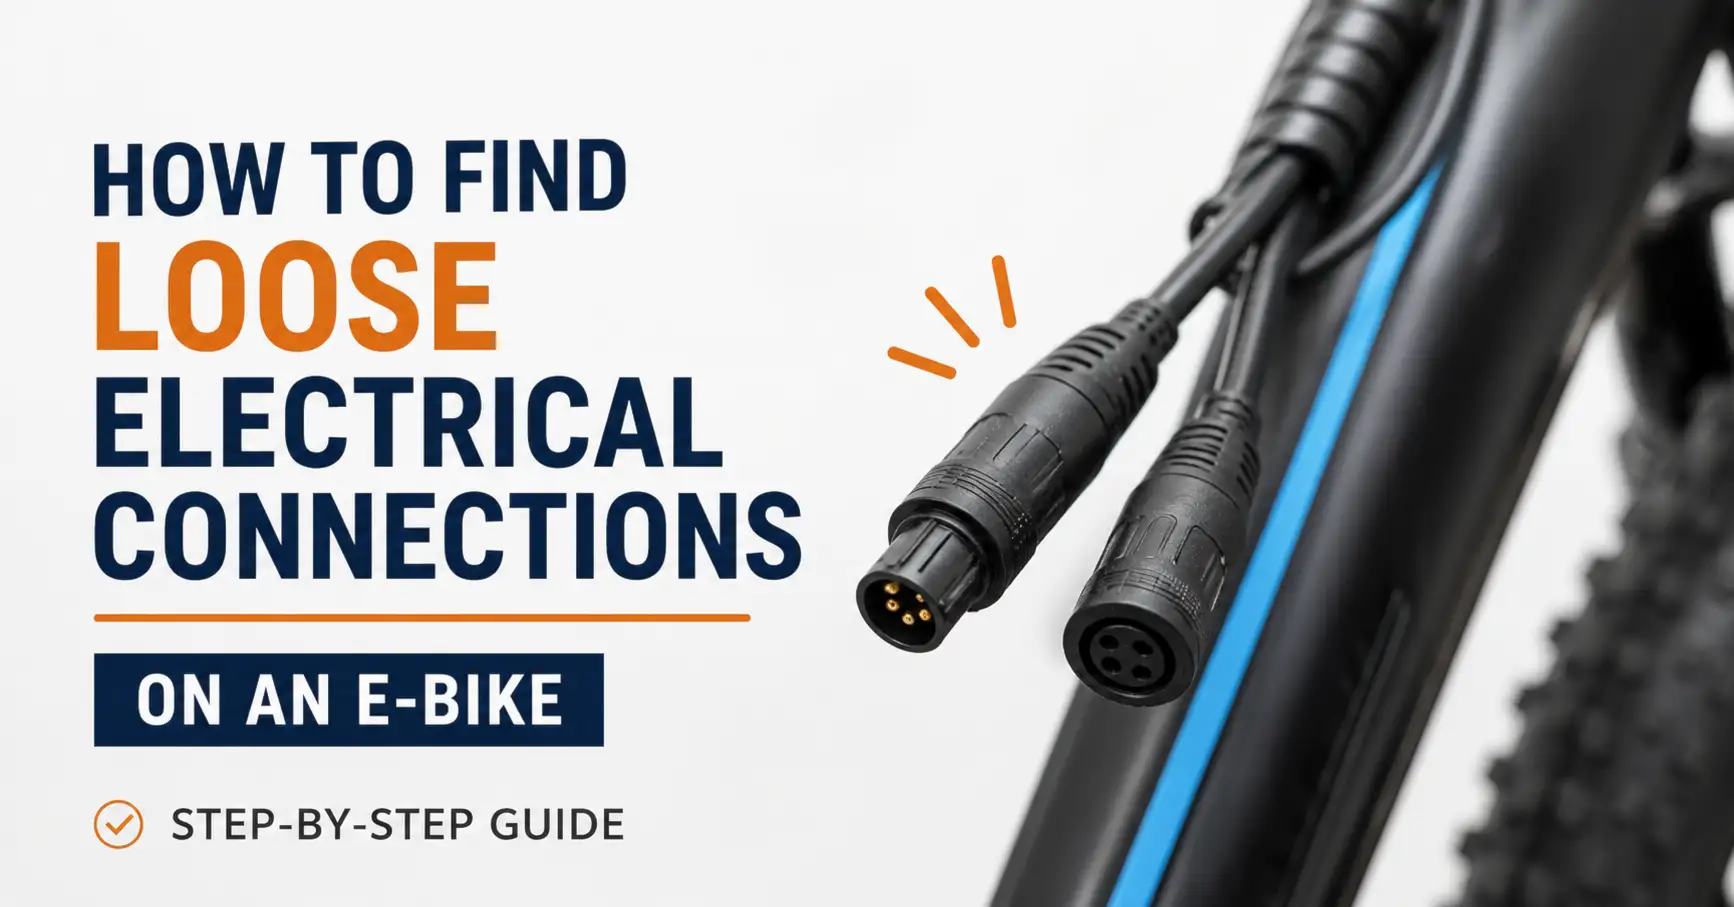
A loose electrical connection is one of the most common causes of intermittent e-bike problems. Modern electric bikes rely on multiple electrical connectors to allow the battery, controller, display, motor, throttle, pedal assist sensor, and other components to communicate with one another. If just one connector isn’t fully seated or has become damaged, it can interrupt that communication and cause symptoms that seem random and difficult to diagnose.
The good news is that many loose electrical connections can be found with a careful visual inspection and a methodical troubleshooting process. In this guide, I’ll walk you through the most common places to check, explain what signs of damage to look for, and share a few safety tips that can help you avoid making the problem worse while troubleshooting.
If you’re experiencing a specific problem, you may also find these guides helpful:
- E-Bike Turns On But Won’t Move? Here’s What’s Wrong (7 Fixes That Actually Work) if your display powers on but the motor won’t engage.
- E-Bike Motor Cutting Out While Riding? Common Causes and Fixes if your motor loses power intermittently while you’re riding.
- E-Bike Shuts Off Going Uphill? Causes, Fixes, and When to Worry if the bike only cuts out under heavy load or on steep climbs.
- E-Bike Not Holding Charge? Causes, Fixes & When to Replace the Battery if you suspect the battery itself may be the problem rather than the wiring.
By the end of this guide, you’ll know how to safely inspect the most common e-bike electrical connections, recognize when a loose connector is likely causing the issue, and determine when it’s time to stop troubleshooting and seek professional repair.
What to Check First
If your e-bike randomly loses power, cuts out while riding, won’t turn on consistently, or only works when the handlebars are turned a certain way, a loose electrical connection could be the cause.
The good news is that many electrical connection problems can be found with a careful visual inspection before you start replacing expensive parts. I always recommend checking the battery contacts, display cable, controller connectors, brake sensor plugs (if your bike has them), motor cable on hub-drive bikes, and any wiring that moves when you steer the handlebars.
While not every electrical problem is caused by a loose connector, it’s one of the simplest and least expensive issues to rule out. In many cases, taking a methodical approach can save both time and money.
Why You Can Trust Electric Bike Explorer
I’ve spent hundreds of hours researching e-bike electrical systems, troubleshooting common problems, testing different electric bikes, and helping riders diagnose real-world issues.
Rather than recommending random fixes, I prefer working through problems logically, starting with the simplest and safest checks before moving on to more advanced troubleshooting. That’s the same process I follow whenever one of my own bikes develops an electrical issue.
My goal isn’t just to help you fix one problem – it’s to help you better understand how your e-bike works so you can diagnose future issues with confidence.
Before You Start
| Difficulty | Beginner to Intermediate |
| Time Required | 20-45 minutes |
| Tools Needed | Flashlight, microfiber cloth, Allen keys, optional plastic trim tools |
| Electrical Testing Required? | No, not for the visual inspection covered in this guide |
| Bike Types Covered | Hub-drive and mid-drive e-bikes |
Recommended Tools for E-Bike Electrical Troubleshooting
Having the right tools makes diagnosing electrical problems much easier and helps prevent accidental damage to connectors.
I recommend keeping these basics on hand:
- Digital multimeter
- Plastic-safe electrical contact cleaner
- Plastic trim removal tools
- Quality Allen key set
- LED headlamp
- Replacement zip ties
- Clean microfiber cloth
- Nitrile gloves (optional)
- Your e-bike owner’s manual, if available
👉 View my recommended e-bike tools and maintenance essentials
You don’t need expensive diagnostic equipment for the steps in this guide. Most loose electrical connections can be found with a careful visual inspection and a little patience.
Not Every E-Bike Has the Same Connectors
Every e-bike is built a little differently.
Some models have external waterproof connectors that are easy to inspect, while others route nearly all of the wiring inside the frame. Mid-drive e-bikes from manufacturers such as Bosch, Shimano, Yamaha, and Brose often have more integrated electrical systems than many hub-drive bikes.
Because of these differences, you may not see every connector mentioned in this guide, and that’s perfectly normal. Use this article as a general checklist while referring to your owner’s manual for the exact layout of your bike.

Why Loose Electrical Connections Are So Common
One of the biggest misconceptions is that electrical problems always mean the battery, controller, or motor has failed.
In my experience, that’s often not the case.
Modern e-bikes rely on dozens of electrical connections working together. Even one connector that isn’t fully seated can interrupt communication between components or briefly cut power to the bike.
Depending on your e-bike, these connections may include:
- Battery contacts
- Display cable
- Main wiring harness
- Controller connectors
- Hub motor cable (hub-drive bikes)
- Brake sensor connectors (on equipped models)
- Pedal assist sensor wiring
- Throttle connector
- Lighting connectors
- Accessory wiring
Because e-bikes experience constant vibration from riding, connectors can occasionally work loose over time, especially if they weren’t fully seated during assembly or after maintenance.
Common Symptoms of a Loose E-Bike Electrical Connection
Loose wiring doesn’t always cause the bike to stop working completely.
Many electrical connection problems are intermittent, meaning they appear and disappear, making them frustrating to diagnose.
Some of the most common symptoms include:
- E-bike randomly shuts off while riding
- Display suddenly turns off
- Motor cuts in and out
- Pedal assist works inconsistently
- Throttle only works sometimes
- Bike won’t turn on every time
- Error codes appear and disappear
- Power returns after hitting a bump
- Display flickers while riding
- Bike only works when the handlebars are turned a certain direction
If several of these symptoms sound familiar, it’s worth inspecting your e-bike wiring before assuming an expensive component has failed.
Helpful troubleshooting guides:
- E-Bike Turns On But Won’t Move? Here’s What’s Wrong (7 Fixes That Actually Work)
- E-Bike Motor Cutting Out While Riding? Common Causes and Fixes
- E-Bike Shuts Off Going Uphill? Causes, Fixes, and When to Worry
If Your Display Shows an Error Code
Some electrical problems don’t shut the bike down completely. Instead, they trigger an error code on the display.
Before disconnecting any wiring, write down the exact error code or take a photo of the display.
Your owner’s manual can often tell you whether the code points toward:
- Battery communication
- Display connection
- Controller fault
- Motor problem
- Brake sensor issue
- Pedal assist sensor
- Throttle
- Another electrical component
Keep in mind that error codes vary between manufacturers, so always refer to your bike’s manual or the drive system manufacturer’s support documentation for model-specific information.
For example, Bosch eBike Systems provides model-specific diagnostic information and error code explanations for many of its drive systems.
While error codes don’t always identify the exact failed part, they can provide valuable clues and help narrow your troubleshooting.
Before You Touch Any Wiring
Safety should always come first.
Before inspecting electrical connectors:
- Turn the e-bike completely off.
- Remove the battery.
- Wait about one minute for any stored electrical charge to dissipate.
- Work in a clean, dry, well-lit area.
- Keep metal tools away from exposed battery contacts.
Never disconnect or reconnect electrical connectors while the battery is installed.
If your battery shows signs of swelling, leaking, overheating, or physical damage, stop using the bike immediately and contact the manufacturer.
The U.S. Consumer Product Safety Commission (CPSC) also recommends discontinuing use of damaged lithium-ion batteries rather than attempting to repair or continue using them.
Start With the Simplest Checks
Whenever I’m troubleshooting an electrical problem, I like to begin with the easiest things first instead of immediately taking the bike apart.
Here’s the order I usually follow:
Basic Troubleshooting Flow
Bike won’t power on or loses power
⬇️
Check battery installation
⬇️
Inspect battery contacts
⬇️
Check display connector
⬇️
Inspect visible wiring
⬇️
Check controller connectors
⬇️
Inspect motor cable (hub-drive bikes)
⬇️
Look for damaged wiring
⬇️
Still no solution?
Professional diagnosis or electrical testing
Working through the problem methodically often saves time and prevents overlooking something simple.
Step 1 – Check the Battery Connection
The battery is always the first place I inspect.
Even if the battery appears fully installed, it’s worth removing it and taking a closer look.
Inspect:
- Battery contacts
- Battery rails
- Locking mechanism
- Battery mount
- Dirt or debris
- Corrosion
- Bent terminals
- Loose mounting hardware
If the battery can move even slightly while riding, it may briefly lose contact with the terminals, causing intermittent power loss.
After reinstalling it, make sure the battery locks securely into place and doesn’t shift.
Cleaning Battery Contacts
If the contacts appear dusty or dirty, gently wipe them with a clean, dry microfiber cloth.
Avoid:
- Sandpaper
- Wire brushes
- Steel wool
- Spraying cleaners directly onto the battery contacts
If you notice heavy corrosion, melted terminals, or burn marks, discontinue use until the problem has been properly diagnosed.
If your battery powers on but no longer provides the range it once did, you may also find my guide on E-Bike Not Holding Charge? Causes, Fixes & When to Replace the Battery helpful.
Step 2 – Inspect the Display Connector
The display cable is one of the most common places for a loose electrical connection.
Because it sits near the handlebars, it flexes every time you steer the bike.
Look for:
- Connector not fully seated
- Bent pins
- Loose locking ring
- Pinched cable
- Cuts in the insulation
- Signs of water intrusion
Understanding Waterproof Connectors
Many e-bikes use waterproof Higo or Julet connectors.
Higo connectors are designed with alignment arrows, keyed grooves, and waterproof seals to help protect electrical connections when they’re properly installed.
These connectors usually include:
- Small alignment arrows
- Keyed grooves
- Rubber O-rings that help keep moisture out
Always line up the arrows or keyed grooves before reconnecting the plug.
If the connector doesn’t slide together easily, stop and check the alignment. Never force waterproof electrical connectors together, as doing so can bend the pins, damage the connector housing, or compromise the waterproof seal.
Step 3 – Follow the Main Wiring Harness
Next, I slowly follow every visible section of the e-bike wiring from the handlebars toward the rear of the bike.
Pay close attention to areas where the wiring:
- Enters the frame
- Passes around the head tube
- Runs under the battery
- Travels beneath the bottom bracket
- Is secured with zip ties
Check for:
- Pinched wires
- Crushed cables
- Abrasion
- Torn insulation
- Loose connectors
- Wires rubbing against the frame
One damaged section of wiring can create intermittent electrical problems that are difficult to diagnose because the bike may work perfectly until the cable moves again.
Step 4 – Inspect the Controller Connections
The controller acts as the brain of the electrical system by sending power from the battery to the motor while managing input from the display, throttle, brake sensors, and pedal assist system.
Many hub-drive e-bikes have a separate controller mounted inside the frame, beneath the battery, or behind a removable cover. Many mid-drive systems integrate much of this electronics into the motor unit, so there may be fewer accessible connectors.
If your controller is accessible, inspect the visible electrical connectors for:
- Moisture
- Dirt
- Corrosion
- Burn marks
- Melted plastic
- Bent pins
- Partially seated connectors
If a connector appears partially unplugged or has worked loose, disconnect it only if you’re comfortable doing so. Inspect both sides carefully before reconnecting it, making sure the connector is properly aligned and fully seated.
Avoid disconnecting every connector unnecessarily, especially if your bike is working normally or the connectors are difficult to access.
⚠️ Before You Replace Expensive Parts
Before ordering a new battery, controller, display, or motor, inspect every accessible electrical connector first.
Loose, partially seated, dirty, or corroded connectors can cause many of the same symptoms as a failed electrical component, including intermittent power loss, motor cutouts, display shutdowns, and throttle problems.
I’ve found that spending a few extra minutes checking the simple things first can sometimes save hundreds of dollars in unnecessary replacement parts.
Step 5 – Inspect the Motor Cable
If your e-bike has a hub motor, the main motor cable is another common place for electrical connection problems.
Locate where the cable exits the motor axle and follows the frame toward the controller. This cable experiences constant vibration while riding, making it more susceptible to wear over time.
Inspect the motor cable for:
- Cuts or tears in the outer insulation
- Pinched sections
- Sharp bends or kinks
- Areas rubbing against the frame
- Loose waterproof connectors
- Signs of water intrusion
If your rear wheel has recently been removed to repair a flat tire or replace the tire, pay extra attention to this area. It’s possible for the cable to become twisted or pinched during reinstallation.
If you have a mid-drive e-bike, you won’t have a hub motor cable to inspect. Instead, look for any visible wiring entering the motor unit and check for damage or loose connectors if they’re accessible.
If you notice exposed wiring or significant cable damage, avoid riding the bike until the problem has been repaired.
Step 6 – Check the Brake Sensor Connectors
Many throttle-equipped e-bikes and some pedal-assist models use brake motor inhibitors that automatically cut power to the motor whenever a brake lever is pulled.
If one of these brake sensor connectors becomes loose or damaged, the controller may mistakenly think you’re applying the brakes even when you’re not.
Possible symptoms include:
- Motor won’t run
- Throttle doesn’t work
- Pedal assist stops working
- Intermittent loss of motor power
Locate the small wiring coming from each brake lever and inspect the connectors for damage, corrosion, or loose connections.
If your e-bike doesn’t have brake motor inhibitors, you can skip this step.
Step 7 – Inspect the Pedal Assist Sensor (PAS) Wiring
If pedal assist works inconsistently while the throttle continues to work normally, the pedal assist sensor may deserve a closer look.
Check for:
- Loose electrical connector
- Damaged wiring
- Dirt or debris around the sensor
- Sensor that has shifted away from the magnet ring
Sometimes what feels like a major electrical failure turns out to be a simple alignment issue rather than a failed electrical component.
Step 8 – Perform a Gentle Movement Test
Once you’ve completed your visual inspection and everything appears properly connected, you can perform a gentle movement test if you’re comfortable doing so.
If you’re using the throttle or pedal assist during this test, securely support the driven wheel off the ground using a repair stand or another stable method.
Then:
- Turn the bike on.
- Slowly move one wiring section at a time.
- Gently turn the handlebars from side to side.
- Watch the display for flickering or unexpected shutdowns.
- Listen for the motor cutting in or out.
Never pull directly on wires.
If moving one section of wiring consistently causes the display to reset or the motor to stop working, you’ve likely identified the area that needs closer inspection.
🎥 Want to see some of these troubleshooting steps in action?
This video demonstrates several common e-bike electrical checks, including inspecting wiring, brake inhibitors, and connections between the controller and motor. While every e-bike is different, it provides a helpful visual overview to complement the step-by-step inspection process covered in this guide.
Remember that connector locations and wiring layouts vary between manufacturers, so always refer to your owner’s manual when identifying components on your specific e-bike.
Signs of Water Damage
Loose electrical connections and water damage sometimes go hand in hand.
While most modern e-bikes use weather-resistant connectors, they aren’t completely waterproof under every riding condition.
Inspect connectors for signs such as:
- Green corrosion
- White powdery deposits
- Rust
- Moisture inside connectors
- Burn marks
- Melted plastic
- Damaged seals or O-rings
If you find moisture inside a connector, allow it to dry completely before reconnecting it unless your manufacturer’s service instructions recommend a different procedure.
Minor dirt can often be cleaned, but heavily corroded or melted connectors usually need replacement rather than simply being reconnected.
Which Connectors Fail Most Often?
Based on my experience researching e-bike problems and helping riders troubleshoot electrical issues, these are the connectors I’d inspect first:
- Battery contacts
- Display connector
- Hub motor connector (hub-drive bikes)
- Brake sensor connectors (if equipped)
- Controller connectors
- Throttle connector
- Pedal assist sensor wiring
Starting with these areas often helps narrow down the problem much faster than inspecting every wire on the bike.
Common Places Loose Electrical Connections Hide
Use this checklist as you inspect your bike.
| Component | What to Inspect |
|---|---|
| Battery | Loose fit, dirty contacts, locking mechanism |
| Display | Waterproof connector, cable damage |
| Main wiring harness | Pinched or rubbing wires |
| Controller | Loose or damaged connectors |
| Hub motor | Main motor cable and connector |
| Brake sensors | Connector security (if equipped) |
| Pedal assist sensor | Wiring and sensor alignment |
| Throttle | Connector security |
| Lights and accessories | Loose accessory wiring |
What NOT to Do
When troubleshooting e-bike electrical wiring, avoid these common mistakes.
⚠️ Avoid these common mistakes
- Pulling on wires instead of the connector housing.
- Forcing waterproof connectors together.
- Ignoring alignment arrows or keyed grooves.
- Spraying WD-40 into electrical connectors.
- Using metal tools around battery contacts.
- Riding with exposed or damaged wiring.
- Assuming the battery or controller has failed before checking simple connections.
- Reconnecting wiring while the battery is still installed.
Taking your time and following a logical troubleshooting process greatly reduces the risk of causing additional damage.
When It’s Probably Not Just a Loose Connection
While loose wiring is a common cause of intermittent electrical problems, it isn’t the only possibility.
If every connector appears secure and your bike still isn’t working correctly, the issue could involve:
- A failing controller
- An internal battery fault
- A defective display
- A damaged motor
- Failed hall sensors
- A faulty throttle
- A defective pedal assist sensor
- A blown fuse (on models equipped with one)
- Internal wiring damage inside the frame
At this point, further diagnosis may require a digital multimeter, manufacturer-specific diagnostic software, or assistance from a qualified e-bike technician.
When to Stop DIY Repairs
I’m a big believer in checking the simple things first, but I also know when it’s time to stop.
If you discover any of the following, I recommend discontinuing your troubleshooting and contacting the manufacturer or a qualified e-bike repair shop:
- Burned electrical connectors
- Melted wiring insulation
- Strong electrical or burning odor
- Battery swelling
- Cracked battery case
- Exposed battery cells
- Water inside the battery
- Smoke or signs of overheating
These problems can present serious safety risks and should be repaired by someone with the proper training and equipment.
How to Prevent Loose Electrical Connections
Most loose electrical connections don’t happen overnight. Regular inspections and good riding habits can help reduce the chances of developing electrical problems.
Some simple ways to help protect your e-bike’s electrical system include:
- Avoid pulling on electrical wires when moving or servicing the bike.
- Keep waterproof connectors clean and fully seated.
- Don’t pressure wash electrical components.
- Secure loose wiring with quality zip ties if needed.
- Inspect wiring after transporting your bike on a vehicle rack.
- Recheck connectors after crashes or tip-overs.
- Make sure your battery is always fully locked into place before riding.
A few minutes of preventative maintenance can often help you avoid hours of troubleshooting later.
Maintenance Reminder
A quick inspection every few months can help you catch small electrical problems before they become expensive repairs.
I recommend checking your visible wiring and electrical connectors:
- At least once every riding season.
- After riding in heavy rain or muddy conditions.
- After transporting your e-bike on a vehicle rack.
- After removing the rear wheel to fix a flat tire.
- After a crash, tip-over, or hard impact.
- Whenever you notice intermittent power loss or unusual electrical behavior.
These inspections usually take only a few minutes and can help prevent loose connectors, damaged wiring, and unexpected breakdowns.
FAQs
Yes. A loose battery connection, controller connector, display cable, or motor cable can briefly interrupt power, causing the display and motor to shut off unexpectedly. These intermittent problems are often more noticeable when riding over bumps or rough roads.
It can. Although most connectors are designed to stay securely connected, years of riding on rough pavement or trails can occasionally loosen poorly seated connectors or expose existing wiring problems.
Only if your e-bike manufacturer recommends it or the connector is designed for it. Many sealed waterproof connectors already provide excellent protection and don’t require additional grease.
Yes, provided the battery has been removed first. Always pull on the connector housing rather than the wires, align any arrows or keyed grooves before reconnecting, and never force the connector together.
In most cases, yes. Many waterproof e-bike connectors are designed to be assembled by hand. Make sure the alignment arrows or keyed grooves line up first, then press the connector together until it’s fully seated. If it doesn’t fit easily, stop and check the alignment instead of forcing it together.
I recommend giving the visible wiring and electrical connectors a quick inspection every few months, especially if you ride frequently, ride off-road, transport your bike on a vehicle rack, or ride in heavy rain.
In some cases, yes. A poor electrical connection can create intermittent communication problems or increased electrical resistance. Finding and repairing loose connections early may help prevent additional wear on other electrical components.
Important: This guide covers visual inspections and basic troubleshooting only. If you discover damaged battery cells, burned wiring, or signs of overheating, discontinue use immediately and contact your e-bike manufacturer or a qualified technician.
My Take
Whenever someone tells me their e-bike randomly shuts off, loses power over bumps, or only works occasionally, I try not to assume the worst.
While batteries, controllers, and motors certainly can fail, I’ve found that loose electrical connections are often one of the simplest things to check and one of the easiest problems to overlook.
That’s why I always recommend starting with a careful visual inspection before spending money on replacement parts. A few extra minutes checking the battery, display connector, motor cable, and other visible wiring can sometimes solve a problem that initially seemed much more serious.
Even if you don’t find a loose connection, you’ll have ruled out one of the most common causes of intermittent electrical problems and be in a much better position to continue troubleshooting.
Disclosure: As an Amazon Associate, I earn from qualifying purchases. This comes at no extra cost to you and helps support the content on this site.
Not sure where to go next?
Some riders are brand new. Others are fixing a problem or thinking about a new bike. Choose what fits you.
Learn & Get Comfortable
Understand how e-bikes work and what to expect when riding.
Improve Your Current Ride
If your bike isn’t performing how you want, learn what affects speed, range, and power.
Compare Better Bikes
Looking for something that fits your riding style? Start here.
- Best Electric Bikes for Beginners
- Recommended Commuter Ebikes
- Most Comfortable City E-Bikes
- Best Fat Tire Ebikes
- Top Folding Ebikes
- Best Step Through Ebikes
- Top Cargo Electric Bikes
- Best Lightweight Ebikes
- Best Long Range Ebikes
- Top Moped Style E-Bikes
- E-bike Reviews
🛒 Ready to Buy?
Top picks and current availability from trusted brands.
👉 Still deciding?
Take our E-Bike Recommendation Quiz to get matched with the right riding style in under two minute
External Sources
For additional information, these official resources are worth bookmarking:
- Consumer Product Safety Commission (CPSC) – E-bike Safety Resources
- Bosch eBike Systems – Support Center
- Shimano STEPS – Product Support
- Higo Connector – Waterproof E-bike Connector Information
Kristina is not just an enthusiast but a true authority on electric bikes. Nestled in the coastal beauty of Virginia, Kristina has found the perfect backdrop for her passion for electric biking. As a dedicated wife and homeschooling mom, her life revolves around family, faith, and the thrill of adventure.
Originally hailing from Ohio, Kristina's journey with electric bikes began as a curiosity and quickly evolved into a deep expertise. Her blog is a testament to her love for electric biking, combining her fascination for eco-friendly transportation with her coastal lifestyle.
When she's not cruising the beach on her electric bike, you'll find Kristina indulging in her other loves: long walks along the shore, getting lost in a good book, and cherishing moments with her loved ones. With a heart as big as her love for animals, especially cats, Kristina brings a unique perspective to the electric bike world, grounded in her strong faith in God and her dedication to a sustainable lifestyle.
Through her blog, Kristina shares her extensive knowledge of electric bikes, offering valuable insights, tips, and recommendations to fellow enthusiasts. Whether you're a seasoned rider or a newcomer to the electric bike scene, Kristina's blog is your go-to source for all things electric biking, fueled by her passion, expertise, and the scenic beauty of coastal Virginia.